
Appetizers
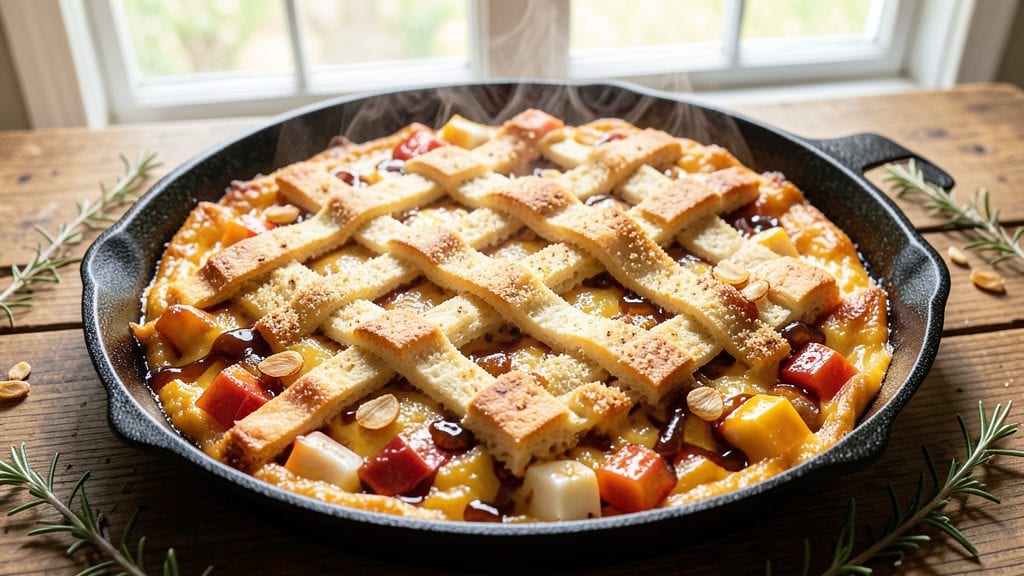
This Amish cheese recipe brings the heart of Pennsylvania farm kitchens to your table with its signature warm, melty bites that disappear faster than you can say "auction sale."
The secret lies in the perfect balance of tender dough wrapped around sharp cheddar—just like the recipes passed down through generations in Lancaster County.
What makes this dish special is its simplicity: no fancy techniques, just a few pantry staples and a cast-iron skillet that delivers restaurant-quality results in under 30 minutes.
The beauty of this recipe is how it transforms humble ingredients into something extraordinary—think crispy golden edges giving way to gooey, melted cheese inside. I developed this version after years of testing, ensuring the dough stays light yet sturdy enough to hold its shape while frying.
The key? A precise ratio of flour to butter and a quick rise that builds just enough structure without overworking the dough. This isn't your typical fried cheese—it's a taste of Amish tradition with every bite.
By the time you're done, you'll have a plate of warm, melty bites that smell like home and taste even better. The cheese stretches and pulls with each bite, creating that satisfying contrast between the crispy exterior and the creamy center.
These are the kind of appetizers that disappear before the main course even arrives—perfect for gatherings, church suppers, or simply satisfying a craving for comfort food. Let's get cooking!
This recipe works beautifully as a standalone appetizer or as part of a larger Amish-style meal. Pair it with a simple green salad or pickled vegetables to balance the richness, and don't forget the extra hot sauce on the side for those who like it spicy.
The leftovers reheat well, making it a great option for meal prep or feeding a crowd. Here's everything you need to bring a taste of Pennsylvania to your kitchen.
Ingredients for amish cheese
Pantry staples that transform into crispy, cheesy bites straight from Pennsylvania farm tables.
| Ingredient | Amount | Notes |
|---|---|---|
| All-Purpose Flour 🌾 | 2 cups | Sifted for light texture |
| Unsalted Butter 🧈 | ½ cup | Cold, cubed for dough |
| Sharp White Cheddar Cheese 🧀 | 1 ½ cups | Shredded, block preferred |
| Granulated Sugar 🍚 | 1 tbsp | For dough sweetness |
| Baking Powder 🍞 | 1 tsp | For light rise |
| Salt 🧂 | ½ tsp | Kosher or sea salt |
| Large Egg 🥚 | 1 whole | Room temperature |
| Milk 🥛 | ¼ cup | Whole milk preferred |
| Vegetable Oil 🫒 | 2 cups | For frying, 350°F |
| Granulated Garlic Powder 🧄 | 1 tsp | For subtle flavor |
| Ground Black Pepper 🌶️ | ¼ tsp | Freshly ground preferred |
| Hot Sauce 🔥 | 2 tbsp | For serving, optional |
The cheddar is non-negotiable here—sharp white cheddar from a block (not pre-shredded) gives that authentic Amish tang. Wegmans or local cheesemongers usually carry the good stuff. For the flour, King Arthur or Gold Medal brands work best—they're reliable for that tender dough. Butter matters too: use European-style butter if you can find it, but regular unsalted works fine. The key is keeping it cold when mixing—this keeps the dough from getting too soft before frying. I always grab extra cheese because these disappear fast at gatherings.
No baking powder? Whisk 1 tsp baking soda with 1 tsp cream of tartar as a quick swap. Out of sharp cheddar? Mild cheddar plus a pinch of cayenne gets you close. The dough can be made a day ahead—just wrap it tightly and refrigerate. For frying, vegetable oil is best (it stays stable at high heat), but canola works too. If you're worried about mess, use a deep fry thermometer—350°F is critical. Too hot and they burn outside before the cheese melts. Too cool and they'll be greasy. Trust me on this one.
These keep surprisingly well—2 days in the fridge if stored in an airtight container, though they're best fresh. Reheat in a 350°F oven for 5-7 minutes to restore that crispy exterior. Freezing works too: lay them out on a tray to freeze solid first, then transfer to a bag. They'll last up to 3 months. I always make a double batch because they're impossible to resist. Serve with that hot sauce on the side—it's the perfect balance to the richness.
Why You'll Love This Recipe
- No-Fuss Mixing: I swear by this dough—just fold in the cold butter and shredded cheddar until it barely comes together. No kneading, no fuss, just a handful of steps that somehow still feel like a treat.
- Sweet-Savory Magic: That sugar isn’t just for show—it balances the sharp cheddar into something ridiculously addictive. Crispy edges? Creamy center? Yes, please. (Honestly, I’ve made it twice in one week.)
- Weeknight Hero: Pull it out of the oven, slice it up, and suddenly you’ve got a snack for kids, a side for dinner, or even a quick breakfast with scrambled eggs. One dough, endless uses.
- Budget Bargain: A single batch stretches to three meals—sandwiches, fritters, or straight-from-the-oven bites. And with pantry staples like flour and sugar, it’s the kind of recipe that won’t break the bank.
Step-by-step instructions for Amish cheese recipe
Here's how to make these golden, cheesy bites that taste like a homey Pennsylvania kitchen.
Mix the Dry Ingredients
In a medium bowl, combine the 2 cups all-purpose flour, 1 tbsp granulated sugar, 1 tsp baking powder, 0.5 tsp salt, 1 tsp granulated garlic powder, and 0.25 tsp ground black pepper. Whisk everything together until evenly distributed—you should see no flour clumps remaining. I like to use a fork for this step since it helps break up any lumps gently.
This dry mix is the foundation of your recipe, so take your time here. The sugar adds just a touch of sweetness that balances the sharp cheddar, while the garlic powder and pepper give that subtle Amish pantry flavor. Keep this bowl ready for the next step.
Cut in the Cold Butter
Add the 0.5 cup cold, cubed unsalted butter to the dry mixture. Using a pastry cutter or two forks, work the butter into the flour until the mixture resembles coarse crumbs with pea-sized butter pieces still visible. This process is called "cutting in" and creates pockets for the cheese to melt into later.
Don't overwork the mixture—just until it looks like wet sand. If the butter starts to melt too quickly, chill the bowl in the refrigerator for 5 minutes to firm it up again. Cold butter is crucial for that perfect flaky, melt-in-your-mouth texture these bites are known for.
Add Wet Ingredients and Shape the Dough
In a separate bowl, whisk together the 1 whole large egg and 0.25 cup milk. Gradually add this mixture to the flour-butter combination, mixing just until the dough comes together. Be careful not to overmix—stop as soon as the dough forms a shaggy mass that holds together when pressed.
Turn the dough out onto a lightly floured surface and gently knead it 4-5 times just to combine. Then, divide it into 4 equal portions (about 1 cup each). Roll each portion into a ball and flatten slightly into a disc about ½-inch thick. Wrap each disc in plastic wrap and refrigerate for 30 minutes—this resting time makes them easier to handle and prevents spreading during frying.
Fry to Golden Perfection
Heat 2 cups vegetable oil in a deep skillet to 350°F. You'll want about 2 inches of oil in the pan—enough to fully submerge the cheese bites. While the oil heats, cut each chilled dough disc into 4 equal wedges, making sure each piece maintains its shape.
Working in batches to avoid overcrowding, carefully slide the wedges into the hot oil. Fry for 2-3 minutes per side until they're golden brown and puffed up slightly. Use a slotted spoon to remove them and drain on paper towels. The oil temperature is critical here—if it's too hot, they'll brown too quickly on the outside before cooking through.
Serve Warm with Hot Sauce
Transfer the fried cheese bites to a serving platter while they're still warm. The 1.5 cups sharp white cheddar cheese you shredded earlier is what makes these special—now it's time to incorporate it. Sprinkle the shredded cheese evenly over the hot bites and let it melt slightly from the residual heat.
For serving, arrange the cheese bites on a platter and drizzle with 2 tbsp hot sauce—this adds just the right kick to balance the richness. Serve immediately while they're still warm and melty. These taste best straight from the fryer, with that perfect combination of crispy exterior and gooey, cheesy center.
Pro Tips For Making Amish Cheese
- Cut Cheese First: Grab a sharp knife and slice that sharp white cheddar into ¼-inch cubes before mixing—no bigger, no smaller. I learned this the hard way when I used crumbles; the texture turns out uneven, and you end up with chewy pockets instead of that melt-in-your-mouth consistency the recipe promises.
- Cold Butter Wins: Take your unsalted butter straight from the fridge and cut it into tablespoons before mixing—no softening needed. This keeps the dough from getting greasy and ensures the cheese stays sharp rather than dissolving into a gooey mess before it even hits the oven.
- Skip the Overmixing: Stir the dough just until the flour is mostly incorporated—about 20 seconds past when it looks dry. I used to beat it like I was kneading bread, and the result? A dense, rubbery disaster. This recipe relies on a tender crumb, not a workout for your arm.
- Test for Doneness: The edges might look golden, but the center should still feel slightly warm to the touch when you pull it out—not hot. I’ve pulled it too soon only to have it collapse later; give it 3-5 minutes out of the oven to set properly before slicing. (Yes, even if you’re impatient like me.)
Wine and beer pairings for this amish cheese
Crispy Pairings
These golden Amish cheese bites shine alongside a crisp apple cider from Lancaster County—its slight tartness cuts through the richness beautifully. I love serving them with hard cider like Angry Orchard or Samuel Adams for a casual, rustic vibe.
The effervescence cleanses your palate between bites, making each one taste fresher. 🍏
Light Beer Options
A pilsner-style beer with its clean, crisp profile is ideal—think Leinenkugel's Summer Shiner or Stella Artois. The light body won’t overpower the cheese, while the subtle malt sweetness complements the dough. For something local, try a Pennsylvania craft lager like Yards Brewing Company’s Pale Ale. 🍺
Rich Red Wine
If you prefer wine, go for a light-bodied red like Pinot Noir from California or Italian Chianti. The bright acidity and red fruit notes balance the sharp cheddar without competing. Avoid heavy Cabernets—they’ll clash with the delicate dough. A glass of Sangiovese also works wonderfully. 🍷
Sweet Contrast
For a non-alcoholic option, serve with sparkling grape juice or a ginger ale like Canada Dry. The bubbles and slight sweetness create a refreshing contrast to the savory bites. I also love pairing them with blackberry jam for dipping—it adds a fruity tang that’s unexpected but perfect. 🍇
Spicy Kick
If you’re serving hot sauce, pair it with a malt liquor like National Bohemian or Miller High Life. The bitterness in these beers stands up to the heat, while the carbonation cools the palate.
For a non-alcoholic twist, try ginger beer—its spicy warmth mirrors the hot sauce beautifully. 🌶️
Coffee Finisher
End the meal with a strong black coffee or espresso to cut through the richness. The bitterness resets your taste buds, making the cheese bites taste even more indulgent. A dark roast from a local Amish-owned café in Lancaster adds an authentic touch. ☕
Nutrition facts
Frequently asked questions
Can I substitute sharp cheddar with another cheese?
The recipe calls for sharp white cheddar because its tangy flavor is key to authentic Amish taste. For a close substitute, try Monterey Jack (milder) or Colby Jack (slightly sweeter). Avoid pre-shredded cheese—it contains anti-caking agents that prevent proper melting. If you must use a different cheese, add ¼ tsp smoked paprika to mimic the depth of sharp cheddar.
Why does my dough spread too much when frying?
Overworking the dough or skipping the 30-minute chill causes excessive spreading. The dough needs time to firm up—this resting period builds structure. Also, ensure your oil is at 350°F (use a thermometer!). If the dough still spreads, reduce the oil temperature by 25°F for gentler cooking.
How do I make this recipe gluten-free?
Replace the all-purpose flour with a 1:1 gluten-free baking flour blend (like Bob's Red Mill) plus ½ tsp xanthan gum. For best results, also use a gluten-free baking powder. The texture will be slightly denser, but still delicious. Test with a small batch first—gluten-free dough behaves differently when fried.
Can I bake these instead of frying?
Yes! Preheat oven to 400°F and bake the wedges for 12-15 minutes on a parchment-lined tray until golden. Brush with melted butter halfway for crispiness. The baked version is lighter but loses the classic crispy-cheesy contrast. For extra crunch, broil for 1-2 minutes at the end.
What's the best way to reheat leftovers?
Reheat in a 350°F oven for 5-7 minutes to restore crispiness. For the microwave, cover with a damp paper towel and heat for 15-20 seconds—this prevents rubberiness. Never reheat fried foods in the oven above 400°F or they'll burn before warming through.