Soups & Stews
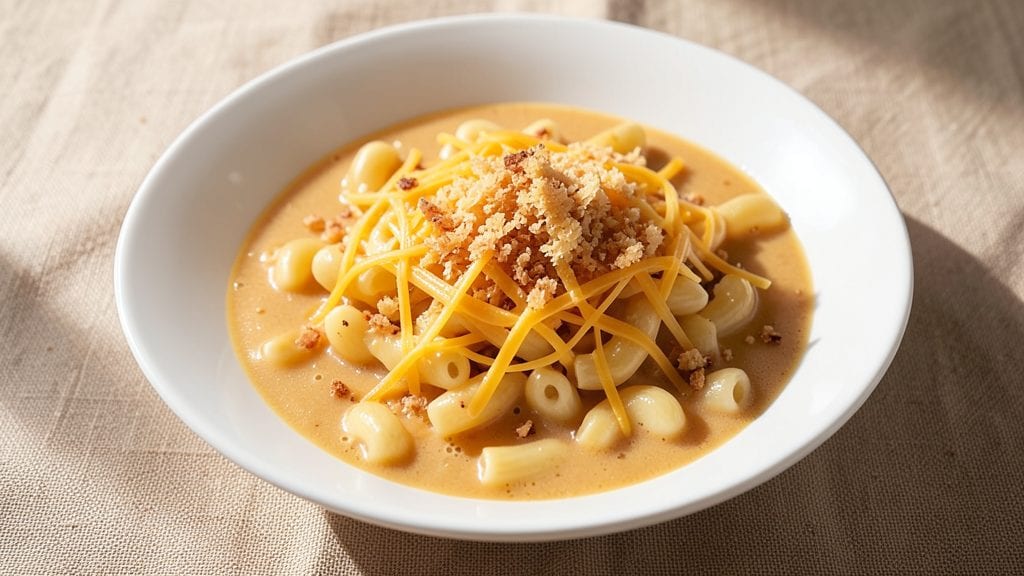
Transforming a simple pantry staple like Campbell's cheddar soup into this crispy, velvety mac and cheese is a game-changer for weeknight dinners. The creamy, cheesy goodness of the soup blends seamlessly with al dente pasta, creating a dish that feels indulgent yet requires minimal effort.
I developed this recipe during a particularly busy month when I needed comfort food that didn't require hours in the kitchen.
What makes this recipe special is the perfect balance between the rich, cheesy soup and the crispy, golden breadcrumb topping. The pasta cooks directly in the soup, absorbing all that flavor while staying tender.
The secret to achieving that crispy texture on top is a simple technique that only takes an extra 5 minutes in the oven—no fancy equipment required.
By the time you pull this dish from the oven, you'll have a bubbling, golden mac and cheese with a crispy crust that's impossible to resist. The creamy cheese sauce coats every noodle, while the breadcrumb topping adds a satisfying crunch that contrasts beautifully with the soft pasta underneath.
This is the kind of dish that feels like a hug in food form.
Serve it as a main course for a cozy family dinner or as a side dish for your favorite proteins. The beauty of this recipe is its versatility—add cooked bacon, steamed broccoli, or even a sprinkle of hot sauce to customize it to your taste. Let's get cooking!
Ingredients for campbell's cheddar soup mac and cheese
Pantry staples plus a few key ingredients for that irresistible crispy-cheesy combo.
| Ingredient | Amount | Notes |
|---|---|---|
| Campbell's Creamy Cheddar Soup 🍲 | 2 cans | Condensed, not low-fat version |
| Elbow Macaroni 🍝 | 12 oz | Uncooked, medium or small shape |
| Shredded Cheddar Cheese 🧀 | 1 cup | Extra-sharp for extra flavor |
| Panko Breadcrumbs 🍞 | ½ cup | For crispy topping (not regular) |
| Butter 🧈 | 2 tbsp | Unsalted, melted for topping |
| Milk 🥛 | ¼ cup | Whole milk for creaminess |
| Salt 🧂 | ½ tsp | Kosher or sea salt |
| Black Pepper 🌶️ | ¼ tsp | Freshly ground preferred |
| Garlic Powder 🧄 | ½ tsp | For extra depth (optional) |
| Hot Sauce 🔥 | 1 tsp | Frank's RedHot or similar |
| Fresh Parsley 🌿 | 2 tbsp | Chopped, for garnish (optional) |
The Campbell's soup is the star here, so grab the regular cheddar version—not the low-fat kind. For the macaroni, medium or small elbow shapes work best (they hold up better than penne). I always check the expiration date on the soup cans—older cans can taste flat. The shredded cheddar? Extra-sharp is worth it—it adds that bold cheesy punch. Panko breadcrumbs are a must for that crispy topping (regular breadcrumbs get soggy). If you're short on time, Trader Joe's sells pre-shredded cheddar that works in a pinch, but freshly grated tastes better.
No panko? Toast regular breadcrumbs in a dry pan for 2-3 minutes—they'll crisp up nicely. Short on cheddar? Add a sprinkle of Monterey Jack for extra creaminess. The milk helps balance the richness, but half-and-half works too if you've got it. Want more kick? Double the hot sauce—it cuts through the creaminess perfectly. The garlic powder is optional but adds a nice depth. Fresh parsley isn't required, but it adds a bright pop of color (and a little freshness). If you're making this ahead, skip the parsley until serving so it stays vibrant.
This reheats beautifully—just cover with foil and bake at 375°F for 10-15 minutes until bubbly. Keeps in the fridge for 4-5 days, though it's best within the first 2 days. For leftovers, reheat covered to avoid a dry top. The crispy part gets soggy if you microwave it uncovered, so always use the oven. Portion into individual servings before reheating for the best texture.
Why You'll Love This Recipe
- Here’s what sold me: that buttery panko crust on top, toasted until golden, while the inside stays unapologetically creamy. The soup’s tangy cheddar flavor cuts through the richness, and the melted cheese? It pulls apart like a dream. Honestly, I’ve made this three times this week—no regrets.
- Five-Ingredient Magic: I swear, this recipe is the kind of dish that makes me feel like a cooking genius—no fancy techniques, just boil pasta, mix soup, add cheese. The Campbell’s soup handles all the heavy lifting while I toss in elbow macaroni (because who has time to cut noodles?) and melt that extra cheddar on top. It’s the ultimate “I can do this” meal.
- Crispy-Creamy Obsession: Here’s what sold me: that buttery panko crust on top, toasted until golden, while the inside stays unapologetically creamy. The soup’s tangy cheddar flavor cuts through the richness, and the melted cheese? It pulls apart like a dream. Honestly, I’ve made this three times this week—no regrets.
- Game Day & Leftovers: Between us, this is my secret weapon for game days, lazy Sundays, or when my kid’s soccer team needs snacks. It reheats like a champ (just add a splash of milk if it gets dry) and actually tastes better the next day. I’ll be real: I’ve frozen portions for busy nights, and it’s still solid after thawing. Budget-friendly? Absolutely. Reliable? Even more so.
Step-by-step instructions for Campbell's cheddar soup mac and cheese recipe
Here's how to turn simple pantry staples into a rich, cheesy masterpiece with that perfect crispy topping.
Cook the Elbow Macaroni Al Dente
Bring a large pot of water to a rolling boil and add 12 oz elbow macaroni. Stir once to prevent sticking, then cook for 8-10 minutes until the pasta is al dente—just slightly firm when you bite into it. Drain the pasta in a colander, but don't rinse it. The starch on the pasta helps create that velvety texture in the finished dish.
While the pasta cooks, open the 2 cans Campbell's Creamy Cheddar Soup and stir each can thoroughly. I like to give them a good mix because sometimes the cheese settles at the bottom. Keep these at room temperature—they'll blend better with the warm pasta later.
Create the Cheesy Sauce Base
In a large mixing bowl, combine the drained pasta with the 2 cans Campbell's Creamy Cheddar Soup. Stir well to coat every noodle completely. The sauce should look thick and creamy right away, but we'll make it even richer. Add the 1 cup shredded cheddar cheese and mix until melted and smooth.
This is where the magic happens. The heat from the pasta will help melt the cheese faster, creating that signature velvety texture. If the mixture seems too thick, add ¼ cup milk one tablespoon at a time until it reaches a smooth, spoonable consistency. The sauce should coat the back of a spoon without being too runny.
Season and Prepare for Baking
Stir in the ½ teaspoon salt, ¼ teaspoon black pepper, ½ teaspoon garlic powder, and 1 teaspoon hot sauce. Taste the mixture and adjust the seasoning if needed—I usually add a pinch more salt and a dash of hot sauce for extra kick. The hot sauce adds a subtle tang that balances the richness of the cheese.
Transfer the macaroni and cheese mixture to a greased 9x13-inch baking dish. Spread it out evenly so it cooks uniformly. For that perfect crispy topping, we'll make a simple breadcrumb mixture. In a small bowl, combine the ½ cup panko breadcrumbs, 2 tablespoons melted butter, and 2 tablespoons chopped fresh parsley. Mix until the parsley is evenly distributed.
Bake Until Bubbly and Golden
Preheat your oven to 375°F. Sprinkle the breadcrumb mixture evenly over the top of the macaroni and cheese, pressing down gently with the back of a spoon to help it adhere. Bake for 20-25 minutes until the top is golden brown and the edges are bubbling. The center should still be slightly jiggly—it'll continue cooking as it rests.
Here's the thing—don't overbake. You want that crispy top but still creamy cheese underneath. If the top starts to brown too quickly, tent it loosely with aluminum foil for the last 5 minutes of baking. The cheese should be fully melted and the breadcrumbs should be crispy enough to stand up to a fork.
Rest and Serve
Remove the baking dish from the oven and let it rest for 5-10 minutes before serving. This resting period allows the cheese to set slightly and makes it easier to cut clean slices. The dish will be hot and bubbly when you take it out, so be careful handling the baking dish.
Cut into squares and serve immediately. Each bite should deliver that perfect combination of creamy, cheesy goodness with a satisfying crunch from the crispy breadcrumb topping. For extra flair, garnish with additional chopped parsley and a sprinkle of black pepper. This dish tastes even better the next day, so leftovers make excellent lunchbox fillings!
Pro Tips For Making Campbell'S Cheddar Soup Mac And Cheese
- Boil Macaroni Firm: Undercooked pasta ruins everything—this isn’t soup, it’s a baked casserole. Cook elbows just shy of al dente (about 1 minute less than package instructions), then drain thoroughly so the sauce doesn’t turn gloppy when baking. I learned this the hard way after a soggy, sad mac and cheese that tasted like mushy pasta soup.
- Toast Panko First: Skip mixing cold panko into butter—it’ll just clump. Melt 2 tablespoons of butter in a dry pan over medium heat, then add the panko and toast for 2–3 minutes until golden. The extra crispiness makes all the difference, and it won’t turn greasy when baked.
- Mix Cheese Early: Don’t just sprinkle cheese on top—fold half of it into the soup-pasta mix before baking. The cheese melts evenly, creating a creamy base instead of clumping like a sad, uneven blanket. I was skeptical until I tried it—now it’s non-negotiable.
- Bake Covered Then Uncovered: Start with the baking dish covered in foil for the first 15 minutes. This traps steam so the cheese melts smoothly, then remove the foil to crisp the panko topping. Trust me, the texture change is worth the extra step—your future self will notice.
Make-ahead tips for this dish
Prep Ahead Strategy
Assemble the entire mac and cheese mixture up to 24 hours before baking and store it in an airtight container in the fridge. The flavors meld beautifully overnight, making it even more flavorful when baked.
I usually do this on Sunday nights so I can pull it out and bake it straight from the fridge for Monday dinners. 📅
Baking Day Shortcut
Take the assembled dish straight from the fridge and bake it at 375°F for 30-35 minutes—the cold start helps create an extra-crispy top. I find this works best when the dish has chilled for at least 4 hours before baking.
The cold cheese melts more evenly, preventing any grainy texture from overworked cheese.
Freezer-Friendly Method
For longer storage, assemble the mac and cheese mixture (without the breadcrumb topping) and freeze it in a single layer in a freezer-safe container. When ready to bake, thaw it overnight in the fridge, then add the breadcrumb topping and bake as directed.
The texture remains creamy when reheated properly. I've kept this in the freezer for up to 2 months with great results. ❄️
Portion Control Tip
Divide the baked mac and cheese into individual quart-sized containers before storing leftovers. This makes reheating easier and keeps the crispy topping intact. When reheating, cover each portion with foil and bake at 350°F for 10-15 minutes until heated through.
The foil prevents the top from drying out while the cheese reheats evenly.
Make-Ahead Garnishes
Skip adding fresh parsley until serving to keep it vibrant. Store garnishes separately in small containers—chopped parsley, extra black pepper, or even hot sauce can be added right before serving. This keeps the dish looking fresh and lets everyone customize their portion.
I keep a small jar of parsley in my fridge for quick garnishes on all my make-ahead dishes. 🌿
Kid-Friendly Prep
Let your kids help assemble the dish—they'll love sprinkling the breadcrumbs on top! I often do this with my daughter Lily, and it makes the whole process more fun.
We make it a game to see who can spread the breadcrumbs most evenly. The extra attention to detail makes the final dish even more special for them. 💛
Nutrition facts
Frequently asked questions
Can I use a different type of pasta for this recipe?
Elbow macaroni is ideal because its shape holds up well to the creamy sauce, but you can substitute penne or cavatappi. Avoid long, thin noodles like spaghetti—they'll break apart when mixed with the thick soup. For a fun twist, try rotini or fusilli, but reduce baking time by 2-3 minutes since smaller shapes cook faster.
What if my breadcrumb topping isn't crispy?
Soggy breadcrumbs usually mean the topping wasn't baked long enough or the butter wasn't melted properly. Next time, press the breadcrumbs down firmly before baking and bake 5 minutes longer uncovered. For extra insurance, broil for 1-2 minutes at the end (watch closely!). A quick fix: Sprinkle extra panko on top after baking and broil until golden.
How can I make this dish spicier?
Double the hot sauce (to 2 teaspoons) or add ½ teaspoon cayenne pepper to the sauce. For smoky heat, stir in 1 teaspoon smoked paprika with the seasonings. If you love kick, top with chopped jalapeños or a sprinkle of chili flakes before baking.
Can I make this in a slow cooker?
Cook the pasta normally, then combine everything (except breadcrumbs) in your slow cooker on Low for 2 hours. Stir occasionally to prevent sticking. Top with breadcrumbs and broil for 3-5 minutes to crisp. The slow cooker keeps the cheese perfectly melted without overbaking the pasta.
Why did my cheese get grainy?
Grainy cheese usually means the mixture was overworked or the cheese wasn't melted properly. Stir gently when combining ingredients, and avoid using pre-shredded cheese (the anti-caking agents cause separation). For smoother results, melt the cheese in a saucepan first with 2 tablespoons milk before mixing with the pasta.