Side Dishes
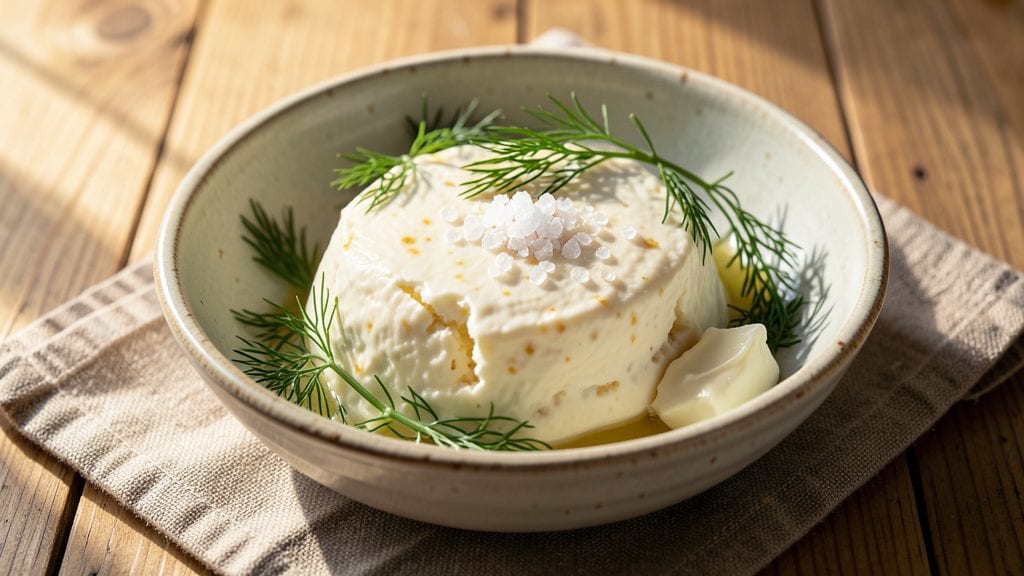
Mastering homemade farmers cheese transforms simple milk into a versatile, tangy spread with endless possibilities. This recipe delivers creamy, fresh curd that's perfect for savory dishes or sweet applications—no special equipment required.
I developed it after years of experimenting with Italian ricotta techniques, adapting them for a lighter, more delicate texture.
The process is straightforward but precise: acidify warm milk with vinegar or lemon juice, then strain the curds for 20 minutes until they achieve that signature firm-yet-creamy consistency. The key lies in temperature control—too hot, and the curds break down; too cool, and they won’t fully form.
This method yields 2 cups of rich, tangy cheese that keeps for 5 days in the fridge.
What you’ll end up with is a blank canvas for flavor—spread it on toast with honey, fold it into savory pancakes, or use it as a base for herbed dips.
The texture is velvety yet sturdy enough to hold shape, and the tangy depth makes it far more interesting than store-bought versions. Perfect for breakfast, appetizers, or even as a protein-rich side dish.
Once you try homemade, you’ll never go back to the grocery store version. Here’s how to make it from scratch—simple, foolproof, and infinitely customizable.
Ingredients for farmers cheese
Four simple ingredients transform milk into velvety, tangy farmers cheese you'll crave daily.
| Ingredient | Amount | Notes |
|---|---|---|
| Whole Milk 🥛 | 4 cups | Room temperature preferred |
| White Vinegar 🍶 | ½ cup | Apple cider works too |
| Lemon Juice 🍋 | ½ cup | Freshly squeezed preferred |
| Diamond Crystal Kosher Salt 🧂 | 1 ½ tsp | Fine grain preferred |
| Unsalted Butter 🧈 | 2 tbsp | Full-fat for richness |
| Fresh Dill 🌿 | ¼ cup | Chopped, optional garnish |
| Fresh Chives 🌱 | ¼ cup | Chopped, optional garnish |
| Heavy Cream 🥛 | ½ cup | For extra creaminess |
| Cheesecloth 🧺 | 1 piece | Or clean kitchen towel |
| Colander 🥫 | 1 whole | Large, for straining |
| Instant-Read Thermometer 🌡️ | 1 whole | For temperature monitoring |
The milk is your foundation—whole milk gives the richest texture, but 2% works in a pinch. I always use organic whole milk from Trader Joe's because it's consistent, but any good-quality milk will work. The acidifier (vinegar or lemon juice) is critical—white vinegar gives a cleaner tang, while lemon adds brightness. For best results, let your milk sit at room temperature for about 30 minutes before heating. The thermometer is non-negotiable here—you need to hit 185°F precisely. Too hot, and your curds will break down; too cool, and they won't fully form. I keep mine handy on my stove for all dairy experiments.
No vinegar? Lemon juice works perfectly—just use the same amount. Want extra tang? Add 1/4 tsp of citric acid to your acidifier. The butter isn't just for flavor—it adds that signature richness you can't get with just milk and acid. European-style butter like Plugrá melts beautifully, but any good unsalted butter works. For garnish, fresh herbs elevate everything—dill and chives are classic, but you could also try basil or parsley. If you're making a big batch, double the acidifier and butter proportionally. The cheesecloth can be any clean, tightly woven fabric—even a bandana works in a pinch. Just make sure it's damp before straining to help the curds release.
This cheese keeps beautifully—5 days in the fridge, covered with a thin layer of milk or water to prevent drying. For longer storage, portion into small containers and freeze for up to 3 months
Why You'll Love This Recipe
- Pantry Magic: I’ll bet you already have everything—just milk, vinegar, and salt. No special tools, no last-minute grocery runs. That tangy lemon twist? Pure magic with ingredients you’re probably staring at right now.
- Creamy Tang Alert: The vinegar and lemon cut through the richness of the milk, giving it that bright, almost yogurt-like bite. Spread it on toast or fold it into pasta—it’s the kind of flavor that makes you pause mid-bite.
- Weeknight Swiss Army: Slather it on grilled cheese, mix it into mashed potatoes, or dollop it on roasted veggies. It’s my secret weapon for turning boring meals into something that feels intentional (even when I’m too tired to care).
- Lasts Like a Champ: A block of this stuff stays fresh for weeks in the fridge—way longer than store-bought. I make a big batch on Sundays, and by Wednesday, it’s still saving my dinner when I’m too wiped to cook. Budget win, flavor win.
Step-by-step instructions for farmers cheese recipe
Transform simple pantry staples into velvety, tangy farmers cheese with this foolproof method.
Acidify and Heat the Milk
In a large, heavy-bottomed pot, combine the 4 cups whole milk with the 0.5 cup white vinegar and 0.5 cup lemon juice. Stir gently to distribute the acids evenly—this is what will curdle the milk into curds. Place the pot over medium-low heat and insert the instant-read thermometer. Heat the mixture, stirring occasionally, until it reaches 185°F. You'll notice the milk begin to thicken and separate into soft curds and liquid whey.
The key here is patience—rushing the temperature rise can cause uneven curdling. Once you hit 185°F, remove the pot from heat immediately. The curds should appear as soft, white clumps suspended in the whey. If they look too loose, return the pot to low heat for an additional 1-2 minutes until they firm up slightly. This step ensures your cheese will have that signature creamy texture.
Drain and Rinse the Curds
Line the colander with the cheesecloth, making sure it hangs over the edges for easy handling. Pour the curds and whey into the colander and let it drain for 5 minutes. The whey will drain away, leaving behind the curds. Gather the cheesecloth corners and lift the curds out of the colander, then transfer them to a clean bowl.
Here's where the magic happens: Rinse the curds under cold running water while gently pressing them with your hands to remove any remaining whey. This step is crucial for that signature tangy flavor and prevents the cheese from becoming too acidic. Work quickly but carefully—you want to remove excess whey without breaking up the curds. Once rinsed, let them drain for another 5 minutes in the colander.
Season and Blend the Cheese
Transfer the drained curds back to the pot and stir in the 1.5 tsp diamond crystal kosher salt and 2 tbsp unsalted butter. The butter adds richness and helps create that luscious texture. Place the pot back over low heat and gently warm the mixture, stirring constantly, until the butter melts completely and the cheese reaches 160°F. This gentle warming ensures the flavors meld together beautifully.
Remove the pot from heat and let the cheese cool slightly. Using an immersion blender or a regular blender, blend the cheese until it reaches your desired consistency—smooth and spreadable for dips, or slightly chunky for a rustic texture. If the cheese thickens too much during blending, add 1-2 tablespoons of the reserved whey to loosen it. The result should be a velvety, tangy cheese with a perfect balance of creaminess.
Finish and Garnish
Once blended, transfer the cheese to a clean bowl and stir in the 0.5 cup heavy cream for extra richness. Fold in the 0.25 cup fresh dill and 0.25 cup fresh chives, reserving a small amount for garnish if desired. The herbs add a bright, fresh contrast to the tangy cheese. Cover the bowl and refrigerate for at least 2 hours to allow the flavors to fully develop and the texture to set.
Before serving, give the cheese a final taste and adjust the seasoning if needed—perhaps a pinch more salt or a squeeze of lemon juice to brighten the flavors. Serve chilled, garnished with extra dill and chives for a pop of color. This farmers cheese is perfect for spreading on toast, pairing with fresh bread, or using as a creamy base for dips. Enjoy it within 3-4 days for the best flavor and texture.
Pro Tips For Making Farmers Cheese
- Heat Milk Slowly: Warm the whole milk over medium-low heat—no rushing. I used to crank it up, and the curds would form unevenly or even split. A gentle simmer (around 185°F) keeps the texture smooth and consistent.
- Measure Vinegar Precisely: Diamond Crystal kosher salt is finer than table salt, so the vinegar ratio matters. Use 2 tablespoons of white vinegar per quart of milk—no eyeballing. Too much makes it tangy; too little leaves it bland.
- Strain Through Cheesecloth: Skip the paper towels or coffee filters—they don’t trap the fine curds well. Wet cheesecloth first, then strain the whey for 1–2 hours. The longer it drains, the thicker and creamier your cheese.
- Finish with Cold Butter: Fold in 1–2 tablespoons of cold, cubed unsalted butter at the end. It melts just enough to coat the curds without turning the whole batch greasy. Warm butter will separate—trust me, I’ve tried.
Troubleshooting this dish
Curds Too Soft
If your curds turn out too soft or watery, you likely didn’t heat the milk to 185°F or drained them long enough. First, always use an instant-read thermometer to confirm the temperature—this is non-negotiable.
Next time, let the curds drain for 10-15 minutes instead of 5, and gently press them with a clean spoon to release more whey. For extra firmness, add 1/4 tsp citric acid to your acidifier next batch.
I’ve found that European-style butter like Plugrá also helps bind the texture better. 🧈
Cheese Too Acidic
An overly tangy flavor usually means you used too much acidifier or didn’t rinse the curds properly. Stick to the exact measurements of 0.5 cup vinegar or lemon juice—no more! After draining, rinse the curds thoroughly under cold water while pressing them gently.
This removes excess acidity. For milder flavor, reduce the acidifier to 0.375 cup and add 1 tbsp honey during blending. I once made a batch with too much lemon juice—adding a splash of heavy cream helped balance it out. 🍯
Grainy Texture
Gritty cheese often happens when curds break apart during draining or blending. Handle them carefully—use a slotted spoon to transfer curds to the colander instead of pouring. When blending, start on low speed and gradually increase.
If the texture is still too rough, strain the blended cheese through a fine-mesh sieve to remove any remaining lumps. For a smoother result, blend in 1 tbsp reserved whey while processing. I’ve also had success adding 2 tbsp sour cream to the final mixture for extra creaminess. 🥄
Whey Separation
If your finished cheese separates into liquid and solids, it likely means the curds weren’t fully formed or the butter wasn’t incorporated properly. Ensure your milk reaches 185°F before removing from heat, and stir constantly while melting the butter.
For extra stability, blend in 1 tbsp cornstarch mixed with 2 tbsp cold water to thicken the mixture. Store the cheese in an airtight container with a thin layer of milk on top to prevent further separation. I keep mine in a glass Pyrex container for best results. ❄️
Mold Growth
Mold can appear if your cheese isn’t stored properly or sits too long. Always refrigerate within 2 hours of making, and use an airtight container covered with plastic wrap pressed directly on the surface. Consume within 5 days for best quality.
If mold develops, discard immediately—it can’t be safely removed. For longer storage, freeze portions in quart-sized freezer bags for up to 3 months. I double-wrap my cheese in plastic wrap before freezing to prevent freezer burn. 🧊
Nutrition facts
Frequently asked questions about homemade farmers cheese
Can I use powdered milk instead of fresh?
Fresh whole milk is ideal for the creamiest texture, but you can substitute with powdered milk if needed. Reconstitute 1 cup powdered milk with 2 cups hot water first, then follow the recipe exactly. The texture will be slightly less rich, but still delicious. For best results, use whole milk powder and add 1 extra tablespoon butter to compensate for the difference.
How do I adjust this recipe for a larger batch?
Double or triple the ingredients while maintaining the same ratios. For 6 cups milk, use 1 cup vinegar/lemon juice, 3 tsp salt, and 4 tbsp butter. The key is keeping the acid-to-milk ratio at 1:8 and ensuring even heating. Use a larger pot and stir frequently to prevent scorching. I’ve made 8 cups milk batches successfully using a 6-quart Dutch oven for better heat distribution.
What are the best ways to use this cheese?
This versatile cheese works beautifully in both sweet and savory dishes! Spread it on toasted sourdough with honey and walnuts, fold into blintzes, or mix into creamy dips with garlic and herbs. For breakfast, blend it into pancake batter or stuff into crepes. In savory dishes, use it as a filling for stuffed peppers or as a topping for roasted vegetables. The possibilities are endless!
Why did my cheese turn out too acidic?
Overly tangy flavor usually means you used too much acidifier or didn’t rinse the curds properly. Stick to the exact 0.5 cup measurement of vinegar or lemon juice—no more! After draining, rinse the curds thoroughly under cold water while pressing them gently to remove excess acidity. For milder flavor, reduce acidifier to 0.375 cup and add 1 tbsp honey during blending. I once balanced a too-tangy batch by stirring in 2 tbsp heavy cream at the end.
Can I make this cheese without a thermometer?
While an instant-read thermometer is ideal, you can estimate by watching for visual cues. The milk should be hot enough to create soft curds when you stir in the acidifier—about 185°F. A good test is to touch the pot (carefully!)—it should feel very hot but not boiling vigorously. If the curds form too slowly, heat for 1-2 more minutes. For best results, invest in a $10 thermometer—it makes all the difference in cheese-making consistency.