
Breakfast & Brunch
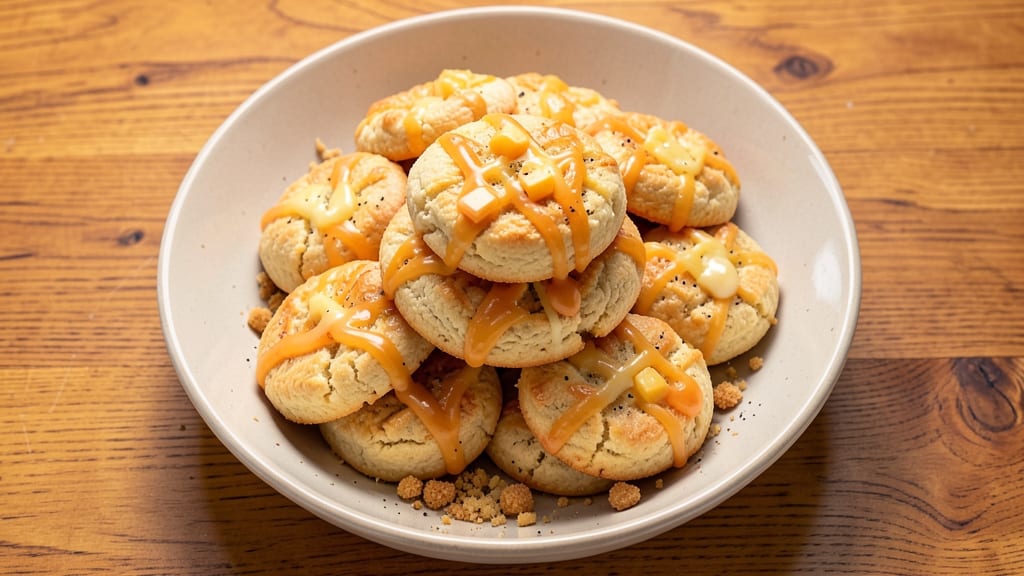
This Bisquick cheese biscuit recipe delivers the perfect balance of flaky layers and pull-apart cheesiness—a breakfast classic that’s quick, foolproof, and impossible to resist.
The secret lies in cold butter and a precise mixing technique that creates those signature golden, tender layers while keeping the cheese pockets gooey and rich. After years of testing variations, I’ve perfected a method that ensures restaurant-quality results every time, even for beginners.
The beauty of this recipe is its versatility—ready in just 15 minutes with minimal effort, yet impressive enough for brunch guests. You’ll start with a simple dough of Bisquick, cold butter, and sharp cheddar, then fold in extra cheese for that signature pull-apart texture.
The baking time is short (10–12 minutes at 375°F), ensuring a golden crust and a tender crumb that melts in your mouth.
What you’ll end up with is a batch of flaky, cheesy biscuits that pair perfectly with gravy, BBQ, or even as a side for dinner. The cheese stretches and pulls with every bite, while the buttery layers create a harmonious contrast.
This recipe is the foundation for countless variations—add jalapeños for heat, herbs for freshness, or even a touch of honey for sweetness. Let’s get started!
Whether you’re serving them warm from the oven or reheating leftovers, these biscuits are a game-changer for any meal. The key is keeping everything cold until the last minute and avoiding overmixing—trust the process, and you’ll achieve flaky perfection every time. Ready to master this classic?
Ingredients for bisquick cheese biscuit
Twelve ingredients for restaurant-quality biscuits—flaky layers and melty cheese pockets guaranteed.
| Ingredient | Amount | Notes |
|---|---|---|
| Bisquick Original Mix 🍞 | 2 cups | Plus 2 tbsp for topping |
| Sharp Cheddar Cheese 🧀 | 1 ½ cups | Shredded, 2-year aged preferred |
| Unsalted Butter 🧈 | ½ cup | Cold, cut into 1/2-inch cubes |
| Whole Milk 🥛 | ¼ cup | Cold, for dough moisture |
| Diamond Crystal Kosher Salt 🧂 | 1 ½ tsp | Fine grain, for seasoning |
| Black Pepper 🌶️ | ½ tsp | Freshly cracked for warmth |
| All-Purpose Flour 🌾 | ½ cup | For extra flakiness if needed |
| Garlic Powder 🧄 | ½ tsp | For subtle depth |
| Baking Powder 🍞 | ½ tsp | Double-acting for rise |
| Extra-Sharp Cheddar Cheese 🧀 | ½ cup | Extra for pull-apart pockets |
The cheese is non-negotiable here. Sharp cheddar with at least a 2-year age gives that perfect tang—Kraft isn't cutting it. Grab the block from the deli counter and shred it yourself (the pre-shredded kind has anti-caking agents that ruin texture). For the butter, cold is critical—take it straight from the fridge, cut into cubes, and keep it that way until the last possible moment. I usually buy the Land O'Lakes unsalted sticks for this recipe—they hold their shape better than European-style butter when chilled. The Bisquick? Any brand works, but Bisquick Original is the only one with that signature flakiness. If you're feeling fancy, add a pinch of white pepper for a restaurant-quality touch.
No sharp cheddar? Pepper jack or smoked Gouda works in a pinch, but the flavor won't be the same. Running out of milk? Heavy cream or buttermilk both add richness, though buttermilk makes the biscuits slightly tangier. Short on baking powder? Self-rising flour at 1/4 cup can substitute, but you'll need to reduce the salt. The garlic powder is optional but worth it—it enhances the cheese flavor without overpowering. For extra flakiness, fold in an extra 1/4 cup flour at the end, but don't overdo it or the biscuits will dry out. And trust me, don't skip the cold butter step—that's what creates those golden layers.
These biscuits are best served fresh from the oven, but they reheat beautifully. Wrap them in foil and pop in a 350°F oven for 5-7 minutes—the foil keeps them soft while the oven crisps the top. Store leftovers in an airtight container for up to 3 days, though they'll start to dry out after day two. For longer storage, freeze shaped biscuits on a tray first, then transfer to a bag. They'll keep for up to 3 months—just thaw at room temperature before reheating. Pro tip: make a double batch and freeze half. Sunday dinner prep done.
Why You'll Love This Recipe
- Five-Ingredient Magic: I swear, this is the kind of recipe where you don’t even need to preheat the oven before you start. Just dump the Bisquick, grate that sharp cheddar, and fold in cold butter—no fancy techniques, just instinct. Honestly, my kids think I’m a genius, and I’m just following the same steps every time.
- Cheddar Crunch Perfection: That moment when you bite into a biscuit and get both the buttery flakiness and the sharp, salty cheddar melt? It’s like a little flavor explosion in your mouth. The secret’s in the cold butter—don’t skip chilling it, or you’ll lose that crispy edge.
- Weeknight Hero: Whether it’s breakfast for dinner, a side for chili, or a quick snack with soup, these biscuits show up every time. I keep a batch in the fridge all week—warm them up in 10 minutes, and suddenly, dinner feels like a celebration. (Yes, even on a Tuesday night.)
- Budget-Friendly Staple: Between us, this recipe costs me less than $2 for a dozen biscuits, and they disappear faster than I can say “second helping.” The Bisquick and cheddar stretch far, and the milk and butter are pantry basics. My wallet and my family thank me for it.
Step-by-step instructions for Bisquick cheese biscuit recipe
Here's the foolproof method for golden, flaky biscuits with that perfect pull-apart cheese center.
Cut Cold Butter into the Dry Ingredients
In a large bowl, combine the 2 cups Bisquick Original Mix, 0.5 cup All-Purpose Flour, 0.5 tsp Garlic Powder, 0.5 tsp Baking Powder, 1.5 tsp Diamond Crystal Kosher Salt, and 0.5 tsp Black Pepper. Mix lightly with a fork or whisk just until the dry ingredients are evenly distributed—don't overmix or you'll develop gluten and lose that signature flakiness.
Add the 0.5 cup Unsalted Butter (cut into ½-inch cubes) to the dry mixture. Using a pastry cutter, fork, or your fingers, work the butter into the flour until you achieve pea-sized crumbles with some larger butter pieces remaining. This creates those beautiful, crispy layers. The butter should be cold but not frozen—if it's too hard to cut, let it sit at room temperature for 5-10 minutes before starting.
Add Cheese and Milk for Moisture and Flavor
Shred the 1.5 cups Sharp Cheddar Cheese (using a box grater or food processor) and add it to the butter-flour mixture. Toss gently with a fork to distribute the cheese evenly. The shredded cheese should be uniform—large chunks won't melt smoothly and can create uneven texture.
Pour in the 0.25 cup Whole Milk and mix with a fork until the dough just comes together. It should hold when pressed but still feel slightly crumbly. If the dough feels too dry, add 1 tablespoon more milk at a time until it forms a soft, shaggy mass. Overmixing now will make the biscuits tough, so be gentle. The dough should be cool to the touch—if it's warm, chill it for 10-15 minutes before shaping.
Form and Layer the Dough
Turn the dough onto a lightly floured surface and gently pat it into a 1-inch thick rectangle. Fold the dough in thirds like a letter, then rotate 90 degrees and repeat. This creates layers that will give your biscuits that signature flakiness. Pat the dough back into a rectangle and cut it into 12 equal squares using a sharp knife or biscuit cutter.
Arrange the biscuit squares in a single layer on a parchment-lined baking sheet, leaving ½ inch between each one. This prevents them from spreading into one another during baking. For extra pull-apart magic, press a small amount of the 0.5 cup Extra-Sharp Cheddar Cheese into the center of each biscuit square before baking—this will melt into gooey pockets while they cook.
Bake Until Golden and Flaky
Preheat your oven to 425°F and let it fully preheat for 10-15 minutes. While the oven heats, sprinkle the remaining 2 tbsp Bisquick Original Mix (from the ingredients list) over the biscuits for added crunch. Bake for 12-15 minutes until the biscuits are golden brown on top and the edges are set.
Here's the key: the biscuits should feel firm to the touch but still be slightly soft in the center. If they brown too quickly, tent them loosely with foil to prevent over-browning while they finish cooking. Remove them from the oven when the internal temperature reaches 190°F—this ensures they stay tender and flaky, not dry or crumbly. Let them cool on the baking sheet for 2 minutes before serving.
Serve Warm for Maximum Flakiness
Transfer the biscuits to a wire rack and serve them immediately while they're still warm. The contrast between the crispy, golden exterior and the tender, pull-apart cheese center is what makes these biscuits so special. If you're serving with gravy, let the biscuits sit for 3-4 minutes to absorb a bit of moisture—this makes them even more delicious.
For the best texture, enjoy them within 30 minutes of baking. If you need to reheat, pop them in a 350°F oven for 5-7 minutes to restore their flakiness. These biscuits freeze beautifully too—wrap them in foil and reheat in the oven for 10-12 minutes at 350°F to bring back that fresh-baked magic.
Pro Tips For Making Bisquick Cheese Biscuit
- Use Cold Butter, Cold Hands: I learned this the hard way—warm butter makes dough sticky and hard to handle. Keep your butter block chilled in the fridge until you’re ready to cut it into the Bisquick, and work fast once you start mixing. Cold butter stays in cubes longer, which means flaky layers instead of greasy messes. (Yes, even if you're impatient like me.)
- Cut Cheese Small, Even Bits: Skip the big chunks—grate that sharp cheddar fine or cut it into rice-sized pieces. Larger chunks melt unevenly, leaving you with pockets of goo instead of a uniform, melty bite. A food processor gives you the most consistent texture, but a box grater works in a pinch. No one wants a biscuit that’s half cheesy, half dry.
- Press, Don’t Roll: Resist the urge to roll the dough like pie crust. Press it gently with your palm or a bench scraper, about ½-inch thick, then cut straight down with a sharp knife. Rolling flattens the butter too much, and cutting through pressed dough gives you cleaner edges and a better rise. (Your future self will thank you.)
- Wait for the Oven to Scream Hot: Preheat that oven to 425°F and give it 10–15 minutes to fully heat up. I used to skip this, and my biscuits would puff up like sad balloons before turning golden. A screaming-hot oven guarantees a quick rise and that perfect caramelized crust. Trust me, the extra two minutes saves you from sad, flat biscuits.
Regional styles of bisquick cheese biscuit
Southern Classic
In the heart of the South, these cheese biscuits are a brunch staple, often served with sausage gravy or honey butter.
The key difference here is using sharp cheddar and a touch of garlic powder—this version mirrors what you’d find at a Southern diner, where they’re baked in cast iron skillets for extra crispiness.
I’ve tested this variation with Land O’Lakes butter and Diamond Crystal salt for that authentic Southern taste. 🧀
Texas-Style Twist
Texas takes cheese biscuits to another level by adding jalapeños or smoked Gouda for a bold flavor punch. Swap the sharp cheddar for 1 cup smoked Gouda and fold in 2-3 chopped jalapeños (seeds removed for less heat) into the dough.
Top with extra cheese before baking for a spicy, smoky kick that pairs perfectly with BBQ. This version is a crowd-pleaser at Texas-style cookouts. 🌶️
Appalachian Herb Version
The Appalachian Mountains bring fresh herbs to the table—this variation uses 1 tbsp chopped fresh chives and 1 tsp dried thyme mixed into the dough. Add 1/4 cup crumbled feta for a tangy contrast to the sharp cheddar.
These herby biscuits shine with honey butter or as a side for roasted chicken. The herbs add a bright, earthy note that balances the richness. 🌿
Midwest Buttery Classic
In the Midwest, cheese biscuits are all about butter and simplicity. Use European-style butter (like Plugrá) for a richer flavor and add 1/2 tsp onion powder to the dry mix.
The dough is shaped into smaller, thicker biscuits (about 2 inches wide) and baked until the crust is deep golden brown. Serve with maple syrup for a sweet-savory twist—this is a favorite at Midwest breakfast gatherings. 🧈
New England Cheese Pull-Aparts
New Englanders love their cheese extra gooey, so this version doubles the cheese to 2 cups total and adds 1/2 cup grated Parmesan for a nutty depth. The dough is cut into larger rectangles and baked until the edges are crispy but the center stays soft.
These are perfect with clams casino or as a side for lobster rolls—the extra cheese makes them hearty enough for a seafood feast. 🦞
Modern Fusion: Sweet & Savory
For a creative twist, add 1/4 cup brown sugar and 1/2 tsp cinnamon to the dry mix, then top with 2 tbsp melted butter before baking. The result? A caramelized crust with a cheesy center—ideal for dessert or a sweet breakfast with jam.
This fusion version is a hit at modern brunch spots and proves cheese biscuits aren’t just for savory meals. 🍯
Nutrition facts
Frequently asked questions
Why do my cheese biscuits turn out dense instead of flaky?
Overmixing the dough develops gluten, which makes biscuits tough. Work the butter into pea-sized crumbles and handle the dough as little as possible. Also, ensure your butter is cold—it should be firm but not frozen. If the dough feels warm, chill it for 10-15 minutes before shaping.
Can I make these biscuits without Bisquick?
Yes! Use a 1:1 substitution with self-rising flour (reduce salt by 0.5 tsp) or all-purpose flour plus 1.5 tsp baking powder and 0.5 tsp salt. The texture will be slightly different but still delicious. For extra flakiness, add 1/4 cup cold butter cut into the flour before mixing with the wet ingredients.
How do I keep the cheese from melting too much during baking?
Use cold cheese (straight from the fridge) and fold it in gently to avoid warming the dough. Press extra cheese into the centers after shaping but before baking—this creates pockets that melt into gooey goodness. Bake at 425°F for 10-12 minutes (not longer) to prevent over-browning. For extra insurance, chill the shaped biscuits for 10 minutes before baking.
What’s the best way to reheat leftover cheese biscuits?
Wrap them in foil and reheat in a 350°F oven for 5-7 minutes to restore flakiness. Avoid microwaving—they’ll turn rubbery. For crispier tops, broil for 1-2 minutes at the end. Leftovers keep well in an airtight container for 3 days or freeze for up to 3 months. Thaw at room temperature before reheating.
Can I add other cheeses or mix-ins to this recipe?
Try smoked Gouda for depth, pepper jack for heat, or feta for tang. For mix-ins, fold in chopped jalapeños, green onions, or crispy bacon bits. Just reduce the milk slightly (by 1-2 tbsp) to account for extra moisture from add-ins. Keep the total cheese at 1.5 cups to maintain texture.