
Appetizers
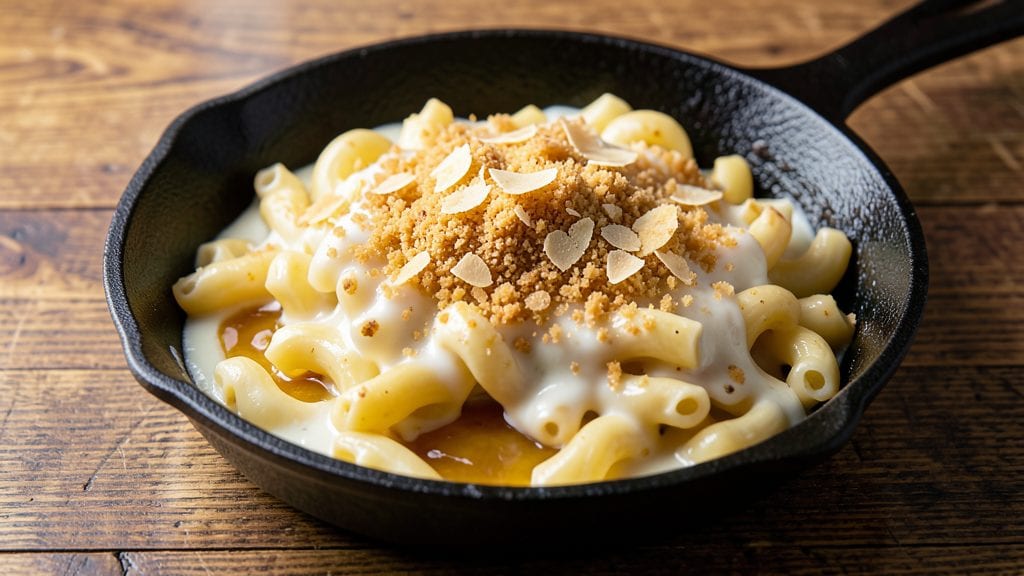
This Boston Market mac and cheese copycat recipe delivers the same crispy-topped, creamy perfection you crave from the restaurant—now made with just three key ingredients.
The secret lies in a foolproof method that transforms ordinary mac and cheese into a restaurant-quality dish with a golden, crunchy crust and velvety sauce inside. I've perfected this technique after years of testing, ensuring every bite tastes like your favorite comfort food.
What makes this recipe work is the combination of sharp cheddar cheese, heavy cream, and a simple breadcrumb topping that creates that signature crispy finish. The sauce is made on the stovetop before baking, which prevents lumps and ensures a smooth, rich texture.
No special equipment is needed—just a baking dish and a broiler for that perfect golden crust.
By following these steps, you'll achieve mac and cheese with a crispy, caramelized top that shatters at every bite, while the inside remains creamy and cheesy. The flavor is bold, the texture is just right, and the presentation is restaurant-worthy.
This is the kind of dish that transforms a simple weeknight dinner into something special.
Serve it as a side dish or as a main course with a fresh salad or steamed vegetables. The recipe is designed to be easy to scale, so you can make enough for a family or even a crowd.
Let's get started on recreating that Boston Market magic at home!
Ingredients for boston market mac and cheese copycat
Three core ingredients plus a few pantry staples—this is how Boston Market makes their legendary crispy-topped mac and cheese.
| Ingredient | Amount | Notes |
|---|---|---|
| Elbow Macaroni 🍝 | 1 ½ lbs | Dry pasta, cooked al dente |
| Sharp White Cheddar Cheese 🧀 | 2 ½ cups | Shredded, block preferred |
| Heavy Cream 🥛 | 1 ½ cups | Full-fat for richness |
| Panko Breadcrumbs 🍞 | ½ cup | Japanese-style for crispiness |
| Butter 🧈 | ¼ cup | Unsalted, melted |
| All-Purpose Flour 🌾 | 2 tbsp | For thickening sauce |
| Milk 🥛 | ½ cup | Whole milk preferred |
| Salt 🧂 | 1 ½ tsp | Kosher or sea salt |
| Black Pepper 🌶️ | ½ tsp | Freshly ground preferred |
| Garlic Powder 🧄 | ½ tsp | For subtle depth |
| Onion Powder 🧅 | ½ tsp | For aromatic base |
| Cayenne Pepper 🔥 | ¼ tsp | Optional for heat |
The cheddar is non-negotiable—sharp white cheddar from a block gives that signature tang. Kraft Singles won't cut it; you need the real stuff. For the pasta, elbow macaroni is traditional, but any short pasta works. The heavy cream must be full-fat—none of that skim nonsense. I always grab mine from Whole Foods or the dairy section at Trader Joe's where it's consistently fresh. Panko breadcrumbs are key for that signature crunch—Japanese-style panko stays crispy even after baking, unlike regular breadcrumbs that turn soggy.
No sharp cheddar? Extra-sharp white cheddar is your next best bet, but if you're in a pinch, a mix of sharp cheddar and Monterey Jack works well. Running low on heavy cream? Half-and-half with a splash of milk mimics the richness, though the texture will be slightly lighter. The flour and milk slurry is essential for that velvety texture—don't skip it. For the breadcrumb topping, if you can't find panko, crushed cornflakes make a decent substitute, though they lack the crispiness. The spices are optional but recommended—garlic powder and onion powder add depth without overpowering, while cayenne gives it that subtle kick Boston Market's version has.
This mac and cheese reheats beautifully—just cover with foil and warm in the oven. The crispy topping will soften slightly, but a quick broil before serving restores that golden crunch. Store leftovers in an airtight container for up to 5 days in the fridge. For freezing, assemble the dish, bake until fully cooked, then cool completely before freezing. It keeps for 3 months this way. I always double the recipe and freeze half—perfect for lazy weeknights when you want that restaurant-quality comfort food without the effort.
Why You'll Love This Recipe
- One-Pot Magic: I swear by this recipe because it’s actually one-pot—no straining, no extra bowls. Just boil the elbows, dump in the cheese sauce, and let that sharp cheddar melt into a velvety blanket. My kids don’t even know I didn’t buy it from the deli.
- Cheese Overload (In a Good Way): That heavy cream and sharp cheddar combo? It’s dangerously good—rich but not greasy, with just enough tang to wake up your taste buds. Honestly, I’ve tried fancier recipes, but this one hits the spot every time without overpowering.
- Lunchbox Legend: Between us, this is my go-to for meal prep. The crispy panko topping stays intact even after reheating, and the leftovers? Still taste like a Boston Market special the next day. Pack it cold or warm—either way, it’s a win.
- Budget-Friendly Luxury: Sharp cheddar and heavy cream might sound fancy, but you’re talking less than $10 for a dish that feels like a restaurant meal. Plus, the panko adds that gourmet crunch without breaking the bank. My wallet and my family thank me.
Step-by-step instructions for Boston Market mac and cheese copycat recipe
This method delivers the signature crispy-topped mac and cheese with a velvety cheese sauce every time.
Cook the Elbow Macaroni to Al Dente Perfection
Bring a large pot of water to a rolling boil and add 1.5 lbs elbow macaroni. Season generously with 1.5 tsp salt—the water should taste like the ocean. Cook for 11-12 minutes until the pasta is al dente (you should still feel slight resistance when biting into a piece).
Drain the pasta in a colander but don't rinse it—those surface starches are essential for creating a creamy sauce. Reserve 1 cup of pasta water before draining; this starchy liquid will help emulsify the cheese sauce later. If you don't have enough water, use the 0.5 cup milk from the ingredients instead.
Create the Cheese Sauce Foundation
In a large Dutch oven or heavy pot, melt the 0.25 cup butter over medium heat. Once melted, whisk in the 2 tbsp all-purpose flour and cook for 1-2 minutes until the mixture forms a smooth paste and smells nutty. This step, called a roux, is crucial for thickening the sauce.
Slowly pour in the 1.5 cups heavy cream while whisking continuously to prevent lumps from forming. Add the 0.5 cup milk next, then stir in the 2.5 cups sharp white cheddar cheese one handful at a time, allowing each addition to melt completely before adding more. The cheese should create a thick, velvety sauce that coats the back of a spoon.
Season and Combine with Pasta
Remove the pot from heat and stir in the 0.5 tsp garlic powder, 0.5 tsp onion powder, 0.5 tsp black pepper, and 0.25 tsp cayenne pepper. Add the cooked elbow macaroni to the cheese sauce and toss gently with tongs until every strand is fully coated. If the sauce appears too thick, add pasta water or milk one tablespoon at a time until it reaches a smooth, pourable consistency.
Return the pot to low heat and stir continuously for 3-4 minutes, allowing the flavors to meld together. The sauce should now be completely smooth with no visible cheese lumps. Taste and adjust seasoning if needed—this is where you can add more salt or black pepper to match your preference.
Create the Signature Crispy Topping
Transfer the mac and cheese to a 9x13-inch baking dish and spread it evenly. In a small bowl, mix the 0.5 cup panko breadcrumbs with 2 tbsp melted butter (reserved from the original amount) until evenly coated. Sprinkle this mixture evenly over the top of the mac and cheese, pressing down gently to ensure good contact with the sauce.
Bake in a preheated 375°F oven for 15-20 minutes until the topping is deep golden brown and crispy. You'll know it's done when the edges pull away slightly from the pan and the top has developed a satisfying crunch. The center should remain warm and creamy—this is the hallmark of Boston Market's signature texture.
Rest and Serve Immediately
Remove the baking dish from the oven and let the mac and cheese rest for 5 minutes before serving. This resting period allows the sauce to set slightly, making it easier to portion without losing the crispy topping. Serve immediately while the top is still crispy and the cheese is warm and melty.
For best results, serve directly from the baking dish to maintain that restaurant-quality presentation. The combination of creamy cheese sauce, perfectly cooked pasta, and crispy breadcrumb topping makes this copycat recipe worth every bite—just like the original.
Pro Tips For Making Boston Market Mac And Cheese Copycat
- MELT THE CHEESE LOW: I learned this the hard way—sharp white cheddar hates high heat. Once it starts burning, there’s no fixing it. Simmer the cheese sauce on medium-low until it’s fully melted and smooth, stirring every 30 seconds. The sauce should coat the back of a spoon like thick paint, not look like it’s fighting for its life.
- GRATE CHEESE FINE: Skip the food processor unless you want grainy bits ruining the texture. Use a box grater with small holes and shred the cheese yourself—it melts faster and blends better. Pro move: Toss the shreds in a bowl with 1 tablespoon of flour first to absorb moisture, so the sauce stays silky.
- TOAST PANKO DRY: Wet panko turns to sad, greasy mush. Toast the breadcrumbs in a dry skillet over medium heat for 2–3 minutes, stirring constantly, until they’re golden and smell toasty. Then mix with melted butter—this guarantees a crispy crust, not a soggy lid.
- SALT THE PASTA WATER: The noodles need flavor before they hit the sauce. Boil them in well-salted water (like the sea, but edible) until al dente—1 minute less than package instructions. Drain, then toss with a splash of pasta water to loosen the sauce. Trust me, this makes all the difference in the first bite.
Pro cooking tips for great boston market mac and cheese copycat
Master the Roux
The secret to a smooth, lump-free sauce starts with the roux. Melt the 0.25 cup butter in a Dutch oven over medium heat, then whisk in the 2 tbsp flour until it forms a smooth paste.
Cook for exactly 1-2 minutes—any longer and you'll get a nutty flavor that overpowers the cheese. I always use a heatproof whisk to avoid scorching. 🌡️
Cheese Melting Trick
Add the 2.5 cups sharp cheddar in small batches, letting each handful melt completely before adding more. If you dump it all in at once, you'll end up with clumps.
I like to use a wooden spoon for stirring—it's gentle on the sauce. For extra creaminess, stir in 1 tbsp reserved pasta water if the sauce thickens too much.
Pasta Water Magic
Never rinse your pasta after draining—those starchy surface waters are essential for emulsifying the sauce. Reserve 1 cup before draining, and keep it nearby. If the sauce gets too thick, add it 1 tablespoon at a time while stirring constantly.
This trick prevents the sauce from breaking and keeps it velvety smooth.
Breadcrumb Crispiness
The key to that restaurant-quality crunch is mixing the 0.5 cup panko with 2 tbsp melted butter before sprinkling. Press the crumbs gently into the sauce so they adhere well. For extra crispiness, broil for 1-2 minutes at the end if the top isn't golden enough.
I use a 9x13-inch baking dish because it gives the perfect surface area for even browning.
Oven Temperature Control
Preheat your oven to 375°F—this is critical for even cooking. If your oven runs hot, reduce to 350°F to avoid burning the topping. Place the dish on the middle rack for consistent heat distribution.
The mac and cheese is done when the edges pull away slightly and the top is deep golden brown. Let it rest for 5 minutes before serving—this prevents the crispy top from falling apart. 💫
Reheating Secrets
Leftovers? Cover with foil and reheat in a 350°F oven for 10-15 minutes until warm. For a crispy top, broil for 1-2 minutes at the end. Microwave reheating works too—cover with a damp paper towel and heat on 50% power in 1-minute intervals, stirring between each.
The goal is to restore that creamy-cheesy texture without soggy breadcrumbs.
Nutrition facts
Frequently asked questions
Can I make this mac and cheese without heavy cream?
Yes, but expect a slightly lighter texture. Replace the 1.5 cups heavy cream with 1 cup whole milk plus 0.5 cup half-and-half for a good compromise. For a dairy-free version, use full-fat coconut milk (the first 1.5 cups) and add 1 tbsp cornstarch to the roux for thickening. The flavor will differ, but the technique remains the same!
Why did my breadcrumb topping turn soggy?
Soggy topping usually means moisture got trapped beneath the crumbs. Always press them gently into the sauce before baking, and avoid overloading the top. For extra insurance, broil for 1-2 minutes at the end to crisp it up. Also, make sure your oven is fully preheated to 375°F—cold spots can cause uneven browning.
How can I make this gluten-free?
Swap the elbow macaroni for gluten-free pasta (like Barilla GF or Jovial), use a gluten-free flour blend for the roux, and replace panko with crushed gluten-free cornflakes or almond flour mixed with melted butter. The texture will be slightly different, but the creamy sauce will still shine through!
Can I add meat or veggies to this recipe?
For extra protein, stir in 1 cup cooked bacon bits or ½ lb diced ham when combining the pasta and sauce. For veggies, try ½ cup steamed broccoli florets or ½ cup diced bell peppers—just add them after the pasta is coated to avoid overcooking. Keep portions balanced to maintain the dish's signature creaminess.
What’s the best way to store leftovers?
Store in an airtight container in the fridge for up to 5 days. For freezing, assemble the dish, bake until fully cooked, then cool completely before wrapping tightly in plastic wrap and foil. Reheat covered with foil at 350°F for 10-15 minutes, then broil for 1-2 minutes to restore the crispy topping.