
Main Courses
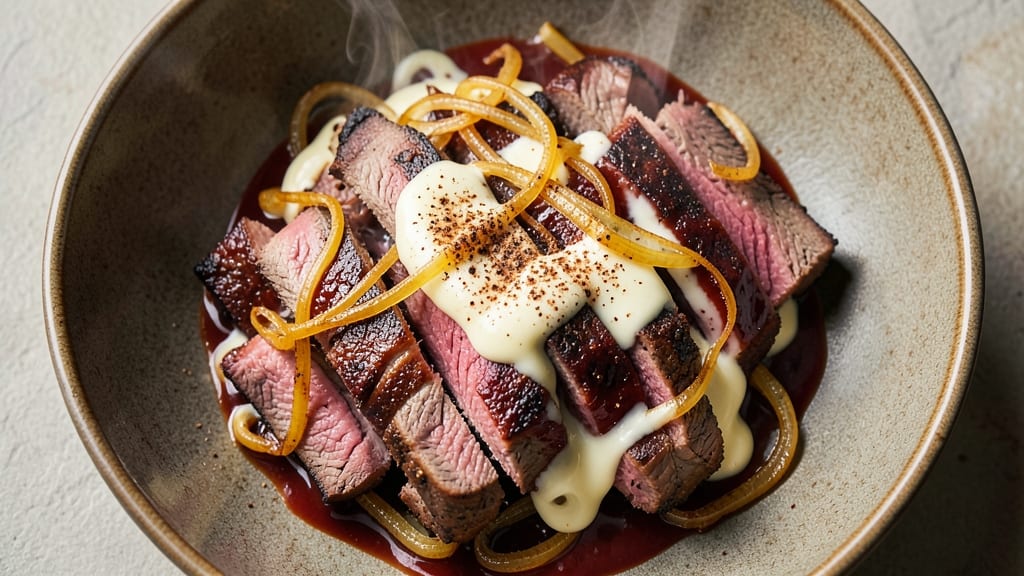
This brisket Philly cheese steak recipe transforms tough beef into melt-in-your-mouth sandwiches with smoky depth and gooey cheese—exactly how late-night diners do it right.
The key lies in thinly slicing brisket against the grain and slow-cooking it until tender, then layering it with melted provolone (or Whiz, for authenticity) on a toasted roll. I perfected this after years of experimenting with regional variations, and it never fails to impress.
What sets this recipe apart is the balance of textures: crispy toasted bread, tender beef that practically dissolves, and cheese that stretches just enough to bind everything together.
The smoky spices—garlic powder, onion powder, and a touch of smoked paprika—penetrate the beef during cooking, creating flavor that lingers in every bite. This isn’t your average cheese steak; it’s a restaurant-quality sandwich you can make at home.
By the time you assemble it—beef piled high, cheese melted to perfection, and all topped with a drizzle of garlic aioli—you’ll have a sandwich that’s hearty enough for a meal but quick enough for a weeknight.
The brisket stays juicy, the cheese pulls just enough to create that signature stretch, and the roll holds up without getting soggy. This is comfort food at its finest, with just the right amount of smoky, savory, and cheesy goodness.
Serve it with classic sides like crispy fries or tangy coleslaw, or keep it simple with a side of pickles for that authentic diner experience. The recipe scales easily too, so whether you’re feeding a crowd or just craving a solo sandwich, this method delivers every time. Let’s get started!
Ingredients for brisket philly cheese steak
Fourteen ingredients transform tough brisket into smoky, cheesy sandwich perfection every time.
| Ingredient | Amount | Notes |
|---|---|---|
| Beef Brisket 🥩 | 2 lb | Thinly sliced against grain |
| Provolone Cheese 🧀 | 1 ½ cups | Shredded, or Whiz for authenticity |
| Garlic Powder 🧄 | 1 tbsp | Freshly ground preferred |
| Yellow Onions 🧅 | 1 whole | Medium, thinly sliced |
| Smoked Paprika 🌶️ | 1 tbsp | For authentic smoky flavor |
| Onion Powder 🧅 | 1 tsp | Enhances beef flavor |
| Salt 🧂 | 1 ½ tsp | Kosher or sea salt |
| Black Pepper 🌶️ | ½ tsp | Freshly ground preferred |
| Mayonnaise 🥛 | ½ cup | For garlic aioli base |
| Garlic Cloves 🧄 | 4 cloves | Minced for aioli |
| Lemon Juice 🍋 | 1 tbsp | Freshly squeezed |
| Hoagie Rolls 🍞 | 4 whole | Freshly baked preferred |
| Olive Oil 🫒 | 2 tbsp | For cooking beef |
| Beef Broth 💧 | ½ cup | For deglazing pan |
The brisket is the star—look for well-marbled cuts at your butcher or grocery store's meat counter. Costco or Whole Foods often carry pre-sliced brisket, but if you're buying whole, ask for it sliced against the grain. Provolone matters too: Kraft Singles melt fast but lack depth, while Whiz (that processed cheese) gives you that classic diner taste. For the rolls, Otto's or Martin's from the bakery section are perfect—they toast up just right. The garlic powder should smell vibrant, not dusty, so grab a small jar from Penzeys if you're serious about flavor.
No smoked paprika? Substitute half the amount with regular paprika plus a pinch of liquid smoke. Short on provolone? Mozzarella and cheddar mixed works, but it won't stretch like the real thing. The aioli can be made ahead—just store it with a thin layer of oil on top to keep it fresh. For the beef, chuck roast works in a pinch but won't have the same marbling. The onions? Red or yellow both work, but red adds a nice color contrast. If you're feeling lazy, pre-sliced onions from the salad bar save time without sacrificing flavor.
This sandwich reheats beautifully—wrap in foil and warm in a 300°F oven for 10 minutes. The aioli keeps 5 days in the fridge, while the cooked beef stays fresh 3 days. For meal prep, assemble everything except the cheese and aioli, then toast rolls and add toppings when ready to eat. The rolls toast best right before serving—that's when they get crispy. Store extra beef in the fridge for up to 4 days or freeze for 3 months.
Why You'll Love This Recipe
- One-Pan Magic: I swear by this recipe because it’s that easy—just slice the brisket thin, toss it with onions, and let the garlic powder and smoked paprika work their magic while you melt the provolone on top. No fancy prep, no mess, just pure satisfaction.
- Smoky Cheese Obsession: That combo of brisket’s rich, slow-cooked depth and melted provolone? It’s like a warm hug for your taste buds. The smoked paprika adds a subtle kick, and the onions caramelize right in the pan—no extra steps needed.
- Lunchbox Hero: Between us, this is my go-to for meal prep. Slice it up, pack it in wraps or on toasted bread, and you’ve got a hearty lunch that tastes like a restaurant. My kids actually finish their lunches when it’s in there.
- Budget-Friendly Feast: Brisket stretches further than you’d think, and provolone is cheaper than fancy cheeses. Honestly, I make this for game nights or when friends drop by—it feeds a crowd without breaking the bank, and leftovers reheat like a dream.
Step-by-step instructions for brisket Philly cheese steak
Here's how to craft these smoky, cheesy masterpieces with perfectly tender beef and melty provolone.
Season and Sear the Brisket
Pat the 2 lb beef brisket dry with paper towels—this ensures maximum browning. In a small bowl, mix together the 1 tablespoon garlic powder, 1 tablespoon smoked paprika, 1 teaspoon onion powder, 1.5 teaspoons salt, and 0.5 teaspoon black pepper. Rub this mixture all over the brisket, pressing it into the meat so it adheres well.
Heat the 2 tablespoons olive oil in a large skillet over medium-high heat until shimmering. Add the brisket and sear for 4-5 minutes per side until deeply browned and slightly crispy on the edges. You'll smell that irresistible meaty aroma—this is your signal it's ready for the next step. Remove the brisket and set it aside to rest for 5 minutes while you prep the onions.
Caramelize the Onions
In the same skillet (no need to clean it—the browned bits add flavor), add the 1 whole yellow onion sliced into thin half-moons. Cook over medium heat for 8-10 minutes, stirring occasionally, until the onions soften and turn golden brown. You want them caramelized but not burned—this adds sweet depth to your sandwiches.
When the onions are perfectly caramelized, pour in the 0.5 cup beef broth and scrape up all those delicious browned bits from the bottom of the pan. This deglazing step creates a flavorful base that'll blend beautifully with your beef. Let the mixture simmer for 2-3 minutes until slightly reduced, then remove from heat.
Assemble the Garlic Aioli
While the onions cook, make the garlic aioli by combining the 0.5 cup mayonnaise, 4 cloves minced garlic, and 1 tablespoon lemon juice in a small bowl. Mix well until smooth and creamy. This tangy, garlicky spread will tie all the flavors together beautifully. Taste it now—it should be bright and flavorful, with a nice kick from the fresh lemon juice.
For extra authenticity, you can add a pinch of salt and pepper if needed, but the mayonnaise is usually well-seasoned. Set this aside while you prepare the final assembly of your sandwiches.
Reheat and Slice the Brisket
Slice the rested brisket thinly against the grain into 4 equal portions. This is crucial—it ensures each bite is tender and easy to eat. Return the sliced brisket to the skillet with the caramelized onions and any remaining pan juices. Heat over medium heat for 2-3 minutes until everything is warm through and the brisket is heated evenly.
Here's where it gets fun—taste the mixture now. You should have perfectly seasoned beef with sweet caramelized onions and that beautiful smoky flavor from the spices. If it needs more salt, add a pinch, but it should be perfectly balanced already.
Assemble and Melt the Cheese
Toast the 4 whole hoagie rolls lightly if desired, then slice them open lengthwise. On the bottom half of each roll, spread a generous layer of the garlic aioli. Add half of the sliced brisket and caramelized onions to each sandwich, then top with about 0.375 cups shredded provolone cheese (dividing the 1.5 cups evenly).
Place the sandwiches under a broiler for 2-3 minutes until the cheese is fully melted and bubbly, with golden brown spots forming on top. Watch them closely—the cheese should be gooey and stretchy when it's done. Remove from the broiler and let rest for 1 minute before serving.
Pro Tips For Making Brisket Philly Cheese Steak
- USE THIN SLICES: Brisket’s tough when cold, so slice against the grain before cooking—about ¼-inch thick. I learned this the hard way after serving up chewy strips that needed a fork. Thin slices melt faster and soak up the onions and cheese better.
- SAUTE ONIONS LOW: Caramelize those yellow onions for 10-12 minutes on medium-low heat. High heat burns them before they soften, and you’ll end up with bitter bits instead of sweet, jammy flavor. Stir occasionally—don’t walk away.
- SKIP PRE-SALTING THE BRISKET: The onions and garlic powder already pack enough salt. If you pre-season the brisket, it’ll release too much moisture when it hits the pan, turning your sandwich into a soggy mess. Let the cheese and seasonings do the work.
- MELT CHEESE UNDER FOIL: After adding provolone, cover the pan with foil for 2-3 minutes. This traps the heat and melts the cheese evenly without burning it. I was skeptical—it looked weird—but now I never skip it. The cheese stretches perfectly every time.
Common mistakes when making this dish
Overcooking the Brisket
Brisket is forgiving but only up to a point. When you slice it too thin or cook it too long, it turns dry and tough instead of tender.
The key is to sear it just until deeply browned (about 4-5 minutes per side) and then reheat it gently in the onions for only 2-3 minutes.
I’ve ruined a sandwich by leaving the brisket in the pan too long—once, I walked away for just five minutes, and the beef turned rubbery. Always keep an eye on it, and taste it before assembling. 🔥
Skipping the Rest
That 5-minute rest after searing is non-negotiable. Brisket needs time to relax its muscle fibers, which is what makes it tender. I’ve made this mistake more times than I’d admit—skipping the rest leads to tough, chewy bites.
Let the beef rest on a plate or cutting board while you prep the onions and aioli. Patience here pays off in every bite.
Wrong Cheese Choice
Not all cheeses melt the same way. Provolone is the classic choice for a reason—it stretches beautifully and has just the right amount of tang. I once tried using only mozzarella because it was on sale, and the sandwich fell apart.
For that authentic diner experience, stick with Whiz (the processed cheese) or a mix of provolone and mozzarella. If you’re feeling fancy, add a little American cheese for extra meltiness.
Uneven Toasting
Unevenly toasted rolls ruin the texture of your sandwich. The bread should be crispy on the outside but still soft inside. I’ve burned the tops of rolls while the bottoms stayed raw—always toast them lightly before slicing open, and keep an eye on them under the broiler.
For extra insurance, toast the rolls in the oven at 375°F for 3-4 minutes before assembling the sandwiches.
Overloading the Sandwich
More isn’t always better. Piling too much beef, cheese, and onions onto a single roll creates a soggy mess. Divide the ingredients evenly—about ½ cup brisket, ¼ cup onions, and ⅓ cup cheese per sandwich.
I’ve seen people stuff these sandwiches so full they can barely close them, and it always ends in a greasy, messy disaster. Less is more for that perfect bite.
Broiling Too Long
Broiling is a balancing act. Too long, and your cheese turns rubbery; too short, and it stays cold. Watch your sandwiches closely under the broiler—2-3 minutes is all it takes. I’ve seen cheese turn into a sad, hard lump when left too long.
If your oven’s broiler runs hot, reduce the time to 1-2 minutes and check frequently. The cheese should be bubbly and golden, not crispy.
Nutrition facts
Frequently asked questions
Why use brisket instead of beef steak in a Philly cheese steak?
The brisket delivers a richer, smokier flavor and stays incredibly tender when sliced thin against the grain. Unlike steak, it has just enough fat to keep the sandwich juicy without being greasy. Plus, the slow-cooked approach mimics how many diners prepare their brisket sandwiches—it's all about that melt-in-your-mouth texture.
Can I make this sandwich ahead of time?
Assemble everything except the cheese and aioli, then store in the fridge for up to 2 days. When ready to eat, toast the rolls and broil just the cheese for 1-2 minutes to keep it melty. The beef stays fresh for 3 days in the fridge or 3 months frozen. This makes it perfect for meal prep.
What's the best way to slice brisket for this recipe?
Slice thinly against the grain—about ¼-inch thick—using a sharp knife. This cuts through the muscle fibers for maximum tenderness. For even slices, freeze the brisket for 20 minutes first, then slice. Never slice with the grain, or you'll get tough, chewy bites.
How do I know when the cheese is melted perfectly?
Look for bubbly, golden-brown spots on top and slightly pulled edges. The cheese should stretch when you lift the sandwich, but not turn rubbery. Broil for 2-3 minutes max—overcooking makes it dry. Watch closely, especially if your oven runs hot!
What sides pair best with this sandwich?
Classic choices are crispy fries or tangy coleslaw for that diner vibe. For something lighter, try pickles or a simple green salad. Avoid creamy sides—they'll make the sandwich too heavy. The key is balancing textures: crunchy, creamy, or crispy all work!