
Appetizers
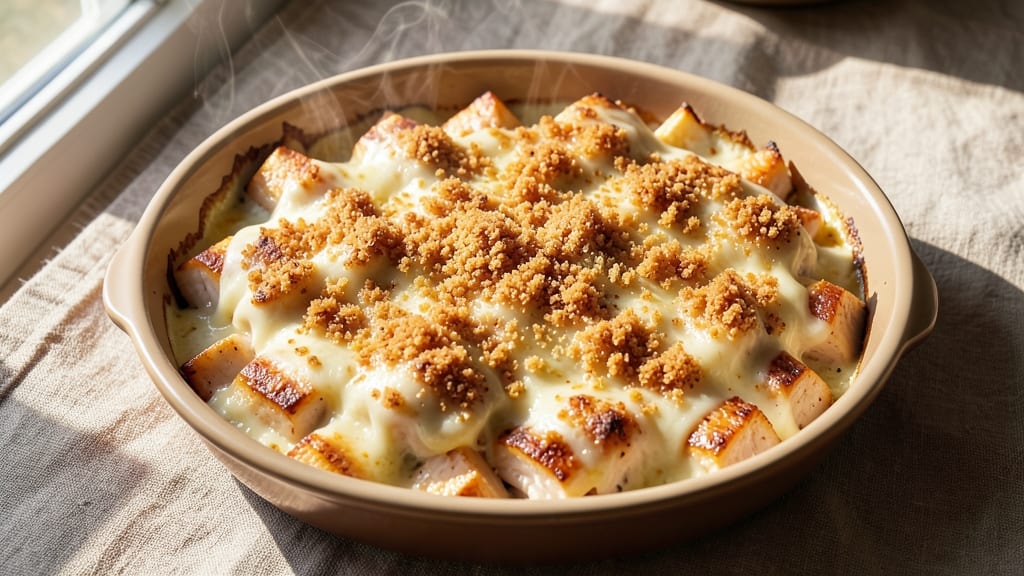
This cheese casserole recipe delivers the perfect balance of crispy breadcrumb topping and gooey, melty cheese layers that make every bite irresistible.
The secret lies in layering ingredients precisely—starting with a flavorful base, building with cheese and protein, and crowning it with a buttery, golden crumb that holds its shape until the very last bite.
I developed this recipe after years of perfecting the art of casserole texture, ensuring it stays tender inside while achieving that satisfying crunch on top.
The beauty of this dish is its versatility—whether you're serving it as a hearty appetizer for a gathering or a satisfying side alongside grilled meats. It’s designed to be foolproof, with clear layering instructions that guarantee a restaurant-quality result every time.
The combination of sharp cheddar, creamy sauce, and crispy breadcrumbs creates a harmony of textures that keeps everyone reaching for seconds. Plus, it bakes in just 30 minutes, making it the ideal dish for busy weeknights or special occasions.
What you’ll end up with is a casserole that’s impossible to resist: golden, bubbling, and topped with a crunchy crown that shatters at the first bite. The cheese pulls slightly in the center, creating pockets of creamy goodness that melt on the tongue.
This isn’t just a side dish—it’s a showstopper that elevates any meal. Ready to master the perfect cheese casserole? Let’s get started with the ingredients and step-by-step instructions that will make this your new go-to recipe.
One of the best things about this casserole is how easily it adapts to your preferences. Swap in chicken, beef, or even vegetables for a vegetarian twist, and adjust the seasoning to suit your taste. It pairs beautifully with salads, roasted vegetables, or as a standalone appetizer for parties.
The key to success is patience during baking—don’t rush it, and you’ll be rewarded with a dish that’s crispy on top, creamy inside, and utterly addictive. Here’s everything you need to make it happen.
Ingredients for cheese casserole
Six layers of cheesy perfection—crispy crown meets gooey, melty heart. These ingredients transform into a showstopper casserole that's impossible to resist.
| Ingredient | Amount | Notes |
|---|---|---|
| Sharp White Cheddar Cheese 🧀 | 2 cups | Shredded, 2-year aged for sharpness |
| Extra-Sharp White Cheddar Cheese 🧀 | 1 cup | Shredded, for extra bite |
| Heavy Cream 🥛 | 1 cup | Full-fat for richness |
| Unsalted Butter 🧈 | ½ cup | Cold, cubed for crispy topping |
| Panko Breadcrumbs 🍞 | 1 ½ cups | Japanese-style for extra crunch |
| Parmesan Cheese 🧀 | ½ cup | Freshly grated, for umami depth |
| Fresh Garlic Cloves 🧄 | 4 cloves | Minced for aromatic base |
| Yellow Onion 🧅 | 1 whole | Thinly sliced, sweet variety |
| All-Purpose Flour 🌾 | ¼ cup | For roux thickening |
| Chicken Breast 🍗 | 1 ½ lb | Boneless, skinless, diced small |
| Chicken Broth 💧 | 1 cup | Low-sodium for flavor base |
| Dried Thyme 🌿 | 1 tsp | Or 1 tbsp fresh thyme leaves |
| Diamond Crystal Kosher Salt 🧂 | 1 ½ tsp | For seasoning balance |
| Freshly Ground Black Pepper 🌶️ | ½ tsp | Cracked peppercorns preferred |
| Dried Mustard Powder 🌶️ | ½ tsp | For subtle tang |
The cheddar is non-negotiable here. Two-year aged sharp cheddar from Whole Foods or a specialty cheese counter delivers that signature bite—pre-shredded lacks the melt and texture. For the topping, Japanese-style panko (the fluffy kind) creates that shatteringly crisp crown. I always buy mine in bulk from Costco—it keeps for months in an airtight container. The chicken breast? Boneless, skinless, and diced uniformly—no one wants rubbery bits in their casserole. If you're using pre-shredded cheese, pulse it in a food processor to break up the anti-caking agents.
No sharp cheddar? Extra-sharp white cheddar or pepper jack works in a pinch, but you'll lose that classic tang. Short on panko? Regular breadcrumbs toasted in butter give decent crunch, though nothing beats the real deal. The chicken can be swapped for ground turkey or Italian sausage—just brown it first. For a vegetarian version, add sautéed mushrooms and spinach to the base layer. The mustard powder adds depth without overpowering—skip it if you're sensitive to tangy flavors. And if you're using dried thyme, toast it lightly in a dry pan first to wake up the flavor.
This casserole reheats beautifully—better the second day, honestly. Store leftovers covered in the fridge for 4-5 days, or freeze portions for up to 3 months. I like to bake extras and freeze them in individual portions for quick meals. The breadcrumb topping hardens when chilled, so reheat covered at 350°F for 10-15 minutes until bubbly. For parties, assemble it in a large disposable baking dish—no one will even notice it's a casserole, they'll just keep reaching for seconds.
Why You'll Love This Recipe
- One-Pan Magic: I swear by this recipe when I’m too tired to scrub pots—just toss everything in one dish, bake, and walk away. The sharp cheddar melts into a golden, gooey blanket, while the panko topping crisps up without a lick of extra effort.
- Rich Without Trying: That combo of heavy cream and two types of chedddar? It’s the kind of depth you’d expect from a fancy restaurant, but here it’s just butter, cheese, and 20 minutes. The extra-sharp chedddar adds a tangy kick that cuts through the richness—trust me, it’s the secret.
- Leftovers? Better.: This casserole actually improves the next day. The flavors meld overnight, and reheating it is a crime if you don’t—just pop it in the oven until bubbly. I’ve taken it to potlucks, packed it for work lunches, and even fed a house full of teenagers without a single complaint.
- Budget Cheat Code: I use this when I’m pinching pennies but still want something that feels special. Sharp chedddar’s cheaper than fancy cheeses, and a stick of butter plus a bag of panko stretch further than you’d think. Honestly, it’s the kind of dish that makes grocery night less stressful.
Step-by-step instructions for cheese casserole with crispy breadcrumb crown
Here's how to create the ultimate casserole—crispy golden breadcrumb topping over a rich, melty cheese filling.
Prepare the Chicken and Aromatics for the Filling
Start by dicing the 1.5 lb chicken breast into small, even cubes—about ½-inch pieces. This ensures the chicken cooks quickly and evenly throughout the casserole. In a large skillet, melt 0.25 cup all-purpose flour in 0.25 cup unsalted butter over medium heat until the butter foams and the flour turns a pale golden color. This creates a light roux that will thicken your filling beautifully.
Add the diced chicken to the skillet and cook for 5-6 minutes, stirring occasionally, until the chicken is no longer pink in the center. Remove it from the skillet and set it aside. In the same pan, add the 1 whole yellow onion (thinly sliced) and 4 cloves fresh garlic cloves (minced). Cook for 3-4 minutes until the onions are translucent and the garlic is fragrant—this aromatic base will infuse the entire casserole with depth.
Build the Creamy Cheese Filling
In a large bowl, combine the cooked chicken with the sautéed onions and garlic. Add 2 cups sharp white cheddar cheese and 1 cup extra-sharp white cheddar cheese, breaking them into small pieces as you go. This ensures the cheese melts smoothly into the filling rather than creating clumps. Stir in 1 cup heavy cream, 1 cup chicken broth, 1 tsp dried thyme, 1.5 tsp diamond crystal kosher salt, 0.5 tsp freshly ground black pepper, and 0.5 tsp dried mustard powder.
Mix everything together until the cheese is fully melted and the filling is smooth and creamy. The mustard powder adds a subtle tang that balances the richness of the cheese. Taste the mixture and adjust the seasoning if needed—this is your chance to ensure every bite is perfectly seasoned. The filling should be thick but still pourable, almost like a rich cheese sauce.
Assemble the Casserole with the Crispy Topping
Preheat your oven to 375°F. Grease a 9x13-inch baking dish with a bit of butter or oil to prevent sticking. Spread the cheese filling evenly into the baking dish, smoothing the top with a spatula. This even layer ensures the breadcrumb topping cooks uniformly and the filling bakes through completely.
In a separate bowl, mix together 1.5 cups panko breadcrumbs, 0.5 cup parmesan cheese (freshly grated), 0.25 cup unsalted butter (cold and cubed), 0.5 tsp diamond crystal kosher salt, and 0.25 tsp freshly ground black pepper. Sprinkle this mixture evenly over the cheese filling, pressing down gently with your fingers to ensure it adheres. The butter in the topping will melt and create a crispy, golden crust as it bakes.
Bake to Golden Perfection
Place the casserole in the preheated oven and bake for 25-30 minutes until the breadcrumb topping is deep golden brown and the filling is bubbling around the edges. The topping should be crispy enough to snap when you press it gently with a fork—this is your signal that it's ready. If the topping browns too quickly, tent it loosely with aluminum foil to prevent over-browning while the filling finishes cooking.
Remove the casserole from the oven and let it rest for 5-10 minutes before serving. This resting time allows the filling to set slightly, making it easier to slice and serve. The contrast between the crispy, golden topping and the creamy, melty cheese filling is what makes this casserole truly incredible. Serve it warm with a side of fresh green salad or crusty bread to soak up any extra cheese sauce.
Pro Tips For Making Cheese Casserole
- Preheat Your Dish: DESCRIPTION: Toss that casserole dish into a 375°F oven for 10 minutes before adding the cheese mixture. I learned this the hard way—cold glass slows down melting, and you’ll end up with a sad, grainy cheese layer instead of that creamy, pull-apart texture you want.
- Grate Cheese Fresh: DESCRIPTION: Skip the pre-shredded stuff—it’s coated with anti-caking agents that make the cheese clump and weep. Use a box grater for sharp white cheddar, and resist the urge to pulse in a food processor (it turns cheese into glue). Freshly grated cheese melts like a dream.
- Don’t Overmix the Topping: DESCRIPTION: Once you mix the butter, heavy cream, and panko for the crust, stop stirring when it just comes together—no need to overwork it. Overmixing makes the topping dense instead of light and crispy. Think "damp sand," not "wet glue."
- Bake Covered First: DESCRIPTION: Start the casserole covered with foil for the first 20 minutes. This locks in moisture so the cheese doesn’t turn into a dry, rubbery mess. After that, uncover and let the top brown—just watch it like a hawk so it doesn’t burn. (Yes, even if you’re impatient like me.)
Make-ahead tips for this dish
Overnight Prep Strategy
Assemble your casserole the night before and refrigerate it uncovered. This allows the cheese to firm up slightly, preventing excessive spreading during baking. I like to cover it loosely with plastic wrap and refrigerate for 12-16 hours—this also gives the breadcrumb topping time to absorb flavors from the filling.
When ready to bake, bring it to room temperature for 30 minutes before putting it in the oven. 🌙
Freezer-Friendly Assembly
For ultimate convenience, assemble the casserole completely (including the breadcrumb topping) and freeze it in a 9x13-inch baking dish for up to 3 months.
When ready to bake, thaw it overnight in the refrigerator, then bake directly from frozen at 375°F for 45-50 minutes, tented with foil for the first 30 minutes. The extra time ensures the breadcrumb topping crisps properly.
Portion Control for Parties
For gatherings, divide the assembled casserole into individual 8x8-inch baking dishes before baking. This lets you bake multiple casseroles simultaneously at the same temperature. I use disposable foil pans for easy cleanup—just assemble, cover, and refrigerate until ready to bake.
Each small casserole bakes in 25-30 minutes, perfect for keeping hot food warm during parties. 🎉
Make-Ahead Baking Hack
Bake your casserole completely the day before serving, then refrigerate it. Reheat covered at 350°F for 15-20 minutes until bubbly. The breadcrumb topping may lose some crispness but still delivers that satisfying crunch.
For extra crunch, broil for 1-2 minutes at the end of reheating. This method works especially well for potlucks or meal prep.
Cheese Prep Shortcut
Shred your cheese the day before and store it in an airtight container in the refrigerator. The cold temperature prevents clumping, and the cheese will be ready to use straight from the fridge.
I also like to prep my breadcrumb topping mixture ahead—just store the dry ingredients (panko, parmesan, salt, pepper) together in a container, then add the cold butter right before assembling. This keeps everything organized and ready to go. 🧀
Protein Swap Prep
If using ground meat or sausage instead of chicken, brown it completely ahead of time and refrigerate it in the filling mixture. This prevents soggy breadcrumbs during baking. For vegetarian versions, sauté mushrooms and spinach the day before and store them with the cheese mixture.
The flavors meld beautifully overnight, creating even more depth in your casserole. 🌱
Nutrition facts
Frequently asked questions
Can I make this casserole without chicken?
Swap the chicken for 1 lb ground turkey, 1 lb Italian sausage, or even sautéed mushrooms and spinach for a vegetarian version. Just brown any meat first to prevent a soggy topping. The key is keeping the protein fully cooked before assembling.
Why does my breadcrumb topping get soggy?
Soggy topping usually happens when the filling isn't fully set or the breadcrumbs aren't crisp enough. Always bake the casserole at 375°F until the topping is golden and crispy (test by pressing gently with a fork). For extra insurance, toast your panko in the oven with butter for 3-4 minutes before assembling.
How do I prevent cheese clumps in the filling?
Break the cheese into small pieces before adding it to the warm filling—this helps it melt smoothly. Also, keep your chicken broth and cream warm (not boiling) when mixing. If clumps form, stir over low heat for 1-2 minutes until fully melted. Pre-shredded cheese often contains anti-caking agents that cause clumping, so freshly grated is ideal.
Can I use a different baking dish size?
Yes, but adjust baking time. A 9x9-inch dish will bake faster (20-25 minutes) while an 8x8-inch dish may need 5-10 extra minutes. For deep dishes, reduce temperature to 350°F to prevent over-browning. Always check doneness by ensuring the center reaches 165°F.
What's the best way to reheat leftovers?
Cover the casserole with foil and reheat at 350°F for 15-20 minutes until bubbly. For extra crispiness, broil for 1-2 minutes at the end. Avoid microwaving—it makes the topping rubbery. Leftovers keep well for 4-5 days in the fridge or 3 months frozen.