
Appetizers
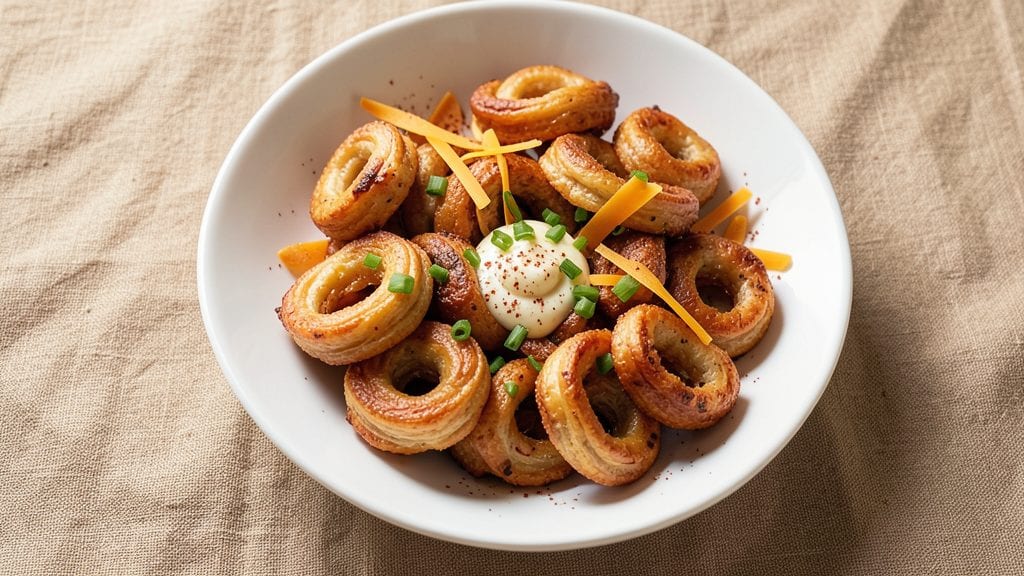
This cheese twist recipe delivers the perfect balance of crispy, golden edges and gooey, pull-apart cheese centers that disappear in your mouth. The secret lies in the precise dough-to-cheese ratio and high-heat baking technique that creates that addictive texture contrast.
I've perfected this method after years of experimenting with different cheeses and seasonings, and it never fails to impress—whether served as a snack or appetizer.
The beauty of these cheese twists is their simplicity: just five ingredients transform into a crowd-pleasing bite that's crispy on the outside and melty inside. The dough wraps around sharp cheddar (or your favorite cheese blend) and bakes until golden brown, creating that satisfying snap when you pull them apart.
This recipe comes together in under 30 minutes, making it ideal for game day, parties, or a quick snack when cravings strike.
What makes these twists truly special is that pull-apart magic—the moment the cheese melts just enough to create strings while maintaining structure. The seasoning blend adds subtle depth without overpowering the cheese, ensuring every bite is perfectly balanced.
Serve them warm with marinara for dipping, or enjoy them straight from the oven as a satisfying snack. The crispy texture holds up beautifully, so you won't find soggy twists here.
These cheese twists work equally well as an appetizer spread or a snackable treat for movie night. The recipe scales easily, so you can make a single batch for two or double it for a crowd.
Once you try them, you'll never go back to store-bought versions—they're that good. Let's get started on creating your own crispy, cheesy masterpiece!
Ingredients for cheese twist
Five simple ingredients create crispy, pull-apart cheese twists that disappear in your mouth.
| Ingredient | Amount | Notes |
|---|---|---|
| All-Purpose Flour 🌾 | 2 cups | Light, not self-rising |
| Sharp Cheddar Cheese 🧀 | 1 cup | Shredded, block preferred |
| Baking Powder 🧂 | ½ tsp | For light, crispy texture |
| Garlic Powder 🧄 | ½ tsp | For subtle flavor depth |
| Onion Powder 🧅 | ½ tsp | Enhances seasoning blend |
| Salt 🧂 | ½ tsp | Kosher or sea salt |
| Unsalted Butter 🧈 | ½ cup | Cold, cubed for dough |
| Milk 🥛 | ¼ cup | Cold, for tender dough |
| Egg 🥚 | 1 whole | Large, room temperature |
The cheese is non-negotiable here—sharp cheddar gives that perfect tangy bite, but Monterey Jack or Gouda work too if you prefer milder flavors. Block cheese shreds better than pre-shredded (no anti-caking agents), and Trader Joe's or Whole Foods have the best quality. For a crowd, I double the batch—just make sure your oven isn't overloaded. The butter needs to be cold and cubed for flaky layers, not melted. And that milk? Cold, straight from the fridge—it keeps the dough tender without making it gummy.
No baking powder? Self-rising flour plus 1/4 tsp baking soda works in a pinch, but the texture won't be quite as crispy. Short on cheddar? Pepper Jack or a blend of cheddar and Parmesan adds extra flavor. The garlic and onion powders can be swapped for fresh herbs like parsley or chives if you're feeling fancy (use about 1 tbsp chopped fresh per 1/2 tsp powder). For a vegetarian-friendly twist, skip the butter and use vegetable shortening—it's neutral and works just as well. Pre-shredded cheese? Only if it's the good stuff—look for brands without anti-caking agents like Kraft's '2-year shelf life' version.
These twists are best served fresh from the oven—that crispy exterior melts into gooey cheese within minutes. Store leftovers in an airtight container at room temperature for 2 days (if they last that long!). For longer storage, freeze them for up to 3 months—just reheat in a 350°F oven for 5-7 minutes to restore that crispy magic. I always make extra—they're perfect for parties and disappear faster than you can say 'pull-apart cheese.'
Why You'll Love This Recipe
- No-Measure-Cup Chaos: I swear, this comes together faster than my coffee brews. Just toss the flour, cheese, and spices into a bowl—no fancy mixers, no measuring cups—then twist and bake. Honestly, the hardest part is deciding whether to eat one fresh out of the oven.
- Sharp Cheddar Magic: That sharp cheddar isn’t just filling—it’s bold. The garlic and onion powders give it a savory punch, while the baking powder keeps it light. Between us, the first bite makes me forget about takeout entirely.
- Snack Attack Ready: These disappear faster than my willpower on a bad day. Keep them in the fridge for a quick protein boost, or freeze half for lazy days. My kids grab them straight from the pan—no plates, no fuss.
- Dollar Stretch Wonder: Four ingredients, zero guilt. Sharp cheddar’s the star, but the flour and spices cost pennies. I’ve made a whole batch for under $5, and they feed my family for days. Budget-friendly doesn’t get much better than this.
Step-by-step instructions for cheese twist recipe
Here's how to create those irresistible, pull-apart cheese twists with a perfect crispy exterior.
Mix the Dough for Ideal Texture
In a large mixing bowl, combine the 2 cups all-purpose flour, 0.5 tsp baking powder, 0.5 tsp garlic powder, 0.5 tsp onion powder, and 0.5 tsp salt. Whisk these dry ingredients together until fully blended and no flour pockets remain. This ensures even distribution of flavor throughout the dough.
In a separate small bowl, melt the 0.5 cup unsalted butter in the microwave for 20-30 seconds until just softened but not liquid. Let it cool slightly, then add the 0.25 cup cold milk and 1 whole egg to the melted butter. Whisk vigorously for 30 seconds until the mixture becomes smooth and slightly thickened.
Pour the wet ingredients into the dry ingredients and stir with a wooden spoon until just combined. You'll want to mix until the dough comes together but avoid overworking it—this keeps the twists tender. The dough should be soft and slightly sticky but not wet. If it feels too dry, add 1 teaspoon milk at a time until it reaches the perfect consistency.
Incorporate the Cheese for Maximum Flavor
Grate the 1 cup sharp cheddar cheese using a box grater for fine, even shreds. Add the grated cheese to the dough mixture and fold it in using your hands or a rubber spatula. Work quickly to distribute the cheese evenly throughout the dough—this ensures every bite has that melty, cheesy goodness.
Once the cheese is fully incorporated, divide the dough into 4 equal portions. I like to work with smaller batches for easier handling. Wrap each portion tightly in plastic wrap and refrigerate for at least 30 minutes (or up to 2 hours). This chilling step is crucial—it firms up the dough so it holds its shape when twisted and baked, preventing any sad, squished twists.
Shape and Twist for Perfect Bites
Preheat your oven to 375°F and line two baking sheets with parchment paper. Remove one portion of chilled dough and place it on a lightly floured surface. Roll it into a 12-inch long rope about 1 inch thick, using gentle pressure to keep it smooth and even.
Here's the fun part—create the twist! Starting at one end, make a diagonal cut about 3 inches long at a 45-degree angle. Then, take the cut portion and twist it 180 degrees before pressing it back down. Repeat this twisting motion every 3 inches along the entire length of the rope. You'll end up with a beautiful, continuous twist pattern that's perfect for those pull-apart moments.
Bake Until Golden and Crispy
Place the shaped twist on the prepared baking sheet, leaving 2 inches of space between each twist. Repeat with the remaining dough portions. Bake in the preheated oven for 18-22 minutes until the twists are golden brown and the edges look crispy and slightly puffed.
Watch carefully during the last 5 minutes of baking—this is when the cheese starts to melt and create that irresistible pull-apart texture. You want them to be golden but not so dark that they burn. If you're unsure, do the "touch test": gently press a twist with a piece of parchment paper. If it springs back, it's done!
Cool and Serve Warm
Remove the twists from the oven and let them cool on the baking sheet for 3-5 minutes. This brief resting period allows the cheese to set slightly, making them easier to handle without losing that perfect crispy texture. Serve them warm for the ultimate experience—each bite should offer a satisfying crunch followed by that gooey, melty cheese pull.
For best results, serve these twists immediately while they're still warm and crispy. They make a fantastic appetizer for game day, a fun snack for parties, or even a delicious side dish. Store any leftovers in an airtight container for up to 2 days, but I promise they won't last that long!
Pro Tips For Making Cheese Twist
- CHILL THE DOUGH: DESCRIPTION: After mixing, pop the dough in the fridge for 30 minutes—yes, even if you’re eager to twist. I learned this the hard way when my first batch stuck to the pan and turned out dense. Cold dough handles better, twists cleaner, and bakes more evenly.
- GRATE THE CHEESE FINE: DESCRIPTION: Use a box grater for the cheddar, not pre-shredded cheese. The pre-shredded stuff has anti-caking agents that make your twists gummy. Sharp cheddar should be like coarse sand—enough texture to hold shape but still melt smoothly.
- DON’T OVERWORK THE DOUGH: DESCRIPTION: Mix just until the flour disappears—overmixing makes tough twists. I used to knead like I was punishing the dough, and it paid off with chewy, sad bites. Stop when the ingredients barely come together, then fold in the cheese gently.
- BAKE UNTIL GOLDEN: DESCRIPTION: Watch for deep golden brown, not just pale yellow. I was skeptical until I tried it—underbaked twists taste raw in the center. Rotate the pan halfway through and bake until the edges are crisp, not just the top.
Wine and beer pairings for cheese twist
Crispy White Wine
For these golden, cheesy twists, a dry white wine like Sauvignon Blanc or Chardonnay cuts through the richness beautifully. I love a crisp New Zealand Sauvignon Blanc—its bright citrus notes and herbal undertones complement the garlic and onion powders in the dough.
The acidity helps cleanse your palate between bites, making each twist feel fresh. Look for a wine with 12-13% ABV and medium body to balance the cheesy indulgence without overwhelming it. 🍷
Light Beer Pairings
A pilsner or lager is perfect for balancing the savory, crispy texture of the cheese twists. I reach for Mexican-style lagers like Modelo Especial or Pacifico—their subtle malt sweetness and light carbonation make them refreshing.
For a local option, Bud Light or Coors Light work well, especially if you're serving these as game-day snacks. The light body won’t compete with the cheese but will keep the experience crisp and satisfying. 🍺
Bold Red Options
If you prefer red wine, opt for a light-bodied variety like Pinot Noir or Beaujolais. A California Pinot Noir with its cherry and vanilla notes pairs surprisingly well with the sharp cheddar and garlic flavors.
Avoid heavy Cabernets or Syrahs—their tannins can clash with the cheese’s creaminess. For a fun twist, try a sparkling rosé—its bubbles and berry flavors add a festive touch to any gathering. 🍇
Non-Alcoholic Choices
Don’t overlook sparkling water with lemon for a refreshing, alcohol-free option. I also love ginger beer—its spicy kick balances the richness of the cheese twists perfectly. For something more substantial, a cucumber-mint infused water adds a cooling contrast to the warm, crispy bites.
These pairings keep the experience vibrant without alcohol, making them great for all ages. 💧
Dipping Sauce Pairings
If you're serving marinara for dipping, a medium-bodied Chianti or Sangiovese enhances the tomato flavors. For a spicy twist, pair with a Zinfandel—its peppery notes complement the heat. If you’re dipping in ranch or blue cheese, stick with the Sauvignon Blanc or lager recommendations above.
The key is to match the sauce’s intensity with a wine or beer that won’t overpower the cheese twists. 🍅
Nutrition facts
Frequently asked questions
Can I make cheese twists without baking powder?
You can substitute ½ tsp baking soda plus ¼ tsp cream of tartar for the baking powder, but the texture won't be as crispy. The baking powder creates lift and crunch—essential for that satisfying pull-apart magic. If you're missing it, try adding 1 extra tablespoon of flour to help with structure, but expect slightly denser twists.
What's the best cheese for these twists?
Sharp cheddar is ideal for that perfect tangy bite, but Monterey Jack, Gouda, or a blend of cheddar and Parmesan work beautifully too. Avoid pre-shredded cheese with anti-caking agents—it contains starches that make the twists gummy. For extra flavor, try Pepper Jack or smoked cheddar!
Can I fry these cheese twists instead of baking?
For frying, use 350°F oil and cook in batches for 2-3 minutes per side until golden brown. The key is to keep the oil hot and avoid overcrowding. The frying method creates an even crispier exterior, but be careful—the cheese melts faster, so work quickly. For extra crunch, toss the fried twists in cornstarch before serving.
Why did my cheese twists turn out dense instead of crispy?
Dense twists usually happen from overmixing the dough or skipping the chilling step. Mix just until combined, and always chill the dough for at least 30 minutes before shaping. Another common issue is using too much cheese—stick to the 1 cup ratio. If the dough feels too wet, add 1 tablespoon flour at a time until it holds together.
How do I store leftover cheese twists?
Store in an airtight container at room temperature for 2 days—they'll lose crispiness but remain tasty. For longer storage, freeze them for up to 3 months. To reheat, bake at 350°F for 5-7 minutes until crispy again. Pro tip: Freeze them unbaked for even better texture after reheating!