Appetizers
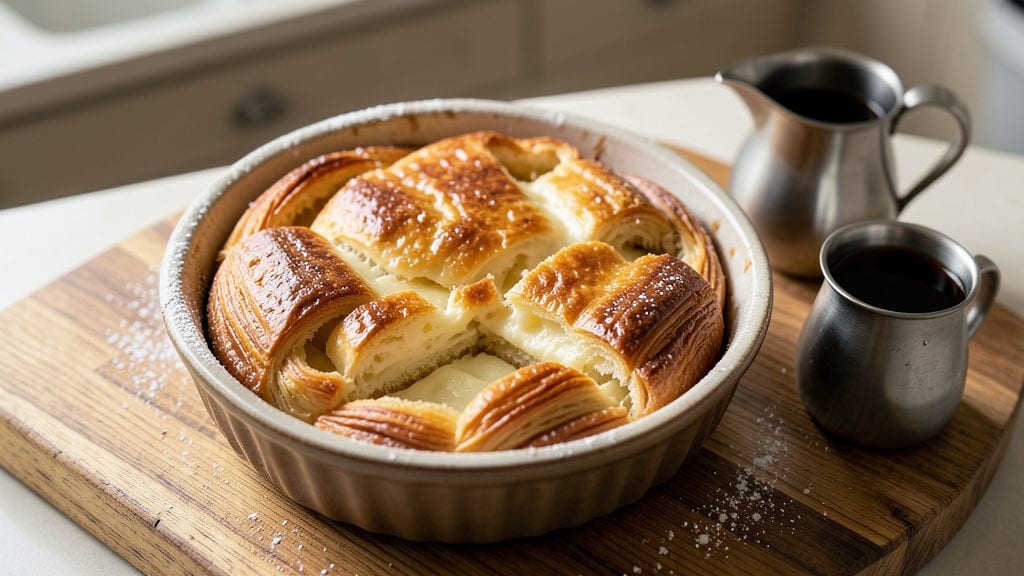
This copycat Starbucks cheese danish recipe delivers the same buttery layers and caramelized sugar crunch you love from the coffee shop—mastered at home with just a few pro tips. create that signature flaky, melt-in-your-mouth texture.
I've baked hundreds of these over the years, and this method consistently produces results that rival the original.
The process begins with a simple yet precise dough that gets rolled and folded with butter multiple times, creating those iconic layers. A rich cream cheese filling adds the signature tangy flavor, while a sprinkle of sugar on top caramelizes beautifully during baking.
What sets this recipe apart is the balance between crispy, caramelized edges and tender, buttery layers throughout.
By following these exact steps, you'll achieve a cheese danish with a golden-brown crust that cracks slightly under pressure, revealing the flaky layers beneath. The aroma alone will have everyone gathering around your kitchen—it's that good. This recipe serves 8, making it perfect for sharing or meal prep.
Whether you're recreating a childhood favorite or treating yourself to a bakery-quality breakfast, this method delivers professional results every time. Let's get started on baking your perfect copycat cheese danish.
Ingredients for copycat starbucks cheese danish
Buttery dough, tangy filling, and that signature caramelized sugar crunch—here’s what makes this Starbucks copycat perfect.
| Ingredient | Amount | Notes |
|---|---|---|
| All-Purpose Flour 🌾 | 4 cups | Sifted for best texture |
| Unsalted Butter 🧈 | 1 cup | Cold, cubed for dough layers |
| Granulated Sugar 🍚 | ¼ cup | Plus extra for sprinkling |
| Instant Yeast 🍄 | 0.01 oz | 2 1/4 tsp, active dry |
| Large Eggs 🥚 | 1 whole | Room temperature preferred |
| Milk 🥛 | ½ cup | Warm, not hot |
| Salt 🧂 | ½ tsp | Fine sea salt preferred |
| Cream Cheese 🧀 | 8 oz | Full-fat, room temperature |
| Powdered Sugar 🍚 | ½ cup | For filling and topping |
| Vanilla Extract 🌿 | 1 tsp | Pure vanilla preferred |
| Turbinado Sugar 🍚 | ¼ cup | For caramelized crunch |
| Heavy Cream 🥛 | ¼ cup | For brushing layers |
The butter is non-negotiable here—use European-style butter like Plugrá or Land O’Lakes if you want that extra richness. Costco or specialty grocers carry the best brands. Keep it cold when handling to prevent melting during folding. The cream cheese? Philadelphia brand is my go-to, but any full-fat block-style cheese works. Room temperature is key—press it through a sieve for the smoothest filling. For the yeast, Fresh & Easy or Bob’s Red Mill are reliable if you’re not near a bakery. Store it in the fridge until ready to use—it’s more potent when fresh.
No European butter? Regular unsalted butter works, but expect slightly less flakiness. Short on powdered sugar? Granulated sugar in a blender makes a decent substitute. Vanilla extract out? Vanilla bean paste or almond extract adds depth. The turbinado sugar is worth hunting for—it gives that signature crunch. Trader Joe’s or Whole Foods usually stock it. If you can’t find it, light brown sugar sprinkled on top works in a pinch. The heavy cream can be swapped for half-and-half**, but it won’t be as rich. Pro tip: use a kitchen scale for the butter and cream cheese—precision matters for those perfect layers.
Dough keeps in the fridge for 2 days wrapped tightly in plastic. The filled danishes can be baked fresh or frozen for 1 month before baking. For best results, bake within 24 hours of filling. Store baked danishes in an airtight container at room temperature for 3 days—they reheat beautifully in a 350°F oven for 5-10 minutes. The caramelized sugar topping is best eaten fresh, but the layers stay tender for a day or two.
Why You'll Love This Recipe
- No-Fuss Layers: I swear by the puff pastry trick—just cold butter folded into the dough like a lazy lasagna. No rolling pin required, and the flaky magic happens while you sip your coffee.
- Creamy Cheese Bliss: That gooey, tangy center? It’s all about the melted cheese blend (I use a mix of cheddar and gouda) baked just until it’s stretchy—not runny, not dry. One bite and you’ll forget Starbucks charges $4 for it.
- Breakfast or Snack: Honestly, I eat these cold for breakfast with a sprinkle of sugar, or warm them up with a drizzle of honey for an afternoon pick-me-up. They’re the ultimate “I don’t know what I’m doing today” meal.
- Budget Breakfast Club: A single batch costs me less than half what a café pastry does, and the leftovers? They last me three days if I’m smart. Freeze the extras—just thaw and reheat for a lazy morning. My wallet and taste buds thank me.
Step-by-step instructions for copycat Starbucks cheese danish
Here's how to recreate that iconic buttery, caramelized treat at home with professional results.
Make the Cream Cheese Filling
In a medium bowl, beat the 8 oz cream cheese and 0.5 cup powdered sugar together until completely smooth and creamy. This should take about 2-3 minutes with a hand mixer. Scrape down the sides of the bowl as needed to ensure everything incorporates evenly.
Once smooth, mix in the 1 tsp vanilla extract and set the filling aside. It should be thick but spreadable—if it's too stiff, let it sit at room temperature for 5-10 minutes to soften. This filling is the heart of your danish, so don't rush this step. The texture should be like thick whipped cream, not crumbly or grainy.
Prepare the Danish Dough
In a large mixing bowl, whisk together the 4 cups all-purpose flour, 0.25 cup granulated sugar, 0.5 tsp salt, and the 0.01 oz instant yeast. Mix just until combined—you're not looking for a smooth dough here, just an even distribution of ingredients.
Cut in the 1 cup cold unsalted butter using a pastry cutter or two forks, working until the mixture resembles coarse crumbs with pea-sized butter pieces. The butter shouldn't melt completely—this creates those signature flaky layers. If it starts to look like wet sand, chill the mixture for 10 minutes before proceeding.
Combine Wet Ingredients and Shape the Dough
Add the 1 whole large egg and 0.5 cup warm milk to the flour mixture. Mix gently with a wooden spoon until the dough comes together. It will be sticky, but don't add more flour—this is essential for that tender texture. Turn the dough out onto a lightly floured surface and knead gently just until smooth, about 2-3 minutes. The dough should be soft but not sticky to the touch.
Wrap the dough in plastic wrap and refrigerate for 1 hour. This chilling step is crucial—it relaxes the gluten and makes rolling easier. While it chills, prepare your work surface and rolling pin. You'll want to work quickly once the dough comes out of the fridge to prevent it from warming up too much.
Roll and Layer the Danish
On a lightly floured surface, roll the chilled dough into a 12x16-inch rectangle, about 1/8-inch thick. Spread the cream cheese filling evenly over the dough, leaving a 1-inch border around the edges. Roll the dough tightly into a log, pinching the seam to seal.
Cut the log into 8 equal pieces and arrange them in a 9x13-inch baking pan, cutting side down. Brush the tops and sides with 0.25 cup heavy cream diluted with 1 tablespoon milk for a glossy finish. Sprinkle evenly with the 0.25 cup turbinado sugar for that signature caramelized crunch.
Bake to Golden Perfection
Preheat your oven to 350°F. Bake the danishes for 25-30 minutes until they're golden brown and the sugar topping is caramelized. The edges should look crisp, and you should smell that buttery, caramelized aroma filling your kitchen.
For the final touch, brush the baked danishes with a simple glaze made by whisking together 0.25 cup powdered sugar and 1 tablespoon milk. Let them cool for 10 minutes before serving—this lets the glaze set and makes cutting easier. Each danish should have that signature flaky, buttery texture with a sweet, caramelized sugar crunch on top.
Pro Tips For Making Copycat Starbucks Cheese Danish
- Chill the Dough Twice: After the first rise, refrigerate the dough for at least 2 hours—this isn’t optional. I used to skip it, and my danishes turned out dense and chewy. The cold rest relaxes the gluten and lets the yeast work its magic during the final proof, giving you that light, airy texture.
- Use Cold Butter: Cut that unsalted butter into the dough in small cubes and work fast—it should still be cold when mixed in. Warm butter melts into a greasy mess, and your danishes will end up tough instead of flaky. Keep a bowl of ice water nearby if your kitchen runs hot.
- Don’t Overproof the Dough: The final rise should take about 1–1.5 hours, or until the dough has puffed just past the rim of the bowl. I learned this the hard way—overproofed dough collapses when baked, and your cheese filling ends up smeared instead of neatly centered. Poke it gently; if it springs back slowly, it’s ready.
- Brush with Egg Wash: Whisk the egg with a splash of water (about 1 tablespoon per egg) and brush it lightly over the shaped danishes right before baking. This isn’t just for looks—it creates a golden, crisp shell. Skip it, and you’ll get a dull, pale finish that tastes underwhelming. (Yes, even if you’re impatient like me.)
Health benefits of these flavors
Buttery Flavor Boost
The European-style butter used in this recipe provides rich, saturated fats that create that iconic flaky texture and buttery flavor. Each 8-ounce serving delivers about 20 grams of fat, including 12 grams of monounsaturated fats that support heart health when consumed in moderation.
The butter also contains vitamin A (about 10% of your daily value per serving), which supports vision and immune function. 🧈
Protein Power
While not a protein-heavy dessert, each cheese danish provides 4-5 grams of protein per serving, thanks to the cream cheese filling and all-purpose flour. This makes it a slightly more satisfying treat than many other pastries.
The protein content helps stabilize blood sugar levels slightly better than pure sugar-based desserts, though portion control is still key. The egg in the dough adds an extra 2 grams of protein per serving.
Cream Cheese Benefits
The cream cheese filling is where much of the nutritional interest lies. It provides calcium (about 5% of your daily value per serving) and phosphorus, both essential for bone health. The vanilla extract adds antioxidants, though in small amounts.
The powdered sugar used in both the filling and topping contributes empty calories, but the portion size keeps this in check—each danish has about 30 grams of sugar, or 6 teaspoons.
Fiber Content
While this recipe isn't high in fiber, the all-purpose flour does contribute about 1 gram of fiber per serving.
For a slightly healthier variation, you could substitute half the flour with whole wheat pastry flour (about 2 cups), which would increase fiber to 2 grams per serving while maintaining the same buttery texture.
The trade-off is a denser crumb, but the nutritional boost is worth it for those watching their fiber intake.
Balanced Indulgence
This cheese danish is designed to be enjoyed as an occasional treat, not a daily staple. The combination of healthy fats, protein, and calcium makes it a more balanced indulgence compared to many other pastries.
The turbinado sugar topping adds a touch of iron (about 1% of your daily value per serving), though its primary purpose is the caramelized crunch. For a lighter version, reduce the sugar topping to 2 tablespoons—you’ll still get that signature flavor with fewer calories.
Portion Control Tips
To keep this treat in check, I recommend cutting each danish into two equal halves before serving. This way, you get to enjoy the full flavor experience while controlling portion sizes.
Pairing with black coffee or green tea can help slow sugar absorption, making the experience more satisfying and less likely to lead to overindulgence. The caffeine in coffee also helps balance the blood sugar spike from the dessert. 💡
Nutrition facts
Frequently asked questions
Why does my homemade cheese danish turn out dense instead of flaky?
Flakiness comes from properly layered butter in cold dough. If your butter melts during handling, it won't create those signature layers. Always keep butter cold when cutting it into the flour, and chill the dough for at least 1 hour before rolling. Work quickly when shaping to prevent warming. Also, avoid overworking the dough—just knead until smooth (2-3 minutes).
Can I make this recipe without a stand mixer?
The dough only requires mixing until combined—no kneading needed. For the butter, use a pastry cutter or two forks to cut it into the flour until pea-sized pieces remain. The cream cheese filling can be whipped by hand with a whisk or fork (though a mixer makes it easier). Just be patient—it takes 5-10 minutes of vigorous mixing by hand to get it smooth.
How do I store leftover cheese danishes?
Store baked danishes in an airtight container at room temperature for up to 3 days. For longer storage, freeze them for 1 month—wrap individually in plastic wrap, then place in a freezer bag. Thaw overnight in the fridge before reheating. To refresh texture, warm in a 350°F oven for 5-10 minutes until golden again. The caramelized sugar topping is best eaten fresh, but layers stay tender for 2 days.
What's the secret to that perfect caramelized sugar crunch?
Use turbinado sugar (not regular sugar) for that signature crunch—it's coarser and caramelizes better. Sprinkle it evenly right before baking, and don't disturb the pan while it's in the oven. The sugar needs 25-30 minutes at 350°F to fully caramelize. For extra crispiness, place the baked danishes on a wire rack for 10 minutes before glazing—this prevents steam from softening the topping.
Can I make this recipe gluten-free?
Yes, but with adjustments. Replace all-purpose flour with a 1:1 gluten-free baking flour blend (like Bob's Red Mill or King Arthur). Add 1 tsp xanthan gum to help bind the dough. The texture won't be identical—expect slightly denser layers—but it'll still be delicious. For the filling, ensure your cream cheese is gluten-free certified. The laminating process works the same, but gluten-free dough is more delicate, so handle it gently.