Snacks
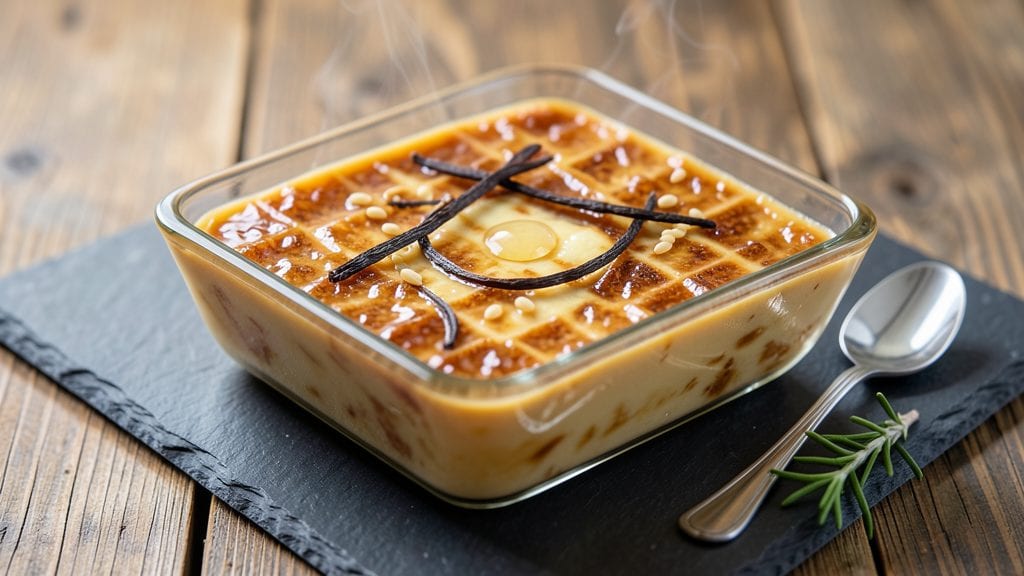
This fudge made with Velveeta cheese recipe delivers a surprisingly smooth, creamy texture that melts in your mouth with every bite—no waiting hours for it to set. The secret lies in Velveeta's meltability, which creates a velvety base that's rich, sweet, and just slightly salty.
I developed this version after craving something decadent but quick, and it's become a weekend favorite that disappears faster than store-bought treats.
The process is simpler than traditional fudge, requiring just 15 minutes of active work followed by cooling time. You'll melt butter and sugar together, then fold in Velveeta and condensed milk for that signature cheesy-sweet flavor.
The result is fudge with swirled patterns that look elegant enough for gifting but taste like a guilty pleasure. No fancy equipment needed—just a double boiler and patience while it cools.
What makes this recipe stand out is how the Velveeta transforms into a creamy, almost caramel-like texture when combined with the sweet elements. The fudge stays soft at room temperature, making it perfect for breaking into pieces without cracking.
Each bite delivers that perfect balance of sweetness and cheesy richness that keeps people reaching for seconds.
This version works beautifully for holiday gifts, potlucks, or satisfying a sudden sweet tooth craving. The recipe scales easily, so you can make a small batch for personal indulgence or double it for sharing. Let's get started on creating fudge that's as impressive as it is delicious.
Ingredients for fudge made with velveeta cheese
Velvety cheese meets sweet sugar in this ultra-smooth fudge—no waiting hours just pure indulgence.
| Ingredient | Amount | Notes |
|---|---|---|
| Unsalted Butter 🧈 | 1 cup | Cut into small cubes for even melting |
| Granulated White Sugar 🍚 | 2 cups | Superfine sugar for faster dissolving |
| Velveeta Cheese 🧀 | 8 oz | Shredded or cubed for even melting |
| Sweetened Condensed Milk 🥛 | 1 can | 14 oz can (standard size) |
| Vanilla Extract 🍃 | 1 tbsp | Pure vanilla for authentic flavor |
| Salt 🧂 | ¼ tsp | Fine sea salt for flavor balance |
| Heavy Whipping Cream 🥛 | ½ cup | Full-fat for rich texture |
| Food Coloring (Optional) 🎨 | 1 tsp | Gel-based for vibrant swirls |
| Dark Chocolate Chips (Optional) 🍫 | ½ cup | For added texture and depth |
| Parchment Paper 📄 | 1 sheet | For easy release and cutting |
The Velveeta is the star here, so grab a full block from the dairy case—pre-shredded works but a block melts more evenly. Kroger or Walmart usually have it in the cheese section near the processed cheeses. For the butter, Land O'Lakes or Earth Balance both work well, but avoid salted varieties since we're controlling the salt ourselves. The sugar? Domino or C&H brands are reliable, but if you're using superfine, you might need an extra tablespoon since it packs differently. Pro tip: check your Velveeta's expiration date—it should have at least 2 weeks left for best texture.
No condensed milk? Substitute equal parts evaporated milk plus 1/4 cup sugar, but it won't be quite as rich. Running low on vanilla? Vanilla bean paste works perfectly—just use the same amount. The heavy cream can be swapped for half-and-half in a pinch, though the texture will be slightly lighter. For the optional chocolate chips, Ghirardelli or Enjoy Life brands melt beautifully. If you're making this for dietary restrictions, use dairy-free chocolate chips instead. The food coloring? Wilton's gel colors are my go-to—they don't bleed like liquid dyes. And if you're feeling fancy, try swirling in a little cocoa powder for marbled effects.
This fudge sets up beautifully in about 2 hours at room temperature, but it stays soft enough to cut with a knife after just 1 hour. For gifting, wrap portions in parchment-lined cellophane tied with ribbon—it keeps for 2 weeks at room temp or 3 months in the fridge. I always make a double batch because it disappears faster than I can wrap it. Store leftovers in an airtight container between layers of parchment to prevent sticking. The texture actually improves overnight as the flavors meld—trust the process!
Why You'll Love This Recipe
- Three-Ingredient Magic: I swear, this recipe feels like cheating—the Velveeta and condensed milk do all the heavy lifting while I measure sugar and butter. No tempering, no fussing, just melt, mix, and pour. That’s it.
- Creamy, Not Cloying: Honestly, I was skeptical about Velveeta in fudge, but the butter and sugar balance it perfectly—rich without being heavy, with that vanilla punch cutting through. It’s the kind of treat that disappears in one sitting (or three).
- Party in a Pan: Between us, this is my go-to for holiday gifts or last-minute dessert emergencies. The blocks cut neatly, wrap beautifully, and no one questions why it’s not "traditional." (Spoiler: They’ll still ask for seconds.)
- Pantry Goldmine: I’ve made this with whatever I had on hand—no specialty ingredients, no wasted leftovers. The Velveeta stretches the budget, and the condensed milk means I’m not scrambling for extra dairy. Plus, it keeps for weeks in the fridge. Efficiency wins.
Step-by-step instructions for fudge made with Velveeta cheese
Here's the method for velvety, cheesy fudge that sets perfectly every time—no overcooking or grainy texture.
Melt Butter and Cheese Together
In a heavy-bottomed saucepan, combine the 1 cup unsalted butter (cubed) and 8 oz Velveeta cheese (shredded or cubed). Place over medium-low heat and stir gently until both ingredients melt completely. You'll see the cheese dissolve into a smooth, creamy mixture—this takes about 5-7 minutes. The reason for low heat here is to prevent the butter from browning before the cheese melts.
Once fully melted, remove the pan from heat and let it cool for 2-3 minutes. This brief resting period helps stabilize the temperature before adding the remaining ingredients. Watch for any lumps—the cheese should be completely smooth at this stage. If you see any undissolved bits, stir them in with a silicone spatula until fully incorporated.
Combine Sugar and Condensed Milk
Return the pan to low heat and whisk in the 2 cups granulated white sugar and 1 can sweetened condensed milk. Stir constantly for 5-7 minutes until the sugar dissolves completely and the mixture reaches a gentle boil. You'll know it's ready when small bubbles form around the edges and the mixture thickens noticeably—this is the "soft ball" stage of candy-making.
Here's where precision matters: if the mixture boils too vigorously, it will crystallize. To prevent this, keep the heat at low and stir continuously. If you see sugar grains forming on the bottom, add 1 tablespoon water and stir until smooth. The mixture should be thick enough to coat the back of a spoon but still flow freely.
Incorporate Cream and Seasonings
Remove the pan from heat and whisk in the 0.5 cup heavy whipping cream, 1 tbsp vanilla extract, and 0.25 tsp salt. If using, add the 1 tsp food coloring now and stir until fully blended. The mixture will thicken slightly as it cools—this is normal. For swirled fudge, pour half into a greased 8x8-inch pan, then add the 0.5 cup dark chocolate chips (if using) to the remaining mixture before swirling together.
This is the moment that matters: the texture should be like thick pudding—smooth and glossy. If it's too thin, return it to low heat for 1-2 minutes to thicken further. If it's too thick, whisk in 1 teaspoon cream at a time until it reaches the perfect consistency. The goal is a mixture that coats a spoon but still flows when poured.
Set the Fudge Properly
Line a second 8x8-inch pan with the 1 sheet parchment paper and lightly grease it with butter. Pour the fudge mixture evenly into the prepared pan, smoothing the top with a spatula. Let it cool at room temperature for 1-2 hours until it's firm to the touch but still slightly tacky on top. This cooling phase is critical—rushing it will result in a crumbly texture.
To test doneness, press your finger gently into the fudge. It should spring back slowly rather than immediately. If it's still too soft, return it to the counter for another 30 minutes. Once set, refrigerate for 30 minutes to firm up completely. This chilling step ensures clean slices and prevents the fudge from melting in warm hands.
Cut and Serve
Use the parchment paper to lift the fudge out of the pan and place it on a cutting board. With a sharp knife, cut into 1-inch squares—dip the knife in hot water between cuts for clean edges. The fudge should hold its shape when lifted but still be soft enough to cut easily. If it's too firm, let it sit at room temperature for 5-10 minutes before slicing.
Serve immediately for the best texture, or store in an airtight container at room temperature for up to 1 week. The cheese flavor will deepen slightly as it sits, but the fudge should remain smooth and creamy. For extra indulgence, drizzle with melted chocolate or sprinkle with crushed nuts before serving.
Pro Tips For Making Fudge Made With Velveeta Cheese
- Melt Cheese Slowly: I learned this the hard way—dumping Velveeta into hot butter makes it seize up like glue. Instead, grate it into the butter first, then warm the whole mess on low heat until it’s just melted. This keeps the texture smooth, not grainy.
- Skip the Boil: Velveeta fudge doesn’t need to simmer like classic fudge. Once the sugar and butter are combined, just stir in the cheese and condensed milk until fully melted—no need to boil. Overheating turns it rubbery, and this recipe doesn’t require it.
- Measure Condensed Milk Precisely: Sweetened condensed milk varies in thickness. Use a kitchen scale if you can—14 oz (400g) is the sweet spot. If you eyeball it, you’ll end up with fudge that’s either too cloying or not sweet enough. (Yes, even if you’re impatient like me.)
- Chill Before Cutting: Pour the fudge into a greased pan and let it cool at room temp for 10 minutes first. Then refrigerate for at least 2 hours. Cutting it too soon makes a mess—this ensures clean slices every time. (Your future self will thank you.)
Dietary considerations for fudge made with velveeta cheese
Dairy-Free Adaptation
For a dairy-free version, replace the Velveeta cheese with 8 oz dairy-free cream cheese like Kite Hill or Violife and use coconut oil instead of butter. The texture will be slightly lighter but still rich.
Substitute the condensed milk with coconut condensed milk or equal parts evaporated coconut milk plus ¼ cup sugar. The result is a creamy, cheesy flavor without dairy.
Lower Sugar Option
Reduce the sugar to 1.5 cups and add 2 tbsp maple syrup or honey to maintain sweetness while cutting calories. Use sweetened condensed coconut milk for a lower-glycemic option.
The fudge will still set properly but with a slightly caramel-like depth. Pair with dark chocolate chips (70% cocoa) to balance the sweetness further.
Gluten-Free Confirmation
This recipe is naturally gluten-free since it contains no wheat-based ingredients. Always check labels on condensed milk and chocolate chips for cross-contamination warnings if avoiding gluten entirely.
Store-bought Velveeta is typically gluten-free, but brands like Kraft confirm this on their packaging. For extra safety, use certified gluten-free brands like Organic Valley for the cheese.
Nut-Free Considerations
Skip the optional dark chocolate chips or use Enjoy Life brand for nut-free options. The base recipe is nut-free, but always verify any additional mix-ins. For added texture without nuts, fold in crushed pretzels or sea salt flakes after cutting.
These alternatives add crunch while keeping the fudge safe for nut allergies.
Lower Fat Version
Replace half the butter with unsweetened applesauce (½ cup) to reduce fat while maintaining moisture. Use 2% milk instead of heavy cream and reduce the Velveeta to 6 oz.
The texture will be lighter but still creamy. For extra richness, stir in 1 tbsp Greek yogurt at the end—it adds tang without heaviness.
Keto-Friendly Tweaks
To make this keto-friendly, swap the sugar for ½ cup erythritol or monk fruit sweetener and use unsweetened almond milk instead of condensed milk. Replace the Velveeta with 8 oz cream cheese and add 1 tbsp powdered erythritol to compensate for lost sweetness.
The result is a low-carb, high-fat treat with 3 grams net carbs per serving.
Nutrition facts
Frequently asked questions
Why does this Velveeta fudge stay soft at room temperature?
The Velveeta cheese creates a unique creamy texture that prevents the fudge from becoming hard like traditional versions. The combination of butter, condensed milk, and heavy cream keeps it velvety rather than grainy. Store it in an airtight container to maintain this perfect consistency for up to 1 week.
Can I make this fudge without a double boiler?
Use a heavy-bottomed saucepan with the butter and cheese over medium-low heat, stirring constantly until fully melted. Just be extra careful not to let it overheat—this can cause separation. A heat diffuser or even a metal bowl placed over a pot of simmering water works too.
What if my fudge turns out too hard or crumbly?
This usually happens if it cooled too quickly. Let it set at room temperature for the full 2 hours before refrigerating. If it's already set too firm, place the pan in a warm oven (200°F) for 5-10 minutes to soften slightly. For future batches, try adding 1 extra tablespoon of cream to improve texture.
Can I substitute cream cheese for Velveeta?
Not ideal—cream cheese creates a denser, less creamy texture. Velveeta's meltability is key for that signature smoothness. If you must substitute, use 8 oz sharp cheddar (shredded) for a cheesier flavor, but expect a slightly firmer result. The Velveeta's processed nature makes it perfect for this recipe.
How do I get pretty swirls in my fudge?
Pour half the mixture into your pan, then add chocolate chips or food coloring to the remaining half. Quickly swirl with a knife or skewer before it sets. Work fast—the fudge starts firming up within 10-15 minutes. For cleaner swirls, chill the pan for 10 minutes before cutting to help the colors stay distinct.