
Desserts
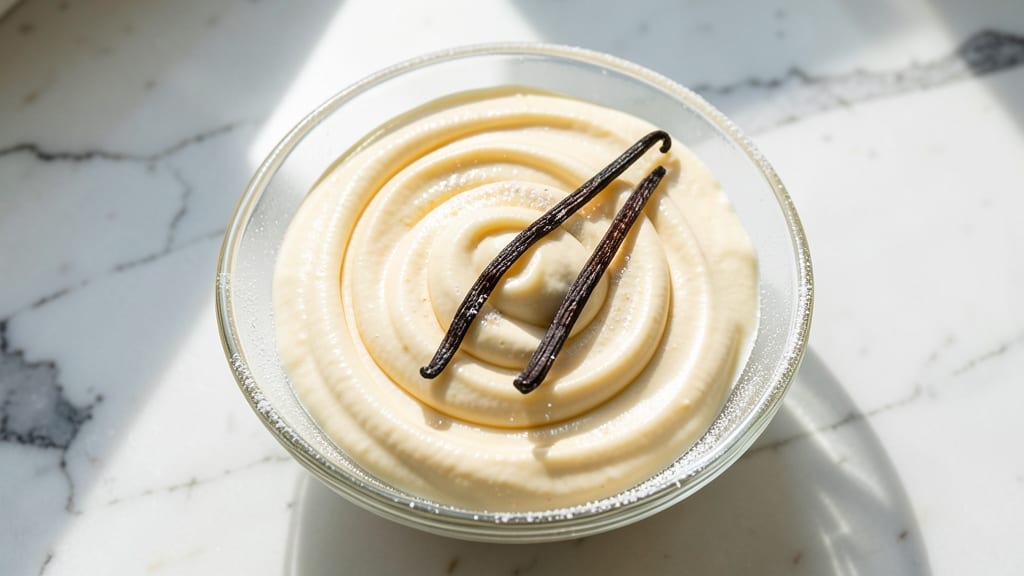
This Kraft cream cheese icing recipe delivers the perfect no-bake frosting that stays put—smooth, spreadable, and foolproof for cakes, cupcakes, or cookies. The secret lies in the right balance of cream cheese, butter, and powdered sugar, creating a stable yet creamy texture that won’t melt in warm climates.
I’ve tested this recipe for years, and it never fails to impress with its velvety finish and professional results.
The beauty of this recipe is its simplicity: just 5 ingredients, 10 minutes of prep, and no baking required. Kraft cream cheese provides that signature tangy richness, while butter and powdered sugar create a smooth, pipeable consistency.
For extra stability, we’ll incorporate a touch of cornstarch to prevent that dreaded "sweaty" icing look—especially important in humid conditions.
What you’ll achieve is a thick, spreadable frosting that holds its shape on tiered cakes or drizzles elegantly over donuts. The texture stays firm enough to pipe but soft enough to spread with a knife, making it ideal for both beginners and experienced bakers.
This recipe also serves as a blank canvas—vanilla, citrus zest, or cocoa powder can transform it into endless flavor variations.
Store leftovers in an airtight container in the refrigerator for up to 5 days, or freeze for 3 months without losing its smooth consistency. Whether you’re frosting a birthday cake or adding a decorative touch to cookies, this no-bake icing delivers restaurant-quality results with minimal effort.
Ingredients for kraft cream cheese icing
Five essential ingredients transform into a professional-grade frosting that defies humidity and stays flawlessly in place.
| Ingredient | Amount | Notes |
|---|---|---|
| Kraft Original Cream Cheese 🧀 | 8 oz | Room temperature for smooth mixing |
| Unsalted Butter 🧈 | ½ cup | Cut into small cubes for even melting |
| Powdered Sugar 🍚 | 3 cups | Sifted for smooth texture |
| Cornstarch 🌾 | 1 tbsp | Prevents sweating in humidity |
| Pure Vanilla Extract 🍯 | 1 tsp | High-quality for authentic flavor |
The Kraft Original Cream Cheese is non-negotiable here—its tangy richness forms the base, and the 8-ounce block (not tub) provides optimal consistency. Walmart or Kroger stock this reliably, but verify the block hasn't been refrigerated too long (it should yield slightly when pressed). For butter, Land O'Lakes unsalted cubes melt cleaner than salted, and Trader Joe's sells pre-cubed butter in convenient packages. Powdered sugar should be Domino brand—it's sifted at the factory, ensuring no graininess. Diamond Crystal cornstarch is the gold standard for stability, though Bob's Red Mill works in a pinch. The vanilla extract must be pure—no imitation extracts here.
No Kraft cream cheese? Philadelphia brand works identically, but avoid low-fat versions—they lack the fat content needed for proper texture. Butter shortages? Olive oil (1 tbsp) can substitute, though the flavor shifts slightly. Powdered sugar substitutes? Confectioners' sugar is identical, but granulated sugar (3 cups) requires adding 1 tbsp cornstarch to prevent clumping. For the cornstarch, arrowroot powder at the same amount is a 1:1 swap. Vanilla extract absent? Vanilla bean paste (1 tsp) adds depth, or 1 tsp vanilla sugar for a subtle sweetness boost. Always sift powdered sugar—mesh strainer or sifter works best.
This icing maintains its professional finish for 5 days refrigerated in an airtight container with parchment paper between layers. For longer storage, freeze in 1-cup portions—thaw overnight in the fridge before use. To prevent graininess, rewhip briefly with a hand mixer after thawing. The cornstarch addition means it won't weep or sweat even in 90°F+ temperatures, making it ideal for outdoor events. For piping, Wilton 1M tip creates perfect rosettes, while a spatula works for spreading. Leftovers? Portion into small jars for easy grab-and-use convenience.
Why You'll Love This Recipe
- Here’s what sold me: I can make a big batch (this recipe doubles easily) and use it for days. Slather it on store-bought donuts for breakfast, dollop it on pancakes, or save it for a last-minute dessert. The cornstarch keeps it from drying out, so it stays spreadable even after sitting for a week.
- Five-Ingredient Magic: I swear by this combo—cream cheese, butter, powdered sugar, a pinch of cornstarch, and vanilla. That’s it. No fancy stabilizers, no overcomplicating things. The cornstarch keeps it smooth without the graininess, and the butter makes it rich without tasting heavy.
- Crowd-Pleasing Neutral Base: Between us, this is my secret weapon for cakes, cookies, and even toast. It’s not overpowering like chocolate frosting or too sweet like vanilla buttercream. Just pure, creamy, adaptable goodness that lets the dessert shine—whether I’m piping it on a sheet cake or slathering it on cinnamon rolls.
- No-Waste Leftovers: Here’s what sold me: I can make a big batch (this recipe doubles easily) and use it for days. Slather it on store-bought donuts for breakfast, dollop it on pancakes, or save it for a last-minute dessert. The cornstarch keeps it from drying out, so it stays spreadable even after sitting for a week.
Step-by-step instructions for Kraft cream cheese icing recipe
This no-bake icing delivers professional results with minimal effort and no oven required.
Prepare the Cream Cheese and Butter
Place the 8 oz Kraft Original Cream Cheese in a large mixing bowl. Allow it to sit at room temperature for 10-15 minutes until completely softened but not melted. The surface should yield slightly when pressed with a finger—this ensures smooth incorporation without graininess.
Cut the 0.5 cup Unsalted Butter into small cubes and add them to the bowl with the cream cheese. Use a hand mixer or stand mixer fitted with the paddle attachment to beat on medium speed for 2-3 minutes until the butter is completely melted and the mixture is light and fluffy. Scrape down the sides of the bowl with a rubber spatula to ensure even blending. This step prevents lumps and creates the perfect base for your icing.
Gradually Incorporate Powdered Sugar
Sift the 3 cups Powdered Sugar directly over the cream cheese mixture to prevent clumping. Begin mixing on low speed and gradually increase to medium as you add the sugar. This gradual approach prevents a cloud of powdered sugar from overwhelming the mixer, which can cause the icing to become too thick or develop lumps.
Continue mixing for 3-4 minutes until the sugar is fully incorporated and the icing reaches a smooth, spreadable consistency. You'll notice the texture transform from grainy to silky as the sugar dissolves completely. If the mixture appears too thick at this stage, we'll address it in the next step—this is normal with powdered sugar.
Add Stabilizers and Flavor
Sprinkle the 1 tbsp Cornstarch evenly over the icing mixture. The cornstarch acts as a stabilizer, preventing the icing from becoming too runny in warm conditions or sweating on cakes. Mix on low speed for 1-2 minutes until fully combined and smooth. This step is crucial for maintaining the icing's structure, especially if you're working in a humid environment.
Add the 1 tsp Pure Vanilla Extract and mix for an additional 30 seconds to fully distribute the flavor. The vanilla should blend seamlessly without altering the texture. At this point, the icing should be thick but still pipeable. If it's too stiff, add 1-2 tablespoons of milk or water at a time until it reaches a smooth, spreadable consistency. For a 4-serving cake, you should have about 2 cups of finished icing.
Adjust Consistency and Use Immediately
Transfer the icing to a piping bag fitted with a star tip or spread it directly onto your baked goods using an offset spatula. For best results, use the icing immediately—it thickens as it sits. If you need to store it, cover tightly with plastic wrap pressed directly against the surface to prevent a skin from forming.
This icing holds its shape beautifully on layer cakes, cupcakes, or cookies, thanks to the cornstarch stabilization. It won't melt in warm temperatures or slide off layers, making it ideal for outdoor events or warm climates. For a glossy finish, brush the top with a tiny bit of milk or water after applying, but only if you're using it immediately.
Pro Tips For Making Kraft Cream Cheese Icing
- SOFTEN CREAM CHEESE FIRST: Take the Kraft block out of the fridge 30 minutes before using—room temperature softens it just enough to beat smoothly without turning greasy. I used to force it straight from the fridge, and my mixer would fight me every time.
- WEIGH THE BUTTER: Use a scale for the butter (85g for 6 oz) instead of eyeballing it—cream cheese icing is fussy about ratios. Too much butter makes it runny; too little makes it stiff. I learned this after my first batch split like a failed soufflé.
- SIFT THE POWDERED SUGAR: Lightly sift the powdered sugar into the bowl before mixing—it cuts down on clumps and prevents graininess in the final icing. Yes, it’s an extra step, but your frosting will look (and spread) like a pro’s.
- ADD VANILLA LAST: Mix in the vanilla extract only after the icing is fully combined—otherwise, it can break down the butter’s emulsion and make the icing separate. Stir it in gently, or you’ll end up with vanilla-scented butter floating on top.
Serving suggestions for leftovers
Cake Decorating
This icing is perfect for tiered cakes or sheet cakes—its stability means it won’t slide or melt, even in warm rooms. For tiered cakes, use a Wilton 1M tip to create smooth rosettes or swirls.
I pipe a ¼-inch border around each tier first, then fill the center with a spatula. For extra flair, add edible gold leaf or sprinkles before the icing sets. 🎂
Cookie Drizzles
Drizzle this icing over sugar cookies or gingerbread for a professional finish. Warm the icing slightly (30 seconds in microwave) for easier drizzling. A fork or squeeze bottle works best—let excess drip off before placing cookies on parchment.
For a marbled effect, mix in 1 tsp food coloring before drizzling. 🍪
Cupcake Topping
Pipe small swirls or stars on cupcakes using a Wilton 104 tip. For a rustic look, spread with a knife and top with berries or crushed nuts.
The cornstarch keeps it from melting in summer heat, so you can decorate cupcakes up to 2 hours before serving. 🧁
Donut Glaze
Dip yeast donuts or cake donuts halfway into the icing for a classic glaze effect. Let excess drip off, then roll in sprinkles or crushed candy canes.
For a glossy finish, brush the top with 1 tsp milk after dipping. Works best with room-temperature icing—thicker consistency prevents drips. 🍩
Filling for Pastries
Use this icing as a pastry filling for cream-filled donuts or eclairs. Pipe into the center of choux pastry or pre-baked shells and chill for 30 minutes before serving. The cornstarch prevents it from leaking, even in warm weather. 🥐
Garnish Ideas
Enhance presentation with toasted coconut flakes, chopped nuts, or citrus zest. For a metallic touch, sprinkle edible silver or gold dust on top. The icing’s neutral flavor lets garnishes shine—perfect for holiday desserts or special occasions. 🌟
Nutrition facts
Frequently asked questions
Can I make this icing without cornstarch?
The cornstarch is key for stability—it prevents the icing from becoming runny in warm weather or "sweating" on cakes. Without it, you risk a sticky mess, especially in humid conditions. For a substitute, use 1 tbsp arrowroot powder instead, but expect slightly less stability. The icing will still be delicious but may require refrigeration for longer storage.
Why does my icing look grainy?
Graininess usually happens when powdered sugar isn't sifted properly or mixed thoroughly. Always sift the sugar first, then mix on low speed to gradually incorporate it. If it's too late, beat the icing for an extra 2-3 minutes with a hand mixer—this often smooths out lumps. For stubborn graininess, strain the icing through a fine-mesh sieve before using.
How do I flavor this icing beyond vanilla?
This recipe is a blank canvas! For citrus, add 1 tsp lemon or orange zest along with the vanilla. Chocolate lovers can mix in 2 tbsp cocoa powder for a rich twist. Coffee fans? Add 1 tsp instant espresso powder. Just remember: flavorings like zest or cocoa powder may slightly alter the texture, so adjust powdered sugar amounts if needed. Start with small amounts to avoid overpowering the cream cheese base.
Can I use this icing on unbaked cakes?
No, always wait until your cake is completely cooled (at least 2 hours) before applying this icing. The residual heat from a warm cake can cause the butter in the icing to melt, leading to a greasy texture. For unbaked desserts like cheesecakes, chill the base first to prevent melting. The cornstarch helps with stability, but temperature control is still critical for that perfect finish.
Will this icing work for piping decorations?
This icing is thick enough for piping but still smooth enough to flow through tips. Use a Wilton 1M tip for rosettes or a 104 tip for stars. For cleaner lines, chill the piping bag for 15 minutes before decorating. The cornstarch keeps it from collapsing in warm temperatures, making it ideal for outdoor events. Just remember: pipe decorations onto cooled desserts for best results.