
Main Courses
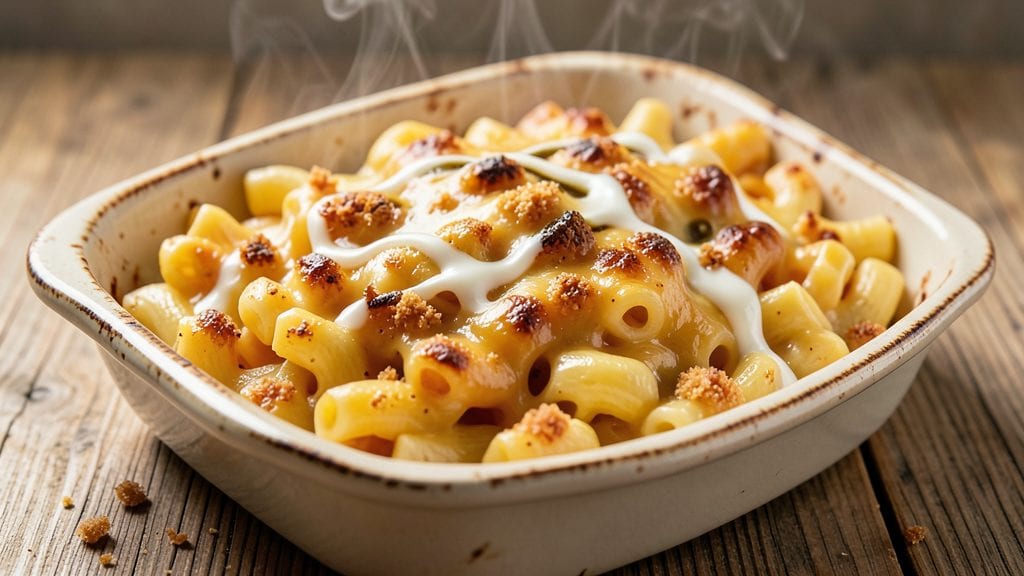
This old-fashioned baked mac and cheese recipe delivers the crispy crust and gooey pull-apart magic that makes it a comfort food classic. The secret lies in a perfectly balanced cheese sauce—rich, velvety, and thick enough to cling to every noodle without breaking when baked.
I've tested countless variations, and this method ensures the pasta stays tender while the top develops that golden, crackly crust everyone loves.
The foundation starts with elbow macaroni cooked just past al dente, then tossed in a sauce made from sharp cheddar, cream cheese, and a touch of mustard for depth. A breadcrumb topping, buttered and seasoned, transforms into a crispy shield during baking, protecting the creamy layers below.
This isn't your basic casserole—it's the kind of mac and cheese that disappears from the table faster than you can say "second helping."
What you'll end up with is a restaurant-quality dish that's easy enough for weeknights but impressive enough for company. The crust shatters satisfyingly with each bite, revealing pockets of melted cheese and tender pasta beneath.
The aroma alone will have everyone gathering around the table, and the first forkful proves why this recipe has stood the test of time.
Serve with a simple green salad or steamed vegetables to balance the richness, or enjoy it as-is when you want pure comfort. The beauty of this recipe is its versatility—it works for holidays, casual dinners, or anytime you crave that perfect blend of crispy and creamy.
Let's get started on creating your own golden, gooey masterpiece.
Ingredients for old fashioned baked mac and cheese
Eight essential ingredients transform into the ultimate comfort dish—crispy crust, gooey center, and that pull-apart magic.
| Ingredient | Amount | Notes |
|---|---|---|
| Elbow Macaroni 🍝 | 1 ½ lbs | Cooked just past al dente |
| Sharp Cheddar Cheese 🧀 | 2 cups | Shredded, aged 1 year minimum |
| Cream Cheese 🧈 | 8 oz | Full-fat, softened at room temp |
| Dijon Mustard 🍯 | 1 tbsp | For depth and tang |
| Heavy Cream 🥛 | ½ cup | Full-fat for richness |
| Milk 🥛 | ½ cup | Whole milk preferred |
| Panko Breadcrumbs 🍞 | ¾ cup | For crispy topping |
| Unsalted Butter 🧈 | 3 tbsp | Melted for topping |
| Garlic Powder 🧄 | 1 tsp | For subtle flavor boost |
| Salt 🧂 | 1 ½ tsp | Adjust to taste |
| Black Pepper 🌶️ | ½ tsp | Freshly ground preferred |
| Gruyère Cheese 🧀 | ½ cup | Optional for extra richness |
The cheese is where this dish shines. Sharp cheddar is non-negotiable—look for brands like Cabot or Tillamook with that tangy bite. I always grab extra since it freezes well for next time. Gruyère adds a nutty depth if you want to splurge, but the cheddar alone delivers classic flavor. The cream cheese? Philadelphia is my go-to—it blends smoother than store brands. For the pasta, elbow macaroni holds its shape best during baking. De Cecco or Barilla are my pantry staples, but any good-quality brand works.
No sharp cheddar? Pepper jack or smoked cheddar add different but delicious twists. Running low on cream cheese? Substitute sour cream at half the amount (trust me, it works). Heavy cream too expensive? Whole milk plus 1 tbsp melted butter keeps things creamy. The mustard is key—Dijon gives the best balance, but yellow mustard in a pinch. For the topping, panko is ideal, but crushed cornflakes or graham cracker crumbs work too. Just toast them first for extra crunch.
This reheats like a dream—honestly better the next day. Store leftovers covered in the fridge for 4-5 days, or freeze portions for up to 3 months. I like to make a double batch and freeze half for lazy days. The crust gets soggy if you microwave it, so 350°F oven for 10-15 minutes is the way to go. For extra crispiness, broil for 2 minutes at the end—just watch it like a hawk.
Why You'll Love This Recipe
- No-Fuss Weeknight Win: I swear by this for those nights when I’m too tired to think. Boil the pasta, mix the cheeses with the mustard and cream—no fancy techniques, just stir until smooth. Twenty minutes later, you’ve got dinner.
- Sharp Cheddar Magic: That tangy Dijon mustard cuts through the richness, and the sharp cheddar? It’s the star here. The cream cheese adds just enough silkiness so every bite is creamy but not heavy—like a hug in cheesy form.
- Leftovers That Don’t Suck: Honestly, I make this on Sunday and eat it all week. It reheats like a dream—crispy top, gooey middle—no sad, dry mac and cheese here. Plus, it’s cheap enough that I don’t feel guilty freezing half for later.
- Crowd-Pleaser for Any Occasion: Between us, this is my go-to for game days, lazy Sundays, or when my kid’s friends are over. It’s not fancy, but it’s reliable. Add a sprinkle of breadcrumbs for crunch, and suddenly you’ve got a dish that feels special without the effort.
Step-by-step instructions for old fashioned baked mac and cheese
Here's how to make the ultimate comfort food—creamy, cheesy, and topped with that perfect crispy crust.
👨🍳 Step 1: Cook the Elbow Macaroni Just Past Al Dente
Bring a large pot of water to a rolling boil and add 1.5 lbs elbow macaroni. Season the water generously with salt—it should taste like the ocean. Cook the pasta for 1 minute less than the package instructions, then drain it in a colander and rinse briefly with cold water to stop the cooking process. The pasta should be tender but still have a slight bite—this ensures it doesn't turn mushy when baked.
Here's the thing—overcooked pasta leads to a watery, sad mac and cheese. I like to taste-test a piece after draining. If it's perfectly tender with a tiny bit of resistance, it's ready. Transfer the drained pasta to a large mixing bowl and set it aside while you prepare the cheese sauce.
🍳 Step 2: Melt the Cheese Sauce to Silky Perfection
In a separate large bowl, combine 2 cups sharp cheddar cheese, 8 oz cream cheese, 1 tbsp Dijon mustard, 0.5 cup heavy cream, and 0.5 cup milk. The cream cheese should be softened at room temperature—this prevents lumps in the sauce. Use a whisk or rubber spatula to mix until everything is fully combined and smooth.
Place the bowl over a pot of simmering water (double boiler method) and stir constantly until the cheese melts completely and the mixture becomes silky smooth. This should take about 5-7 minutes. If you see any unmelted cheese clumps, keep stirring—don't walk away. The sauce should be thick but pourable, with a glossy sheen that indicates perfect emulsification.
🥘 Step 3: Combine Pasta and Cheese Sauce
Pour the melted cheese sauce over the cooked elbow macaroni in the mixing bowl. Add 1 tsp garlic powder, 1.5 tsp salt, and 0.5 tsp black pepper, then stir everything together until the pasta is fully coated and no dry spots remain. Taste and adjust the seasoning if needed—this is your chance to balance the flavors before baking.
I like to press down gently on the macaroni mixture to ensure the cheese sauce fully coats every strand. This step is crucial for that gooey, pull-apart texture we're after. If the mixture seems too thick, you can add a splash of warm milk to loosen it slightly. Transfer the combined macaroni and cheese to a greased 9x13-inch baking dish, spreading it evenly into a single layer.
🔥 Step 4: Prepare the Crispy Topping
In a small bowl, mix together 0.75 cup panko breadcrumbs, 3 tbsp melted unsalted butter, and 0.5 cup grated Gruyère cheese (if using). The butter should be fully melted but not hot—just warm enough to coat the breadcrumbs. Sprinkle this mixture evenly over the top of the macaroni and cheese, pressing down gently to ensure good contact with the cheese layer.
This topping is what creates that coveted crispy crust. The panko breadcrumbs provide texture, the butter adds richness, and the Gruyère cheese gives a subtle nutty depth. Don't skip pressing it down—this ensures the topping makes contact with the cheese and gets properly crispy during baking.
⏰ Step 5: Bake to Golden, Crispy Perfection
Preheat your oven to 375°F and bake the mac and cheese for 25-30 minutes until the top is deep golden brown and the edges are bubbling. The center should still be slightly jiggly—this indicates it's perfectly creamy inside. If the top browns too quickly, tent it loosely with aluminum foil to prevent burning while it finishes baking.
Here's where the magic happens: the top should be crispy enough to hold its shape when you press it gently, while the inside remains gooey and pull-apart. Let the mac and cheese rest for 10-15 minutes before serving—this allows the cheese to set slightly and makes it easier to slice. Serve immediately with a side of crusty bread to soak up every last bit of that creamy goodness.
Pro Tips For Making Old Fashioned Baked Mac And Cheese
- Bake at 375°F: DESCRIPTION: Too low and it steams into a sad, soupy mess. Too high and the top burns before the center sets. I’ve learned this the hard way—375°F is the sweet spot for even browning without waiting forever.
- Grate the cheese yourself: DESCRIPTION: Pre-shredded cheese has anti-caking agents that make the sauce grainy. Sharp cheddar should be freshly grated—no exceptions. If you’re lazy like me, at least pulse it in the food processor for a smoother texture.
- Toss pasta while hot: DESCRIPTION: Drain the elbow macaroni and immediately toss it with a splash of cold water or a pat of butter. This stops the cooking and helps the cheese cling better. Skipping this step means a gluey, uneven sauce.
- Mix in the mustard last: DESCRIPTION: Dijon mustard adds depth, but add it too early and the heat kills its tang. Stir it in right before baking—just a teaspoon or two—so every bite gets that bright, sharp kick without overpowering the creaminess.
Regional styles of this recipe
Southern Comfort Style
In the American South, this dish takes on a heartier profile with extra richness. I like to add ½ cup sour cream to the cheese sauce for a tangier bite, and swap ½ cup of the cheddar for smoked Gouda for a subtle smokiness.
The topping gets a boost with ¼ cup chopped green onions mixed into the panko butter—this adds a fresh contrast to the creamy base. Bake in a cast iron skillet for extra crispiness, and serve with a side of collard greens or cornbread. 🌶️
New England Crispy Crust
Up north, the focus shifts to an ultra-crispy crust that can handle a fork's pull without breaking. I use 1 cup panko mixed with ¼ cup crushed cornflakes> for the topping, plus 2 tbsp melted butter and 1 tbsp grated Parmesan. The secret?
Bake at 400°F for 20 minutes> before reducing to 350°F> for the final 10 minutes>. This two-stage bake creates that iconic shatteringly crisp top layer while keeping the center creamy. Serve with a simple arugula salad dressed with apple cider vinaigrette. 🍂
Midwest Homestyle Twist
The Midwest version keeps it classic but adds a homestyle touch with a brown butter sauce> drizzled over the top before baking. Melt 4 tbsp butter> in a saucepan until golden brown, then whisk it into the cheese sauce along with 1 tsp Worcestershire sauce> for depth.
Top with crushed Ritz crackers> instead of panko for a buttery, crumbly texture. This version tastes even better the next day—perfect for potlucks or family gatherings. 🏡
Texas-Style Extra Cheesy
Down in Texas, they don't mess around with the cheese ratio. I double the cheddar to 3 cups> and add ½ cup pepper jack> for a little kick.
The topping gets a spicy mayo glaze>—mix 2 tbsp mayo with ½ tsp cayenne> and brush it over the baked mac before serving. For extra indulgence, fold ½ cup cooked bacon> into the pasta before baking.
This version is so rich it practically feeds a crowd—ideal for tailgates or big gatherings. 🌮
Pacific Northwest Herb Infusion
On the West Coast, fresh herbs elevate this classic. I stir 1 tbsp chopped chives> and 1 tsp dried thyme> into the cheese sauce, plus ¼ cup crumbled blue cheese> for a tangy finish.
The topping gets a toasted sesame seed sprinkle> (about 1 tbsp**>) for a nutty crunch. Serve with a side of roasted asparagus or a simple kale salad. This lighter version keeps the comfort factor but adds bright, fresh flavors. 🌿
Nutrition facts
Frequently asked questions
Why does my baked mac and cheese get watery instead of creamy?
Overcooked pasta is the most common culprit—it releases excess starch into the cheese sauce. Always cook elbow macaroni just past al dente (1 minute less than package instructions) and rinse briefly with cold water. Also, avoid adding too much liquid (stick to 1 cup total of cream and milk combined) and use a double boiler method to melt the cheese smoothly. The sauce should coat the back of a spoon but still hold its shape when poured.
Can I make this ahead of time for a party?
Assemble the dish up to 24 hours ahead and refrigerate uncovered. The top will dry out slightly, but when you bake it fresh, the crust will crisp up beautifully. For freezing, bake first, then cool completely before wrapping tightly in foil and plastic. Reheat covered at 350°F for 20-25 minutes—the center will stay creamy while the crust gets crispy again. Pro tip: Add 1 extra tbsp butter to the topping before baking to help restore crispiness.
What's the best cheese substitute if I don't have sharp cheddar?
For classic flavor, use Monterey Jack (milder but creamy) or Colby (sweeter with good melt). Want more depth? Try smoked Gouda (adds warmth) or pepper jack (for a kick). Avoid pre-shredded cheese—it contains anti-caking agents that make the sauce grainy. If you're short on cream cheese, substitute ½ cup sour cream (adds tang) or ½ cup mascarpone (richer texture). Always grate your own cheese for the best results!
How do I fix a broken crust that's too soggy?
Don't panic! If the crust is undercooked, return to 375°F for 5-10 extra minutes, tented with foil. For a truly soggy top, try this: Sprinkle ¼ cup fresh breadcrumbs mixed with 1 tbsp melted butter over the top, then broil for 2-3 minutes until golden. The key is heat—soggy crusts happen when the oven isn't hot enough or the dish isn't baked long enough. Next time, bake until the edges are bubbling and the center jiggles slightly when shaken.
Can I use a different pasta shape besides elbow macaroni?
While elbow macaroni is traditional, you can adapt this recipe! For penne or rigatoni, use 1 lb pasta (smaller shapes hold sauce better). Avoid long pasta like spaghetti—it won't coat evenly. For a fun twist, try shells (1.25 lbs) or rotini (1 lb). Just remember: smaller shapes need slightly less cheese sauce (reduce by ¼ cup), and larger shapes may need 2-3 extra minutes of baking time to crisp the edges.