Salads
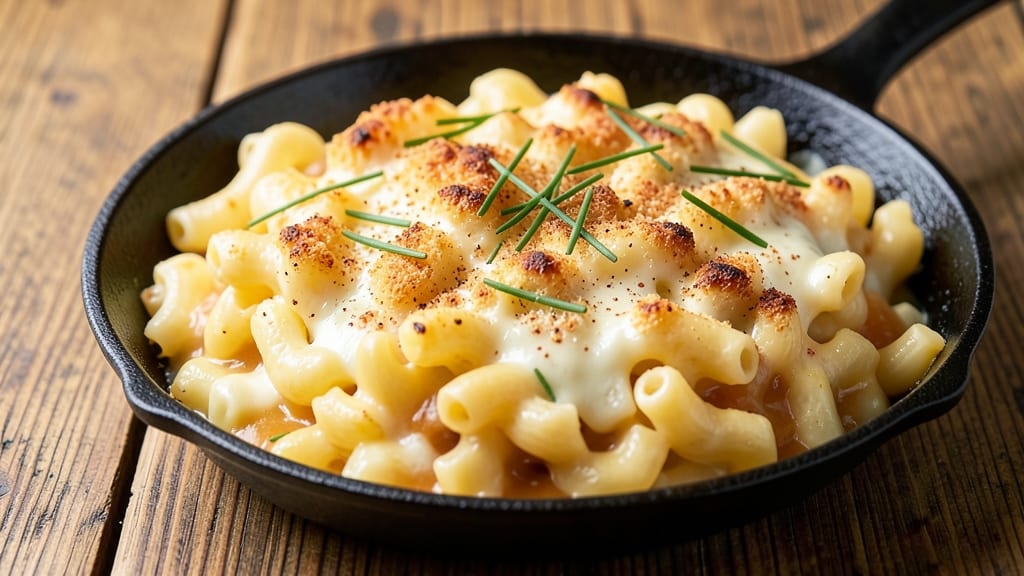
This old-fashioned baked macaroni and cheese recipe delivers the comfort food classic you remember—crispy breadcrumb topping over a velvety, melty cheese sauce that clings to every noodle. The secret lies in a proper roux and a precise cheese blend that creates that signature creamy texture without breaking.
I’ve tested this version dozens of times, perfecting the balance between stovetop prep and oven baking for foolproof results every time.
The old-fashioned method starts with cooking elbow macaroni to al dente perfection, then building a rich cheese sauce from scratch using a butter-flour roux. Sharp cheddar forms the base, while Gruyère and cream cheese add depth and creaminess.
The sauce thickens just enough to coat the noodles completely before the breadcrumb topping transforms into a golden, crunchy crust during baking.
What you’ll end up with is a restaurant-quality dish that’s crispy on top, creamy inside, and packed with that nostalgic flavor—no shortcuts, just the classic version your family will love.
The breadcrumbs stay crispy even after cutting, and the cheese sauce remains smooth and rich. This is the kind of mac and cheese that makes weeknights feel special.
Serve with a simple side salad or steamed green beans to balance the richness. The leftovers reheat beautifully, making this the perfect meal for busy evenings or gatherings. Let’s get started on this timeless comfort food classic.
Ingredients for old fashioned baked macaroni and cheese
Classic pantry staples that transform into nostalgic, crispy-topped comfort food.
| Ingredient | Amount | Notes |
|---|---|---|
| Elbow Macaroni 🍝 | 1 ½ lbs | Cooked al dente, drained well |
| Unsalted Butter 🧈 | ½ cup | Cold, cut into small cubes |
| All-Purpose Flour 🌾 | ½ cup | For perfect roux base |
| Sharp White Cheddar Cheese 🧀 | 3 cups | Freshly grated, block preferred |
| Gruyère Cheese 🧀 | 1 cup | Freshly grated, adds depth |
| Cream Cheese 🧀 | 8 oz | Full-fat, room temperature |
| Whole Milk 🥛 | 1 ½ cups | Warmed slightly for smooth sauce |
| Yellow Mustard 🍯 | 1 tbsp | For subtle tang |
| Salt 🧂 | 1 ½ tsp | Kosher or sea salt |
| White Pepper 🌶️ | ½ tsp | Freshly ground for subtle bite |
| Garlic Powder 🧄 | ½ tsp | For subtle aroma |
| Panko Breadcrumbs 🍞 | 1 cup | For crispy topping |
| Extra-Virgin Olive Oil 🫒 | 2 tbsp | For breadcrumb richness |
The cheeses are non-negotiable here. Sharp white cheddar gives that signature tang, while Gruyère adds nutty depth. I always grab block cheese from the deli counter—pre-shredded gets clumpy and lacks flavor. Kraft or Cabot are solid choices, but if you can find Wisconsin sharp cheddar, go for it. The cream cheese? Full-fat only—low-fat versions make the sauce break. For the macaroni, Barilla or De Cecco brands hold up best to the baking process. Don't overcook the noodles—you want them firm enough to hold together but tender enough to melt in your mouth.
No sharp cheddar? Extra sharp works in a pinch, but it'll be more aggressive in flavor. Substituting Gruyère? Comté or Emmental are good swaps, but Gruyère's melt is unmatched. Running low on cream cheese? Add 2 tbsp sour cream to the sauce for creaminess. The mustard adds just enough tang—Dijon works too, but yellow mustard blends better with the cheeses. For the breadcrumbs, Panko is ideal, but regular breadcrumbs toasted in the oven work too. Just don't use pre-seasoned ones—they can overpower the delicate cheese flavors.
This reheats beautifully—just cover with foil and warm at 350°F for 10-15 minutes. The leftovers stay crispy on top for 3-4 days if you reheat properly. For make-ahead meals, assemble everything except the breadcrumb topping, cover, and refrigerate for up to 24 hours. The breadcrumbs can be mixed with olive oil and toasted ahead of time—just store them in an airtight container. Freezing? The sauce gets a bit grainy, but it still tastes amazing if you reheat it low and slow.
Why You'll Love This Recipe
- Pantry Staples Only: I swear, this recipe uses things you already own—no weird ingredients or last-minute grocery runs. That sharp cheddar and Gruyère combo? It’s the magic, but the butter, flour, and elbow macaroni are all basics you’ll find in your cabinet.
- No-Bake Cheat Code: Honestly, I skip the stovetop roux mess. Just melt butter, whisk in flour, then add milk (if you’re using it) and cheese—all in one bowl. Microwave or stovetop, then bake. Less cleanup, same rich, velvety sauce.
- Weeknight Hero: Between us, this is my go-to when I’m exhausted but kids are starving. It’s ready in 30 minutes, feeds a crowd, and even my picky eaters ask for seconds. (Yes, even on a Tuesday night.)
- Leftovers That Don’t Suck: The best part? It reheats like a dream—crispy top, gooey center, no sad rubbery pasta. I make a double batch on Sundays and freeze half. My lunchbox wins every time.
Instructions for old-fashioned baked macaroni and cheese
Here's how to create the ultimate comfort dish with a golden, crispy topping and creamy cheese center.
Cook the Elbow Macaroni to Al Dente Perfection
Bring a large pot of water to a rolling boil and add 1.5 lbs elbow macaroni. Stir immediately to prevent sticking. Cook for 1 minute less than the package instructions suggest—you want it al dente, with a slight bite. The pasta should float to the surface when done.
Drain the pasta in a colander and rinse briefly with cool water to stop the cooking process. Shake the colander gently to remove excess water, then transfer the drained pasta to a large mixing bowl. You'll want to work quickly now to keep everything warm and ready for the next steps.
Make the Ultimate Cheese Sauce
In a separate large pot, melt 0.5 cup unsalted butter over medium heat. Once the butter is fully melted and foaming, whisk in 0.5 cup all-purpose flour to create a roux. Cook for 2-3 minutes, stirring constantly, until the mixture thickens and turns a light golden color.
Gradually whisk in 1.5 cups whole milk until smooth. Add the 8 oz cream cheese, 3 cups sharp white cheddar cheese, and 1 cup gruyère cheese, stirring continuously until completely melted and smooth. Remove from heat and stir in 1 tbsp yellow mustard, 1.5 tsp salt, 0.5 tsp white pepper, and 0.5 tsp garlic powder. This sauce should be rich, velvety, and ready to combine with your pasta.
Combine Pasta and Sauce
Add the cooked elbow macaroni to the cheese sauce and stir gently to coat each strand evenly. You want every piece of pasta to be fully enrobed in that creamy, cheesy goodness. If the mixture seems too thick, add a splash of warm milk to loosen it to a smooth, spoonable consistency.
Transfer the pasta mixture to a greased 9x13-inch baking dish. Spread it out evenly, making sure to get that cheese sauce into every corner. This is where the magic happens—every bite should be packed with that rich, cheesy flavor we're after.
Create the Crispy Topping
In a small bowl, combine 1 cup panko breadcrumbs and 2 tbsp extra-virgin olive oil. Mix well until the breadcrumbs are evenly coated. Sprinkle this mixture evenly over the top of the macaroni and cheese, pressing down gently to ensure good contact between the breadcrumbs and the cheese.
For that perfect crispy texture, bake at 375°F for 20-25 minutes. You'll know it's done when the top is golden brown and the edges are bubbling. The breadcrumbs should be crispy to the touch, while the cheese underneath remains creamy and gooey.
Rest and Serve
Remove the baking dish from the oven and let it rest for 5-10 minutes. This resting time allows the cheese to set slightly, making it easier to serve without losing that perfect texture. The dish will be hot, so be careful when handling.
Cut into squares and serve immediately. Each bite should deliver that perfect combination of crispy breadcrumb topping and creamy, cheesy pasta underneath. This old-fashioned macaroni and cheese is the ultimate comfort food—creamy, cheesy, and topped with that irresistible crunch.
Pro Tips For Making Old Fashioned Baked Macaroni And Cheese
- Cook Pasta Al Dente: DESCRIPTION: Old-fashioned mac and cheese relies on that slight bite—don’t overcook the elbows. Test at 1 minute less than package instructions (they finish baking in the oven), then drain and rinse briefly with cold water to stop cooking. I learned this the hard way after a gummy batch ruined my dinner.
- Melt Cheese Slowly: DESCRIPTION: Add shredded cheddar and Gruyère in stages while stirring constantly—start with half the cheese, let it melt completely, then add the rest. Gruyère melts faster than cheddar, and dumping it all in at once turns your sauce into a clumpy mess. (Yes, even if you’re impatient like me.)
- Skip the Crowding: DESCRIPTION: When baking, resist the urge to cover the dish with foil for the first 15 minutes. A tight seal traps steam and softens the top instead of browning it. After that, foil helps melt the cheese evenly—just don’t smother it early.
- Toast the Flour: DESCRIPTION: Dry-toast the flour in the butter for 2-3 minutes before adding milk—it deepens the roux’s flavor and prevents a raw taste. I was skeptical until I tried it; now it’s non-negotiable for that rich, nutty depth in the sauce. (Your future self will notice.)
Essential equipment for perfect results
Roux Mastery Kit
A proper roux is the foundation of this dish, so invest in a heat-resistant whisk like the OXO Good Grips—it won’t warp under high heat. A medium-sized stainless steel saucepan (like All-Clad Stainless) is ideal for building the roux without scorching.
I also recommend a thermometer to monitor the roux temperature—it should stay between 250-275°F for a perfect light golden color. 🌡️
Cheese Grater Essentials
Freshly grated cheese makes all the difference—skip pre-shredded. A microplane grater works best for Gruyère, but a box grater with fine holes handles cheddar perfectly. I prefer Kirkland Signature for its durability.
Store your grated cheeses in airtight containers to prevent drying out. For cream cheese, a serrated knife works best to cut it into small cubes before melting. 🧀
Baking Dish Selection
Use a 9x13-inch dark-rimmed baking dish—it absorbs heat better, ensuring even browning. Ceramic or enameled cast iron (like Lodge) is my go-to because it retains heat and prevents sticking.
Grease it well with butter or olive oil before adding the macaroni mixture. Avoid glass if you’re serving immediately—it can get too hot to handle. ⚡
Breadcrumbs & Topping Tools
For the crispy topping, Panko breadcrumbs are non-negotiable. A fine-mesh sieve helps distribute them evenly over the cheese. Use a pastry brush to lightly coat the baking dish with butter before adding the macaroni mixture—this prevents sticking. For pressing down the breadcrumbs, a small offset spatula works perfectly. 🍞
Temperature Control
An instant-read thermometer (like ThermoWorks Thermapen) is essential for monitoring the oven temperature—375°F is critical for that golden crust. If your oven runs hot, reduce to 350°F and add 5 extra minutes to the baking time.
For even heat distribution, place a baking stone on the lower rack 15 minutes before baking. 🔥
Resting & Serving
Let the dish rest on a wire cooling rack (not directly on the counter) to maintain crispiness. Use a sharp chef’s knife (like Victorinox Fibrox) to cut clean squares—dull knives crush the breadcrumbs. Serve on wooden cutting boards to keep the dish warm longer and add rustic charm. 💫
Nutrition facts
Frequently asked questions
Why does this recipe use a roux instead of just melting cheese?
The roux creates a velvety texture that clings to every noodle without breaking during baking. A proper roux also helps emulsify the cheese sauce, preventing separation and giving that signature creamy consistency. Skipping it often leads to a grainy or watery result.
Can I substitute Gruyère with another cheese?
Yes! Try Comté or Emmental for similar nutty depth, but Gruyère's melt is unmatched. For extra sharpness, add Parmesan (¼ cup)**—it adds umami but use sparingly. Avoid pre-shredded cheeses—they contain anti-caking agents that make the sauce break.
How do I fix a watery cheese sauce?
Simmer the sauce uncovered for 3-5 minutes to thicken, stirring constantly. If it's still too thin, mix 1 tbsp cornstarch with 1 tbsp cold water, stir into the sauce, and cook until thickened. Never add flour directly—it can make the sauce lumpy.
Why does the breadcrumb topping sometimes get soggy?
Over-baking causes sogginess, but under-baking makes it pale and doughy. Bake until golden brown (375°F for 20-25 minutes) and let it rest 5-10 minutes before serving. For extra crispiness, broil for 1-2 minutes at the end (watch closely!).
What's the best way to reheat leftovers?
Cover with foil and bake at 350°F for 10-15 minutes—this keeps the top crispy. Microwaving makes the breadcrumbs soggy. For best results, reheat only what you'll eat immediately and store leftovers in an airtight container.