Snacks
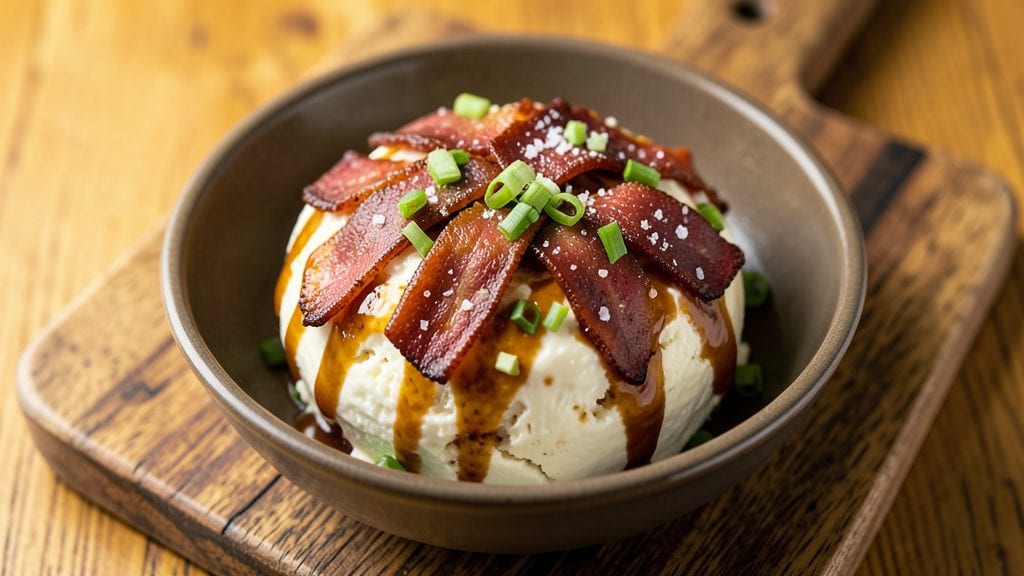
This old fashioned dried beef cheese ball brings back the nostalgic flavors of classic party snacks while adding a savory twist with finely chopped dried beef. The perfect balance of creamy cheese, tender beef, and aromatic spices creates a bite-sized appetizer that’s impossible to resist.
I’ve perfected this recipe over years of hosting gatherings, ensuring every bite delivers that satisfying crunch and rich flavor combination.
The foundation of this cheese ball lies in a smooth blend of cream cheese and sharp cheddar, bound together with finely chopped dried beef for that signature umami kick.
Traditional techniques like rolling in crushed crackers or nuts add texture, while modern twists—like a pinch of garlic powder or smoked paprika—elevate the flavor profile. The result is a cheese ball that’s both nostalgic and refined, perfect for any occasion.
What makes this recipe stand out is its versatility—serve it with mustard or cocktail sauce for dipping, or let guests enjoy it on its own as a party-friendly appetizer. The cheese ball chills beautifully, developing deeper flavors as it rests, so it’s ideal for making ahead.
Whether you’re hosting a holiday gathering or just craving a savory snack, this recipe delivers every time.
With just a few simple ingredients and a foolproof method, you’ll have a cheese ball that rivals any store-bought version. The key is patience—letting the mixture set properly ensures it holds its shape and stays creamy. Once you try this, it’ll become a staple at your gatherings. Let’s get started!
Ingredients for old fashioned dried beef cheese ball
Classic party flavors meet nostalgic textures in this dried beef cheese ball masterpiece.
| Ingredient | Amount | Notes |
|---|---|---|
| Cream Cheese 🧀 | 16 oz | Full-fat, room temperature |
| Sharp Cheddar Cheese 🧀 | 8 oz | Shredded, aged 6+ months |
| Dried Beef 🥩 | 4 oz | Finely chopped, premium cut |
| Green Onions 🧅 | 2 tbsp | Chopped, fresh or dried |
| Worcestershire Sauce 🍯 | 1 tbsp | High-quality, full-bodied |
| Garlic Powder 🧄 | ½ tsp | Freshly ground preferred |
| Smoked Paprika 🌶️ | ½ tsp | For smoky depth |
| Ground Black Pepper 🌶️ | ¼ tsp | Freshly cracked |
| Crushed Ritz Crackers 🍞 | 2 cups | For classic crunch coating |
| Toasted Slivered Almonds 🥜 | ½ cup | Optional for nutty texture |
| Unsalted Butter 🧈 | 2 tbsp | Melted, for binding |
The cheeses form the heart of this recipe. Philadelphia cream cheese is non-negotiable—it's the secret to that signature creaminess. For the cheddar, Cabot or sharp white cheddar from the deli section delivers the best flavor. The dried beef should be premium quality, like that found in the meat department's specialty section—not the canned variety. I always buy 2 oz extra to account for any moisture loss during chopping. The green onions add freshness, but if you're using dried, reduce to 1 tbsp since they're more concentrated. For Worcestershire, Lea & Perrins is the gold standard, but any high-quality brand works.
No cream cheese? Substitute with mascarpone cheese for a similar texture, though it'll be slightly richer. Out of cheddar? Gruyère or gouda work beautifully, though the flavor profile shifts slightly. For the dried beef, high-quality corned beef can be used as a substitute if chopped extremely fine, but it won't have the same authentic taste. The cracker coating can be swapped for crushed potato chips or pecans for variety. If you're avoiding nuts, the almonds can be omitted entirely. For the spices, onion powder can replace garlic powder if needed, though it won't have the same punch.
This cheese ball develops its best flavor after at least 4 hours of chilling, so make it ahead when possible. Store in an airtight container between layers of parchment paper to prevent sticking. It keeps well in the fridge for up to 5 days, though the texture may become slightly softer over time. For longer storage, wrap tightly in plastic wrap and freeze for up to 3 months. When serving, let it sit at room temperature for 15-20 minutes before slicing for the cleanest cuts. The flavors only get better as it sits, so don't be afraid to make it a day ahead for your gathering.
Why You'll Love This Recipe
- No-Fuss Mixing: I swear by this recipe because it’s literally one bowl. No fancy techniques—just softened cream cheese, shredded cheddar, and chopped dried beef tossed together with Worcestershire and green onions. The texture comes together while you chop, so no waiting around.
- Umami Bomb: That dried beef isn’t just flavor—it’s a punch. The salty-savory bite cuts through the creamy cheddar, and the Worcestershire ties it all into something dangerously addictive. Honestly, the first time I tasted it, I immediately made a second ball.
- Party-Ready Snack: This cheese ball is the ultimate crowd-pleaser. It’s easy to slice, stays fresh for days, and fits any spread—game day, holiday appetizers, or just because. My kids even ask for it at birthday parties, and that’s saying something.
- Budget Stretch: Dried beef might sound fancy, but it’s a pantry staple that lasts forever. A little goes a long way, and the cheddar-cream cheese combo makes this way cheaper than store-bought cheeses. Plus, leftovers? They disappear faster than I can say “second helping.”
Step-by-step instructions for old fashioned dried beef cheese ball
Here's how to create a perfectly balanced cheese ball with that signature dried beef flavor and satisfying crunch.
Prepare the Cheese Mixture
In a large mixing bowl, combine the 16 oz cream cheese and 8 oz sharp cheddar cheese. Using a hand mixer or stand mixer fitted with the paddle attachment, beat on medium speed for 2-3 minutes until completely smooth and creamy. This ensures no lumps remain and creates a velvety base for your cheese ball.
Add the 4 oz finely chopped dried beef, 2 tbsp chopped green onions, 1 tbsp Worcestershire sauce, 0.5 tsp garlic powder, 0.5 tsp smoked paprika, and 0.25 tsp ground black pepper to the cheese mixture. Mix on low speed until all ingredients are fully incorporated. The dried beef should be evenly distributed throughout the cheese, giving each bite that distinctive savory flavor. If the mixture seems too thick, add 1 teaspoon of milk at a time until it reaches a workable consistency.
Add Butter and Shape the Cheese Ball
In a small microwave-safe bowl, melt the 2 tbsp unsalted butter in 10-second intervals, stirring between each interval until completely melted. Pour the melted butter into the cheese mixture and mix thoroughly. This step ensures the cheese ball holds together better and adds a subtle richness.
Transfer the cheese mixture to a clean, lightly floured surface. Using your hands, gently shape it into a ball, about 3 inches in diameter. The mixture should be cool enough to handle but still soft enough to mold. If it feels too sticky, wet your hands slightly with cold water to prevent sticking. Place the shaped cheese ball on a parchment-lined plate and cover it with plastic wrap. Refrigerate for at least 1 hour or until firm enough to roll in the cracker coating.
Create the Crunchy Coating
In a shallow bowl, combine the 2 cups crushed Ritz crackers and 0.5 cup toasted slivered almonds. If using, you can add a pinch of smoked paprika to the cracker mixture for extra flavor. Mix gently to distribute the almonds evenly throughout the cracker crumbs.
Once the cheese ball has chilled and firmed up, remove it from the refrigerator. Roll it gently but firmly in the cracker mixture, pressing lightly to ensure the coating adheres evenly. If the coating doesn't stick well, lightly dampen the cheese ball with a bit of cold water and roll again. Place the coated cheese ball back on the parchment-lined plate and refrigerate for an additional 30 minutes to allow the coating to set.
Slice and Serve
After the final chilling period, use a sharp knife to slice the cheese ball into 4 equal wedges. For cleaner cuts, dip the knife in hot water and wipe it dry between slices. This ensures the cheese ball holds its shape and the slices are neat and presentable.
Serve immediately with toothpicks for easy handling. The cheese ball should have a smooth, creamy interior with a satisfying crunch from the Ritz cracker and almond coating. Each bite should deliver a perfect balance of rich, tangy cheese, savory dried beef, and subtle smoky notes from the paprika. Store any leftovers in an airtight container in the refrigerator for up to 5 days.
Pro Tips For Making Old Fashioned Dried Beef Cheese Ball
- Soak the Dried Beef: Toss it in hot water for 10 minutes—not boiling, just warm enough to loosen the fibers. I used to skip this and ended up with a chewy, unappetizing mess. The Worcestershire sauce will cling better to properly hydrated beef, and the texture becomes tender without falling apart.
- Chill the Cheese Mix: Pop the cream cheese and cheddar in the fridge for 15 minutes before mixing. Cold cheese blends smoother and doesn’t melt into a greasy sludge when you add the Worcestershire. Trust me, your cheese ball won’t be gloppy if you do this.
- Shape It Tight: Pack the mixture firmly into a ball—no loose crumbles or gaps. I learned this the hard way when mine fell apart rolling it in green onions. Press it like you’re rolling a meatball, and it’ll hold together when you slice it.
- Toast the Onions First: Sauté the green onions in a dry pan for 2 minutes before mixing them in. The slight char adds depth, and they won’t wilt into a sad, soggy mess when wrapped around the cheese ball. (Yes, even if you’re impatient like me.)
Make-ahead tips for leftovers
Prep Ahead Strategy
The beauty of this cheese ball is how well it makes ahead—perfect for parties or meal prep. After shaping the cheese ball but before coating, wrap it tightly in plastic wrap and refrigerate for up to 24 hours.
This allows flavors to meld beautifully while keeping it firm for rolling. I always prep mine the night before so it’s ready to coat and serve the next day. 🧀
Coating Make-Ahead
Pre-mix your cracker coating up to 3 days in advance and store in an airtight container at room temperature. The Ritz crackers stay fresh longer this way, and you won’t have to crush them last-minute.
For extra crunch, toast the almonds separately and store them in a separate container until ready to mix. This saves time and keeps everything crisp. 🥜
Freezing for Later
For long-term storage, wrap the fully coated cheese ball in plastic wrap, then place it in a freezer bag with all air squeezed out. It keeps for up to 3 months without losing texture.
When ready to serve, thaw in the fridge overnight, then let it sit at room temperature for 15 minutes before slicing. The flavors remain vibrant, and the coating stays crunchy. ❄️
Portioning for Parties
Divide the cheese mixture into 4 equal portions before shaping the full ball. Roll each portion into a smaller cheese ball (about 1.5 inches in diameter) and coat individually.
This makes serving easier—just slice and serve straight from the fridge. Guests love the convenience, and you avoid the mess of a giant cheese ball. 🍽️
Flavor Development Tip
The longer this cheese ball chills, the richer the flavors become. For maximum depth, let it rest in the fridge for at least 4 hours before serving. The dried beef absorbs the spices, and the cheeses soften just enough to create that perfect creamy texture.
I often make mine a full day ahead for gatherings—it’s worth the wait! 💪
Reheating Leftovers
If you have leftovers, store them in an airtight container and reheat in the microwave for 10-15 seconds on 50% power to soften slightly without melting. For a firmer texture, serve straight from the fridge. The coating stays crunchy, and the inside remains creamy—just like fresh! 🔥
Nutrition facts
Frequently asked questions
Why does my dried beef cheese ball turn out greasy?
Greasiness usually happens when the cream cheese and cheddar aren't fully blended smooth, leaving fat pockets. Use a stand mixer for 2-3 minutes to emulsify completely. Also, avoid overmixing after adding dried beef—just combine until evenly distributed. For extra insurance, chill the mixture 1 hour before shaping to firm up the fats.
Can I make this cheese ball without crackers?
Swap the Ritz coating for crushed potato chips (for a salty kick), toasted pecans (for richness), or even crushed pretzels (for a tangy twist). For a no-coating option, simply dust with smoked paprika or garlic powder after chilling. The key is texture contrast—just pick something crunchy!
How do I keep the cheese ball from crumbling when slicing?
Chill the cheese ball at least 4 hours before serving—this firms up the mixture. When slicing, dip your knife in hot water, wipe dry, and make clean cuts. For extra stability, shape the cheese ball slightly larger (about 3.5 inches) and slice into 6 wedges instead of 4. The longer it rests, the better it holds together!
What's the best way to reheat leftovers?
Never microwave fully—just warm for 10-15 seconds on 50% power to soften slightly. For best results, serve straight from the fridge. The coating stays crisp, and the inside remains creamy. If you prefer a warmer bite, place slices on a baking sheet and heat in a 200°F oven for 5 minutes to melt just the edges.
Can I add other meats to this recipe?
While dried beef gives the signature flavor, you can substitute with finely chopped corned beef (for a similar texture) or crumbled bacon (for smokiness). For seafood lovers, try finely chopped smoked salmon—just reduce the Worcestershire to ½ tbsp since salmon is naturally salty. Keep meat portions to 4 oz total to maintain balance.