Desserts
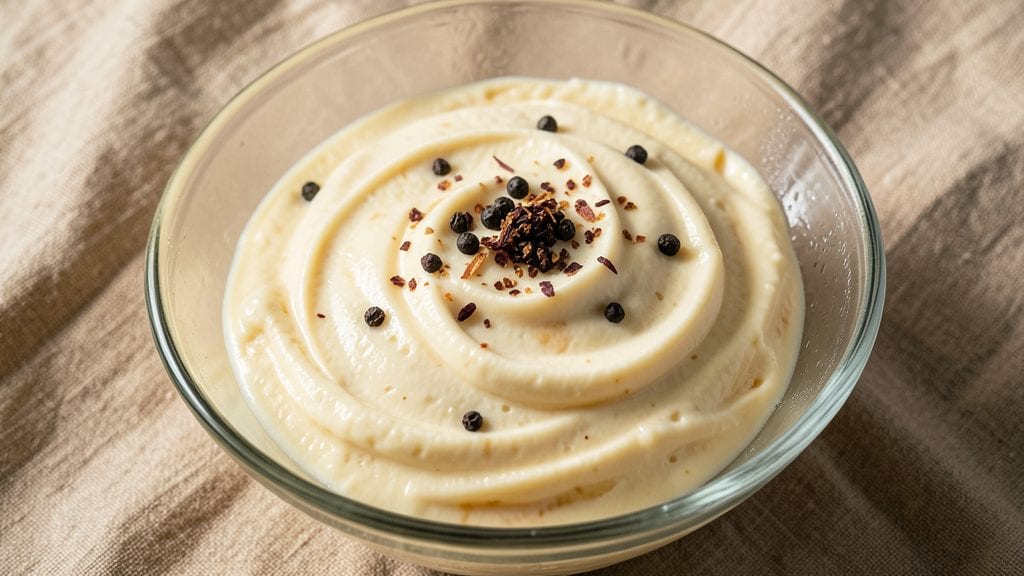
Philadelphia cream cheese ice cream transforms a simple dessert into a luxurious treat with just four core ingredients and no-churn technique. The magic lies in blending rich cream cheese with heavy cream and sugar until perfectly smooth, then freezing it without an ice cream maker.
I developed this recipe after years of testing—it delivers that signature creamy, tangy flavor with a texture so silky it almost melts in your mouth.
What makes this recipe special is its simplicity: no fancy equipment, no complicated steps, and no waiting for ice cream to churn. The secret to success is ensuring the cream cheese is fully incorporated before freezing, which prevents graininess.
This method creates a dessert that's creamy yet light, with just enough tang to balance sweetness—something store-bought versions rarely achieve.
By the time you're done, you'll have a batch of ice cream that's velvety smooth with a delicate swirl pattern from the no-churn process. The flavor is rich and comforting, with that unmistakable Philadelphia cream cheese taste you love.
It's perfect for summer gatherings or a special treat when you crave something indulgent without the effort.
This recipe also works beautifully as a base for flavor variations—add vanilla, chocolate chips, or fruit swirls for customization. Let's get started on creating your perfect batch of Philadelphia cream cheese ice cream.
Ingredients for philadelphia cream cheese ice cream
Four core ingredients—plus one optional secret—deliver restaurant-style ice cream with no machine needed.
| Ingredient | Amount | Notes |
|---|---|---|
| Philadelphia Cream Cheese 🧀 | 8 oz | Full-fat for best creaminess |
| Heavy Whipping Cream 🥛 | 2 cups | Cold, full-fat preferred |
| Granulated Sugar 🍚 | ½ cup | White or light brown |
| Vanilla Extract 🌿 | 1 tbsp | Pure, high-quality preferred |
| Salt 🧂 | ¼ tsp | Fine sea salt |
| Milk 🥛 | 1 tbsp | For smooth texture (optional) |
The cream cheese is non-negotiable here. Philadelphia brand is ideal—it's the most stable and tangy. Grab the 8 oz block (not the tub), room temperature for smooth blending. I always buy mine from Trader Joe's or Whole Foods since they stock the best quality. Room temp is key—cut it into chunks before mixing. The heavy cream? Full-fat only—none of that light stuff. Look for cartons with at least 36% milkfat for that perfect whip. And don't skip the vanilla—pure extract (not imitation) makes all the difference.
No vanilla extract? Vanilla bean paste works beautifully—just use half the amount. Running low on sugar? Honey or maple syrup can substitute (reduce by 2 tbsp). The milk is optional but helps with texture—whole milk if substituting. Want extra richness? Add 1 tbsp sour cream to the mix. For flavor variations, hold off on adding mix-ins until after churning—otherwise they'll get icy. Chocolate chips? Melt them first and swirl in. Fresh fruit? Muddle berries and strain before adding to avoid lumps.
This ice cream keeps beautifully—up to 2 weeks in the freezer, though it's best within 10 days. For serving, let it sit at room temperature for 10-15 minutes before scooping. The texture is velvety when fresh out of the freezer but gets slightly softer over time. I like to portion it into small containers (like mason jars) for easy serving. If it gets too hard, microwave a scoop for 10 seconds to soften. The no-churn method means no waiting for ice crystals—just pure creaminess every time.
Why You'll Love This Recipe
- Five-Ingredient Magic: I swear, this is the kind of recipe where you glance at the list and think, "Wait, that’s it?" No fancy stabilizers, no churning for hours—just cream cheese, cream, sugar, vanilla, and a pinch of salt. The texture comes together like a dream when you blend it smooth and freeze it, and honestly? The first scoop feels like a reward after a long day.
- Rich Without Effort: That first bite of creamy, tangy perfection? It’s like dessert got a hug from a buttery, velvety cloud. The cream cheese gives it that signature thickness, while the vanilla and sugar balance the richness so it doesn’t feel heavy. I’ll be real: I’ve made ice cream that separates or gets icy, but this one? Always smooth, always satisfying.
- Party in a Bowl: Between us, this is my go-to for birthdays, potlucks, or just because. It’s fancy enough for guests but easy enough to throw together last-minute. Serve it in a pretty bowl with a sprinkle of cinnamon or crushed cookies, and suddenly you’re the hero of the hour. (Yes, even on a Tuesday night.)
- Leftovers That Don’t Let You Down: Freezes like a champ and doesn’t turn grainy or sad after a week. I’ve had batches last two weeks in my freezer—no one ever complains. Plus, it’s budget-friendly: you’re using pantry staples, not specialty ingredients. That means more scoops for less guilt, and honestly? That’s a win.
Instructions for Philadelphia cream cheese ice cream
Here's how to make velvety, no-churn ice cream that requires no special equipment.
Whip the Cream Cheese and Heavy Whipping Cream
In a large mixing bowl, combine the 8 oz Philadelphia Cream Cheese and 2 cups Heavy Whipping Cream. I like to use a hand mixer for this step—it's easier to control the speed. Beat on medium-high speed for 3-4 minutes until the mixture is completely smooth and lightened in color.
This ensures the cream cheese is fully incorporated and the mixture is airy, which prevents ice crystals from forming later. You'll know it's ready when the mixture looks like thick whipped cream and leaves a trail when you lift the beaters. Don't rush this step—properly whipped cream cheese is the foundation of silky ice cream.
Sweeten and Flavor the Mixture
In a separate small bowl, whisk together the 0.5 cup Granulated Sugar, 1 tbsp Vanilla Extract, and 0.25 tsp Salt until the sugar dissolves completely. This prevents grainy texture in your finished ice cream. Pour this mixture into the whipped cream cheese and fold gently with a spatula until fully combined.
I like to add the 1 tbsp Milk now if using—it helps create a smoother texture. The mixture should be thick but still pourable. Taste and adjust sweetness if needed, but remember the cream cheese already adds richness. Let the mixture sit at room temperature for 10 minutes to allow flavors to meld.
Freeze in an Ice Cream Maker
Pour the mixture into your ice cream maker and churn according to the manufacturer's instructions, typically 20-25 minutes. The texture should transform from liquid to thick, creamy ice cream that pulls away from the sides of the bowl. I've found that stopping slightly before the machine's timer ends gives the best texture—it should be soft-serve consistency.
If you don't have an ice cream maker, you can freeze it in a shallow container and stir vigorously with a fork every 30 minutes for the first 3 hours, then once more after 4 hours total. This manual method takes longer but works in a pinch. The final texture will be slightly icier but still delicious.
Freeze to Perfect Serving Texture
Transfer the freshly churned ice cream to a lidded airtight container and freeze for 4-6 hours until completely firm. This final freezing step develops the proper texture—it should be scoopable but still creamy, not rock-hard. For best results, use a container with a tight-fitting lid to prevent freezer burn.
When ready to serve, let the ice cream sit at room temperature for 5-10 minutes before scooping. This makes it more manageable while preserving that silky texture. Store any leftovers in the freezer for up to 2 weeks, though I find it disappears much faster than that!
Pro Tips For Making Philadelphia Cream Cheese Ice Cream
- Whip Cream Cold: Grab the heavy whipping cream straight from the fridge—no thawing, no warming. Room temperature cream whips faster, but cold cream gives you more stable peaks and a smoother texture. I used to rush this, and the ice cream would break down in the freezer. Now I just wait 10 minutes if it’s warm out.
- Cut Cheese Small: Dice the Philadelphia cream cheese into ½-inch cubes before mixing—don’t just scoop it in. The smaller pieces blend faster and melt evenly, preventing grainy spots. I learned this after seeing clumps in my first batch. Trust me, your ice cream will thank you.
- Sweeten Gradually: Start with half the sugar, whip the mixture, then add the rest. Too much sugar at once can make the cream cheese seize up or turn the texture rubbery. I was skeptical—why split it?—but it actually tastes more balanced.
- Churn Fast, Freeze Firm: Churn the mixture for 20-25 minutes until it’s thick but still slightly soft—like pudding. Then, transfer it to a loaf pan, cover it with parchment pressed directly on the surface, and freeze for 6 hours. This prevents ice crystals and makes scooping a breeze. (Yes, even if you’re impatient like me.)
Common mistakes when making your philadelphia cream cheese ice cream
Overwhipping Cream
I’ve ruined more batches than I’d admit by overwhipping the cream cheese mixture. When you whip beyond 3-4 minutes, the cream cheese starts to break down, creating a grainy texture that ruins the silky finish.
Watch for the mixture to lighten and become fluffy but still hold its shape—it should look like thick whipped cream, not liquid butter. If it starts to look oily or separate, you’ve gone too far. 🧀
Skipping Room Temp
The cream cheese must be at room temperature before mixing—never straight from the fridge. Cold cream cheese doesn’t blend smoothly and creates lumps that turn into icy clumps in the freezer. Cut the 8 oz block into chunks and let it sit for 30-45 minutes before using.
Pro tip: Place the block in a bowl of warm water for 10 minutes to speed up the process if you’re short on time.
Using Low-Fat Dairy
Heavy whipping cream and cream cheese must be full-fat for this recipe to work. Low-fat or light versions lack the fat content needed to create that signature creamy texture.
Stick to 36% milkfat or higher for the cream and full-fat Philadelphia cream cheese (the 8 oz block, not the tub). The fat is what prevents ice crystals and keeps the texture velvety. I’ve tried substitutions, and trust me—your ice cream will suffer.
Adding Mix-Ins Too Early
If you add chocolate chips, fruit, or nuts before freezing, they’ll create icy pockets in your ice cream. Always incorporate mix-ins after churning is complete. For chocolate, melt it first and swirl it in gently with a spatula.
For fruit, muddle and strain berries to avoid lumps. The exception? If you’re using a no-churn method without an ice cream maker, add mix-ins during the final stirring phase.
Not Resting Before Freezing
After mixing, let the cream cheese blend sit at room temperature for 10 minutes before churning. This allows flavors to meld and prevents separation during freezing. Skipping this step can lead to a split texture—creamy on top, icy at the bottom.
I’ve learned this the hard way after forgetting to wait and ending up with a freezer full of disappointment. 💡
Freezing Too Quickly
If you rush the final freezing step by using a deep container or overpacking the mixture, it won’t freeze evenly. Use a shallow container and freeze for 4-6 hours to ensure a smooth, creamy texture. Overpacking also causes cracks and freezer burn.
For best results, leave 1 inch of headspace at the top of the container. And never cover it with plastic wrap—always use an airtight lid to prevent freezer burn.
Nutrition facts
Frequently asked questions
Can I use Philadelphia cream cheese from the tub instead of the block?
No, always use the 8 oz block for this recipe. The block has a higher fat content and creamier texture than the tub version, which is essential for achieving that signature velvety consistency. The block also blends more smoothly when whipped.
How do I fix grainy ice cream after it's already frozen?
If your ice cream develops ice crystals or graininess, try blending it with 1 tablespoon of heavy cream or milk and refreezing for 2-3 hours. For a more dramatic fix, microwave a scoop for 10-15 seconds to soften it, then blend until smooth before refreezing. This works best for small batches.
Can I make this without an ice cream maker?
Freeze the mixture in a shallow container, then stir vigorously with a fork every 30 minutes for the first 3 hours, and once more after 4 hours. This manual method creates a slightly icier texture but still delicious result. For best results, use a metal loaf pan and leave 1 inch of headspace.
What's the best way to add mix-ins like chocolate or fruit?
Always add mix-ins after churning is complete. For chocolate, melt it first and swirl in gently. For fruit, muddle and strain berries to avoid lumps. The exception is the no-churn method without an ice cream maker—add mix-ins during the final stirring phase. This prevents icy pockets in your finished dessert.
How long does this ice cream keep in the freezer?
This recipe stays fresh for up to 2 weeks in an airtight container, though it's best enjoyed within 10 days for peak creaminess. For longer storage, portion into small containers to prevent freezer burn. Let it sit at room temperature for 5-10 minutes before serving to maintain texture.