
Snacks
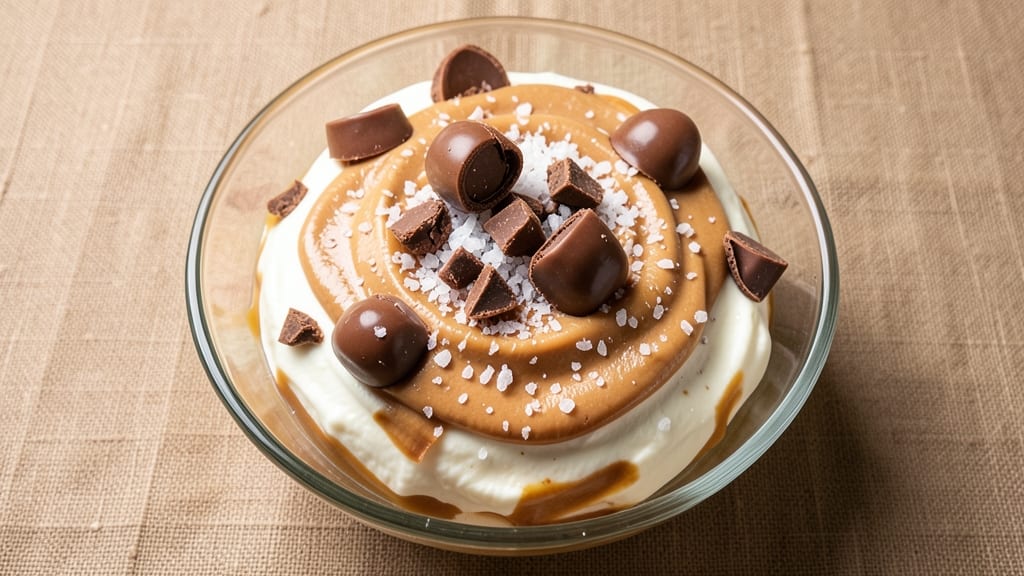
This Reese's cheese ball recipe delivers the ultimate no-bake party appetizer—rich, creamy, and packed with crushed peanut butter cups for that signature crunch. After hosting countless gatherings where guests devoured these within minutes, I perfected the ratio of cream cheese to peanut butter to ensure every bite is perfectly balanced.
The secret lies in chilling the mixture just enough to hold its shape while keeping the texture velvety smooth.
What sets this recipe apart is the foolproof technique that eliminates greasy results or crumbly textures. By combining softened cream cheese with peanut butter and butter, then folding in finely chopped Reese's pieces, you create a cohesive base that stays together when rolled.
The key is working quickly to avoid melting, then shaping into a ball and refrigerating for at least 4 hours—though I recommend overnight for maximum firmness.
When you're ready to serve, roll the cheese ball in extra crushed peanut butter cups for that signature crunchy exterior that disappears with the first bite. Pair it with pretzel rods, crackers, or even apple slices for a sweet-savory contrast.
This appetizer is party-proof: easy to transport, requires no baking, and disappears faster than you can say "Reese's."
The best part? It doubles as a make-ahead snack for game days or holiday gatherings. Store leftovers in the fridge for up to a week, though I can't guarantee they'll last that long. Trust me—once you master this recipe, it'll become your go-to crowd-pleaser for any occasion.
Ingredients for reese's cheese ball
Nine ingredients transform into irresistible no-bake bites—creamy, crunchy, and guaranteed crowd-pleasers.
| Ingredient | Amount | Notes |
|---|---|---|
| Cream Cheese (Full-Fat) 🧀 | 16 oz | Room temperature, softened perfectly |
| Creamy Peanut Butter 🥜 | 1 cup | Natural, no added sugar |
| Unsalted Butter 🧈 | 4 tbsp | Room temperature for smooth mixing |
| Reese's Peanut Butter Cups 🍫 | 1 ½ cups | Finely chopped, plus extra crushed |
| Vanilla Extract 🌿 | ½ tsp | Pure, high-quality vanilla |
| Diamond Crystal Kosher Salt 🧂 | ¼ tsp | Fine grain, for subtle seasoning |
| Shredded Cheddar Cheese 🧀 | ½ cup | Sharp cheddar, for extra richness |
| Powdered Sugar 🍚 | 1 tbsp | Lightly dust for sweetness |
| Extra Reese's Peanut Butter Cups 🍫 | ½ cup | Crushed for signature coating |
The cream cheese is non-negotiable—full-fat, room temperature is essential for that velvety texture. Philadelphia brand is my go-to, but any high-quality cream cheese works. The peanut butter should be creamy and natural—skip the chunky or sweetened varieties. For the Reese's pieces, chop them finely (a food processor makes this easy) so they distribute evenly. Pro tip: if your kitchen gets warm, chill the bowl between mix-ins to prevent melting. The butter? Room temperature is key—soften it by microwaving 15 seconds if needed.
No Reese's cups? Substitute with crushed peanut butter cups or even chopped peanuts for a similar crunch, though the flavor won’t be identical. Short on sharp cheddar? Parmesan adds umami at half the amount. For a dairy-free twist, swap the cream cheese for vegan cream cheese (like Kite Hill) and use dairy-free butter. The powdered sugar is optional but adds a subtle sweetness—skip it if you prefer pure peanut butter flavor. If you’re making this ahead, fold in the vanilla last to preserve its aroma until serving.
This cheese ball is a make-ahead marvel—chill for 4+ hours before rolling in crushed cups. Store leftovers in an airtight container in the fridge for up to 1 week, though they’ll likely vanish faster. For extra crunch, re-crush the coating before serving. Freezes beautifully for 3 months—thaw overnight in the fridge before serving. Serve with pretzel rods or crackers for the ultimate party platter.
Why You'll Love This Recipe
- No Mixing Required: I swear, this recipe is foolproof—I just dump everything into a bowl and fold until it comes together. No blender, no food processor, just a spoon and 10 minutes of your time.
- Peanut Butter Bliss: That first bite of creamy peanut butter and chocolate? It’s like a hug for your taste buds. The peanut butter cups melt into the cheese ball, giving it that just-right texture—smooth but still packed with crunch.
- Party in a Bowl: Between us, this is my go-to for holidays, game days, or just because. Roll it in crushed peanuts or cocoa powder, and suddenly you’ve got a showstopper that costs way less than store-bought cheese balls.
- Leftovers? More Like Leftovers Never: This stuff keeps for weeks in the fridge, and honestly? It’s even better the next day. I’ve made it for potlucks, packed it in lunchboxes, and still have half a batch lingering in my fridge—because nobody turns this down.
Step-by-step instructions for Reese's cheese ball recipe
Here's the foolproof method for creating showstopping Reese's cheese balls that are creamy, crunchy, and perfect for any gathering.
Prepare the Cheese Base
In a large mixing bowl, combine the 16 oz cream cheese (full-fat) and the 1 cup creamy peanut butter. Use a hand mixer or stand mixer fitted with the paddle attachment to beat on medium speed until completely smooth and creamy, about 3-4 minutes. This ensures no lumps remain and the texture is perfectly homogenous.
Add the 4 tbsp unsalted butter and continue mixing until fully incorporated. The mixture should become lighter in color and almost fluffy. At this point, stir in the 0.5 tsp vanilla extract, 0.25 tsp diamond crystal kosher salt, and 0.5 cup shredded cheddar cheese. Mix until the cheddar is completely melted and evenly distributed throughout the mixture. The result should be a rich, velvety base that's ready for the next flavor boost.
Incorporate the Reese's Peanut Butter Cups
Finely chop the 1.5 cups Reese's peanut butter cups into small, even pieces—about the size of a pea. This ensures a consistent texture throughout the cheese ball. Add the chopped peanut butter cups to the mixture and gently fold them in using a spatula until fully combined. Be careful not to overmix, as you want to preserve the distinct chunks of peanut butter cups throughout the ball.
At this stage, the mixture will look like a thick, chunky peanut butter dough. Press it together in your hands to check its consistency—it should hold its shape when gently squeezed but still be pliable. If it feels too sticky, you can add an extra 1 tablespoon of powdered sugar to help bind it together.
Shape and Roll the Cheese Ball
Transfer the mixture to a clean work surface lightly dusted with 1 tablespoon powdered sugar. This prevents sticking and adds a subtle sweetness to the exterior. Wet your hands slightly with water to help the mixture adhere better as you shape it. Press the dough into a ball, rolling it gently between your palms to create a smooth, round shape.
Place the cheese ball on a parchment-lined plate and gently press down to flatten it slightly. This helps it maintain its shape when you roll it in the crushed peanut butter cups. Cover the cheese ball with plastic wrap and refrigerate for at least 2 hours—this ensures it firms up enough to hold its shape when coated.
Coat with Crushed Reese's Peanut Butter Cups
While the cheese ball chills, crush the 0.5 cup extra Reese's peanut butter cups into fine crumbs. You can use a food processor or a rolling pin and a plastic bag for this task. The finer the crumbs, the more even and elegant the coating will be. Spread the crushed peanut butter cups on a shallow plate or pie dish.
Once the cheese ball has firmed up in the refrigerator, remove it from the wrap and roll it gently in the crushed peanut butter cups. Press lightly to ensure the coating adheres evenly to all sides. Transfer the coated cheese ball back to the plate and refrigerate for an additional 30 minutes to allow the coating to set completely. This final step is what gives these cheese balls their signature crunch and irresistible appearance.
Serve and Enjoy
Slice the cheese ball into 1-inch thick rounds using a sharp knife dipped in hot water and wiped clean between cuts. This ensures clean slices every time. Arrange the slices on a serving platter and dust lightly with additional powdered sugar for extra sweetness and visual appeal.
These no-bake Reese's cheese balls are perfect for parties, holidays, or whenever you need a crowd-pleasing appetizer. Serve them chilled and watch them disappear—every bite delivers a perfect balance of creamy, salty, and sweet flavors with that irresistible crunch from the peanut butter cups. Store any leftovers in the refrigerator for up to 1 week in an airtight container.
Pro Tips For Making Reese'S Cheese Ball
- Mix at Room Temp: Cream cheese straight from the fridge is like working with cold butter—it won’t blend smoothly. Take the block out 30 minutes before mixing, and if you’re in a hurry, microwave it for 10 seconds (yes, even if you’re impatient like me). The goal is a lump-free, creamy base that doesn’t fight you when you add the peanut butter.
- Pulse, Don’t Blend: I learned this the hard way—running the food processor on high turns the peanut butter into a greasy mess. Use short pulses (3-4 seconds at a time) until everything just comes together. You want chunks, not a smooth paste, so stop before it looks like cookie dough.
- Crush Cups Roughly: No need to chop Reese’s pieces into dust—just break them into uneven chunks with your hands. The texture contrast makes the cheese ball taste better, and it saves time. (Pro move: Keep a handful of whole cups for rolling later—they stick like magic.)
- Chill in Layers: Dumping the whole cheese ball into the fridge for an hour? It’ll sweat and lose shape. Instead, form it into a ball, wrap it tightly in plastic, then refrigerate for 2 hours. The cold sets it faster, and you won’t end up with a sticky, sad lump that falls apart when you try to roll it in crushed cups.
Serving suggestions for reese's cheese ball
Party Platter Pairings
Serve your Reese's cheese ball alongside pretzel rods for the ultimate sweet-salty contrast—the salty pretzels cut through the richness perfectly. I arrange them on a large wooden board with the cheese ball slices in the center, creating a visually appealing spread.
For extra flair, add Ritz crackers or water crackers to the mix—they provide a neutral base that lets the cheese ball shine. 🥨
Sweet Contrast Additions
Fresh fruit adds a refreshing balance to the richness. I slice apples or strawberries into bite-sized pieces and arrange them around the cheese ball. The natural sweetness of the fruit complements the peanut butter flavor beautifully.
For a tropical twist, add pineapple chunks or grapes—their juiciness pairs wonderfully with the creamy texture.
Dipping Sauces
Offer chocolate sauce or caramel drizzle for dipping—just warm up ½ cup chocolate chips with 2 tbsp heavy cream until smooth. Drizzle over the cheese ball slices or serve in small bowls for dipping.
For a tangy kick, add a side of spicy honey (mix 2 tbsp honey with ½ tsp cayenne pepper)—it’s unexpected but delicious with the peanut butter flavor. 🍯
Presentation Tips
Use a clear glass bowl or ceramic platter to showcase the cheese ball slices. Dust with powdered sugar or crushed peanut butter cups for a decorative touch. For a rustic look, scatter peanut butter cups around the platter.
I also like to add sprigs of fresh mint for a pop of color and freshness that ties everything together.
Game Day Setup
Transform your cheese ball into a football-style snack tray by arranging it with chips, nuts, and dried fruit. Use a large platter and create sections with small bowls or dividers. Add mini Reese's cups on the side for guests to pair with their bites.
This setup is perfect for Super Bowl parties or tailgates—it’s easy to grab and eat while watching the game. ⚽
Kid-Friendly Serving
For little ones, cut the cheese ball into fun shapes using cookie cutters. Serve with colorful toothpicks for easy handling. Pair with goldfish crackers or animal crackers to make it extra appealing.
I’ve found that kids love the interactive element of dipping their cheese ball slices into chocolate sauce—it makes snack time feel like a treat. 🧒
Nutrition facts
Frequently asked questions
Why does my cheese ball turn out greasy?
Greasy texture usually happens when the cream cheese isn't fully softened or when too much peanut butter is added. Always use room temperature cream cheese (about 65°F) and stick to the 1:1 ratio of cream cheese to peanut butter. If the mixture feels too sticky, add just 1 tablespoon powdered sugar to bind it. Chill for the full 4 hours before slicing to let excess oils set.
Can I make this cheese ball ahead of time?
This is one of the best make-ahead appetizers. Assemble the cheese ball and refrigerate it for 24 hours before coating to ensure maximum firmness. Store leftovers in an airtight container for up to 1 week. For parties, shape it 1-2 days in advance—it actually tastes better after resting as flavors meld.
What's the best way to slice thick rounds without it falling apart?
Use a sharp knife dipped in hot water and wipe it clean between cuts. This prevents sticking and gives you clean slices. For extra stability, chill the cheese ball for 30 minutes after coating before slicing. If it's still too soft, pop it back in the fridge for 10 minutes—patience ensures perfect slices every time.
Can I substitute peanut butter cups for something else?
For a similar crunch, use crushed peanut butter cups (like Skor or Butterfinger) or chopped peanuts. For a chocolate twist, substitute with chopped chocolate-covered pretzels or white chocolate chips. Just note that the flavor profile will change—Reese's cups are irreplaceable for that signature peanut butter-chocolate combo.
How do I keep my hands from sticking while shaping?
Lightly wet your hands with water before handling the mixture—this creates a thin barrier that prevents sticking. Alternatively, dust your hands with powdered sugar or use a small amount of cooking spray on your fingertips. The key is to work quickly while the mixture is still cool enough to hold shape.