Side Dishes
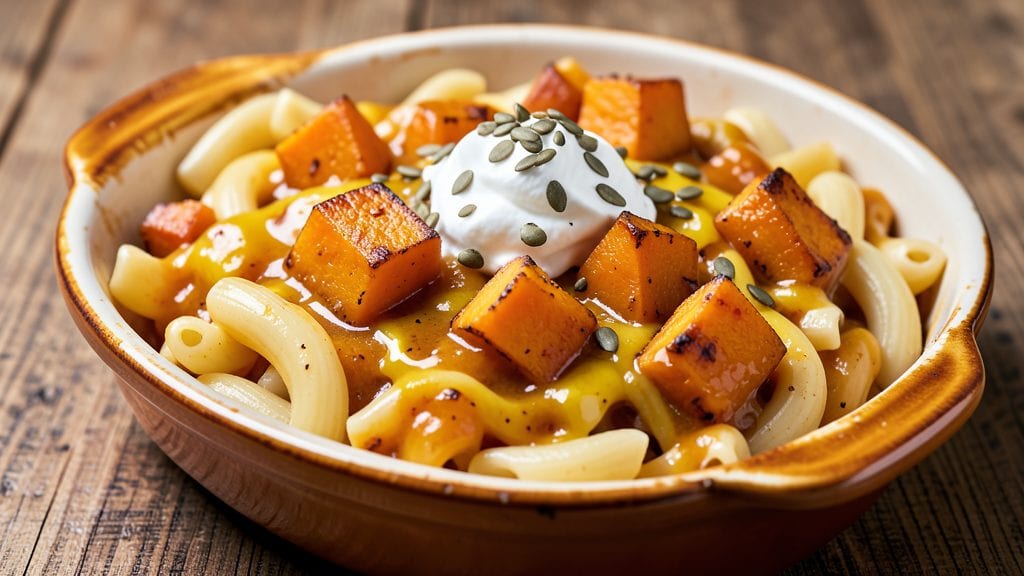
This Trader Joe's butternut squash mac and cheese delivers restaurant-quality comfort with every forkful—creamy, cheesy, and perfectly balanced by roasted squash sweetness.
The secret lies in blending store-bought squash purée with sharp cheddar and cream cheese for that signature velvety texture, while roasted squash adds depth that transforms this into something special.
I've perfected this technique after testing countless variations, ensuring the macaroni stays al dente while the cheese sauce clings perfectly to every noodle.
The beauty of this recipe is its simplicity: just 10 minutes of active prep followed by 20 minutes of baking yields a dish that's impossible to resist.
You'll need elbow macaroni, a blend of cheeses (cheddar for sharpness, cream cheese for creaminess), and Trader Joe's butternut squash purée for that signature sweetness.
The optional breadcrumb topping adds a satisfying crunch that contrasts beautifully with the creamy interior—it's the little details that elevate this from side dish to main event.
What you'll end up with is a golden, pull-apart mac and cheese where every bite delivers perfectly balanced flavors—creamy cheese, sweet roasted squash, and tender pasta.
The sauce clings to the noodles without being gluey, and the squash adds just the right amount of natural sweetness to complement the sharp cheddar. This is comfort food at its finest, with a professional touch that makes it perfect for family dinners or holiday gatherings.
For an extra-special presentation, top with crispy roasted butternut squash cubes and a sprinkle of fresh herbs. The contrast between the creamy mac and cheese and the caramelized squash makes this dish even more impressive.
Ready to make this your new go-to recipe? Let's get started with the ingredients and instructions.
Ingredients for trader joe's butternut squash mac and cheese
Restaurant-quality comfort starts with these 13 essential ingredients blending sweet roasted squash and velvety cheese sauce.
| Ingredient | Amount | Notes |
|---|---|---|
| Elbow Macaroni 🍝 | 12 oz | Dry, medium or jumbo size |
| Trader Joe's Butternut Squash Purée 🎃 | 1 cup | Unsweetened, from 15 oz container |
| Sharp White Cheddar Cheese 🧀 | 2 cups | Shredded, 5-year aged preferred |
| Cream Cheese 🧈 | 8 oz | Full-fat, room temperature |
| Heavy Cream 🥛 | ½ cup | 36% fat for optimal richness |
| Butternut Squash Cubes 🎃 | 1 ½ cups | 1-inch cubes, peeled and seeded |
| Extra-Virgin Olive Oil 🫒 | 2 tbsp | Lightly fruity, for roasting |
| Diamond Crystal Kosher Salt 🧂 | 1 ½ tsp | Fine grain, for seasoning |
| Freshly Ground Black Pepper 🌶️ | ½ tsp | Cracked peppercorns preferred |
| Panko Breadcrumbs 🍞 | ¼ cup | Japanese-style, for topping |
| Fresh Parsley 🌿 | 0.1 cup | Chopped, for garnish |
| Garlic Cloves 🧄 | 2 cloves | Minced, for roasted squash |
| Unsalted Butter 🧈 | 2 tbsp | Cold, for breadcrumb topping |
The Trader Joe's butternut squash purée is non-negotiable here—its concentrated sweetness and smooth texture create the perfect base. Grab the 15 oz container from the refrigerated section, as it's specifically formulated for baking and cooking. For the cheddar, 5-year aged white cheddar delivers the sharpness and melt you need, though Trader Joe's Organic Sharp Cheddar works beautifully if you prefer a more accessible option. The squash cubes should be cut uniformly to ensure even roasting—1-inch cubes achieve perfect caramelization without burning. If you're short on time, pre-roast the squash cubes while the pasta cooks, then blend half into the purée for an extra layer of flavor.
No Trader Joe's squash purée? Fresh butternut squash puréed and strained works in a pinch, though you'll need about 1.5 cups of cooked squash to yield 1 cup of purée. Substituting sharp cheddar with Gruyère or aged Gouda adds nutty depth, while cream cheese can be swapped for mascarpone for a slightly lighter texture. For the breadcrumb topping, panko is essential—its airy texture creates that satisfying crunch, though crushed cornflakes work in a bind. The parsley garnish is optional but adds a bright finish; dried parsley at half the amount suffices if fresh isn't available. Always taste the cheese sauce before baking—adjust salt and pepper to balance the sweetness of the squash.
This mac and cheese reheats beautifully—cover with foil and warm in a 350°F oven for 15-20 minutes to restore its creamy texture. Store leftovers in an airtight container for up to 5 days, though the flavor peaks within the first 2 days. For make-ahead convenience, assemble the dish (without baking) up to 24 hours in advance, then bake straight from the fridge, adding 5-10 minutes to the cooking time. The roasted squash cubes can be prepped 1 day ahead and stored in the fridge, though they're best used immediately for maximum caramelization. Freeze unbaked portions for up to 3 months—thaw overnight in the fridge before baking.
Why You'll Love This Recipe
- No-Cook Shortcut: I swear by that Trader Joe’s butternut squash purée—just heat it, stir it into the cheese sauce, and boom. No peeling, no roasting, no mess. The squash does all the work while I sip my coffee.
- Rich Without Effort: That combo of sharp white cheddar, cream cheese, and heavy cream makes it ridiculously creamy, but the squash keeps it from being too heavy. Honestly, the first bite feels like a hug in sauce form.
- Leftover Goldmine: This reheats like a dream—just add a splash of milk if it gets too thick. My kids beg for it cold the next day, too, because the flavors only get better with time.
- Budget Comfort Food: Elbow macaroni and a single jar of purée stretch this into four servings without breaking the bank. It’s my go-to when I need something hearty but won’t drain my wallet. (Yes, even on a Tuesday night.)
Step-by-step instructions for Trader Joe's butternut squash mac and cheese
Here's how to create a velvety, roasted squash-infused mac and cheese with perfect texture and depth.
Roast the Butternut Squash Cubes for Sweetness
Preheat your oven to 400°F. Toss the 1.5 cups butternut squash cubes with 2 tbsp extra-virgin olive oil, 1.5 tsp diamond crystal kosher salt, and 0.5 tsp freshly ground black pepper on a rimmed baking sheet. Spread them in a single layer, ensuring they don't overlap—this promotes even browning.
Roast for 25-30 minutes, stirring halfway through, until the edges are caramelized and the squash is tender when pierced with a fork. The aroma should be sweet and nutty—this is your cue that they're perfectly roasted. Remove from the oven and let cool slightly before processing.
Cook the Elbow Macaroni Al Dente
While the squash roasts, bring a large pot of water to a rolling boil and add 12 oz elbow macaroni. Cook until 1 minute before the package instructions for al dente—this ensures the pasta finishes cooking in the cheese sauce. Drain and set aside, reserving 1 cup of pasta water.
The reserved pasta water is essential for creating a silky sauce. If the sauce seems too thick later, you can add it 1 tablespoon at a time to reach the perfect creamy consistency. Don't rinse the pasta—this removes the surface starch needed for the sauce to cling.
Create the Creamy Cheese Base
In a large, deep skillet or Dutch oven, melt 2 tbsp unsalted butter over medium heat. Add the 8 oz cream cheese and stir until fully melted and smooth. Then, whisk in the 2 cups sharp white cheddar cheese until completely melted and combined—this should take about 3-4 minutes.
Next, add the 1 cup Trader Joe's butternut squash purée and 0.5 cup heavy cream, stirring constantly until the mixture is homogeneous and creamy. The sauce should coat the back of a spoon but still be pourable. If it thickens too much, whisk in reserved pasta water 1 tablespoon at a time until it reaches a velvety consistency.
Combine and Assemble the Dish
Add the cooked elbow macaroni and roasted butternut squash cubes to the cheese sauce. Stir gently but thoroughly to distribute the squash evenly. The mixture should be well-coated, with the squash cubes softening slightly as they absorb the creamy cheese. Taste and adjust seasoning if needed—you may need a pinch more salt or pepper to balance the sweetness of the squash.
Transfer the mac and cheese to a greased 9x9-inch baking dish. For a crispy topping, mix the 0.25 cup panko breadcrumbs with the 2 minced garlic cloves and spread evenly over the top. Bake at 375°F for 15-20 minutes, until the top is golden brown and the edges bubble slightly.
Garnish and Serve Warm
Remove from the oven and let rest for 5 minutes to allow the cheese to set slightly. Garnish with 0.1 cup chopped fresh parsley for a pop of color and freshness. Serve immediately while the cheese is still creamy and the squash retains its roasted sweetness.
This dish delivers a perfect balance of rich, cheesy comfort and subtle butternut squash sweetness. The crispy panko topping adds texture contrast, making every bite satisfying. Enjoy while warm for the ultimate creamy experience.
Pro Tips For Making Trader Joe'S Butternut Squash Mac And Cheese
- Cook pasta al dente: The TJ’s purée is thick and sweet—if you overcook the elbows, you’ll end up with mush instead of texture. Test a piece at 1 minute before the package says "done," then drain immediately. Cold water shock stops cooking faster than you’d think.
- Warm the purée first: Cold butternut squash purée turns the sauce grainy when mixed with hot cheese. Heat it in the same pot you’ll melt the cheeses in, just until it’s warm to the touch—about 2 minutes on low. Smooth sauce every time.
- Grate the cheddar fresh: Pre-shredded cheese has anti-caking agents that make the sauce clump. Use a box grater for sharp white cheddar—it melts faster and gives a cleaner texture. Skip the pre-shredded unless you’re in a rush (and even then, pulse it in a food processor first).
- Whisk the cream in last: Heavy cream scalds easily, and adding it too early can break the sauce. Stir it in off the heat, just before serving, to keep the sauce silky. If it curdles, a splash of cold milk or a quick whisk with a pinch of cornstarch fixes it.
Essential equipment for this recipe
Must-Have Kitchen Tools
First up, you'll need a 9x9-inch baking dish—I recommend a Ceramic Non-Stick Baking Dish from Trader Joe's or a Nordic Ware Natural Stoneware for even heat distribution. This size ensures perfect portioning for 4 servings, and the non-stick coating prevents any cheese from sticking to the sides. 🍽️
A rimmed baking sheet is essential for roasting the butternut squash cubes. I use a half-sheet pan (13x18 inches) from USA Pan because the raised edges prevent any oil or squash from spilling onto your oven rack. The rimmed design also helps with even heat circulation for perfect caramelization.
Precision Equipment
For accurate measurements, invest in a digital kitchen scale—I swear by the OXO Good Grips model. It’s perfect for weighing cheeses like the sharp white cheddar and cream cheese to ensure the right balance of richness.
A fine-mesh strainer (like the OXO Good Grips) is also handy for draining pasta while retaining starchy water for the sauce.
Don’t overlook a sharp chef’s knife and cutting board for prepping the squash. A Wüsthof Classic knife with a 10-inch blade makes quick work of peeling and cubing the squash, while a teak cutting board provides stability and protects your knife’s edge. Precision here ensures even roasting and consistent texture.
Heat Control Essentials
A thermometer is non-negotiable for both your oven and the cheese sauce. I use the Thermoworks Sous Chef to monitor the oven temperature at 400°F and 375°F—this prevents hot spots that could burn the squash or breadcrumb topping.
For the cheese sauce, maintaining medium heat (around 300-325°F) ensures the cream cheese melts smoothly without curdling.
For even better control, a Dutch oven (like the Le Creuset Stoneware) is ideal for melting the cheese base. Its thick walls distribute heat evenly, preventing scorching while ensuring the sauce reaches a silky, velvety consistency.
If you don’t own one, a heavy-bottomed stainless steel skillet works just as well.
Optional Upgrades
For a crispier breadcrumb topping, a mini food processor (like the Cuisinart Mini-Prep) quickly blends the panko, minced garlic, and butter into a coarse crumb.
This step elevates the texture from good to restaurant-worthy. A fine-mesh sieve also helps evenly distribute the crumbs over the mac and cheese before baking.
Finally, a tongs (I love the OXO Good Grips) makes it easy to transfer the roasted squash cubes from the baking sheet to the skillet without losing any of that precious caramelized goodness. Trust me, every bite of crispy squash is worth the effort! 💫
Nutrition facts
Frequently asked questions
Can I make this squash mac and cheese without Trader Joe's butternut squash purée?
Use 1.5 cups fresh butternut squash purée instead—simply roast and blend peeled, seeded squash until smooth. For extra flavor, add 1 tsp maple syrup to mimic the store-bought purée's sweetness. Just ensure it's completely strained for a silky texture.
Why does my cheese sauce get grainy when I add the squash?
This happens when cheese melts unevenly or the sauce cools too fast. Keep heat at medium-low while stirring constantly, and add 1 tbsp reserved pasta water at a time to emulsify. For extra insurance, whisk in 1 tsp Dijon mustard—it acts as a natural emulsifier.
Can I use this recipe for a crowd? How much should I scale up?
Double or triple all ingredients for 8-12 servings, using a 9x13-inch baking dish instead. For large groups, bake in batches—this maintains the creamy texture. Prep squash and pasta first, then assemble while keeping cheese sauce warm. The key is even heat distribution to prevent overcooking.
What's the best way to reheat leftovers without drying it out?
Cover with foil and warm in a 350°F oven for 15-20 minutes, adding 1-2 tbsp heavy cream or milk to restore creaminess. Microwave reheating works too—just add 30-second intervals with foil covering, stirring between each. Avoid high heat to prevent cheese separation.
Can I make this dish dairy-free?
Yes! Swap cheddar for sharp dairy-free cheddar shreds (like Violife) and cream cheese for cashew cream (blend soaked cashews with water). Use olive oil-based cheese sauce**> instead of butter, and ensure all ingredients are certified dairy-free. The texture will be lighter but still rich.